
Thinking about tearing out your kitchen cabinets? Before you grab a sledgehammer, let's talk about the incredible potential hiding in the wood you already have. Refinishing your cabinets is so much more than a budget-friendly fix—it’s a chance to completely transform your kitchen's aesthetic while holding on to the solid, quality craftsmanship that’s often hard to find today.
The process is straightforward: you'll clean, strip the old finish, sand everything smooth, and then apply a fresh coat of paint or stain. It's a high-impact DIY project that can single-handedly update your kitchen's entire look for a fraction of the cost of replacing everything.
Transform Your Kitchen Without a Total Renovation
This project is your ticket to moving on from an outdated look. If you're tired of seeing that '90s honey oak or a dark, heavy cherry finish, refinishing lets you pivot to something fresh and modern. You can completely shift the mood of the room without the chaos of a full demolition.
Why Refinishing Is the Smart Choice
At its heart, refinishing is all about getting maximum impact for minimum cost and disruption. A full cabinet replacement isn't just messy; it's often the single most expensive line item in a kitchen remodel. By refinishing, you get a stunning visual upgrade while keeping your high-quality cabinet boxes right where they are.
Here’s why it just makes sense:
- Serious Cost Savings: You can achieve a high-end, custom look without the five-figure price tag that comes with brand-new cabinetry.
- Minimal Disruption: Unlike a full tear-out that can leave your kitchen out of commission for weeks, you can keep using the space for most of the project.
- Keep the Quality: You get to preserve your well-built, solid wood cabinets instead of swapping them for particle board or other lower-quality materials.
- Boost Your Home's Value: An updated kitchen is a huge selling point for potential buyers and offers an excellent return on your investment.
A Modern Solution for a Timeless Space
As the cost of materials and labor continues to climb, refinishing has gone from a niche DIY project to a mainstream renovation strategy. It's easy to see why. New cabinets can eat up 25–40% of a kitchen remodel budget, which helps explain why over 70% of homeowners are now choosing to refinish instead of replace.
You can refresh your entire kitchen for just 30–60% of the cost of new cabinets. This approach lets you embrace current design trends without the massive expense.
The best part is the creative freedom. Whether you're dreaming of a classic, crisp white, a deep moody blue, or a rich new wood stain, the final result is a kitchen that truly reflects your personal style. For anyone ready to dive in, a detailed guide on how to paint kitchen cabinets for a flawless DIY finish is an excellent place to start.
Remember, the goal is to enhance what you already have. Just because your cabinets are made of solid wood doesn't mean their current finish is doing them any favors. A thoughtful update respects the quality of the material while bringing the look into the present day.
It's also worth knowing the difference between your options. Our guide comparing cabinet refacing vs refinishing breaks down the pros and cons to help you decide which route is right for you. When you choose to refinish, you're not just slapping on a coat of paint; you're reimagining the heart of your home.
Getting Your Cabinet Refinishing Toolkit Together
A flawless cabinet finish is all about the prep work, not just the final coat of paint. I’ve learned this the hard way. The secret to a smooth, stress-free project is having every single tool and material you need before you even start. Think of it as setting up your command center—it turns a potentially chaotic job into a methodical, predictable process.
Your first move? Create a dedicated workspace and figure out dust control. I've done projects like this in both my garage and a basement, and the key is always containment. Grab some plastic sheeting and tape to section off the area. This protects everything else from that fine layer of dust that seems to get everywhere.
A simple box fan with a cheap furnace filter taped to the back, pointing out a window or door, works wonders. It creates a negative-pressure system that pulls most of the airborne dust right out of your space.
Safety Gear is Not Optional
Okay, let's talk safety. Before you even think about sanding or opening a can of chemical stripper, you have to get your protective gear sorted. Trust me on this—paint particles and chemical fumes are no joke. Don't cut corners here. A few extra bucks is a tiny price to pay for protecting your health.
- Respirator: You need a proper half-mask respirator with P100 particulate filters (for dust) and organic vapor cartridges (for fumes). It's essential.
- Safety Glasses or Goggles: Keep sawdust and chemical splashes out of your eyes. I recommend sealed goggles when you're working with liquid strippers—they offer much better protection.
- Gloves: Use heavy-duty, chemical-resistant gloves for stripping. For the painting and staining phases, simple nitrile gloves are perfect for keeping your hands clean and protected.
This flowchart lays out the big picture, comparing the path of refinishing your cabinets versus a full-blown replacement. It really helps clarify why one is a focused project and the other is a major renovation.
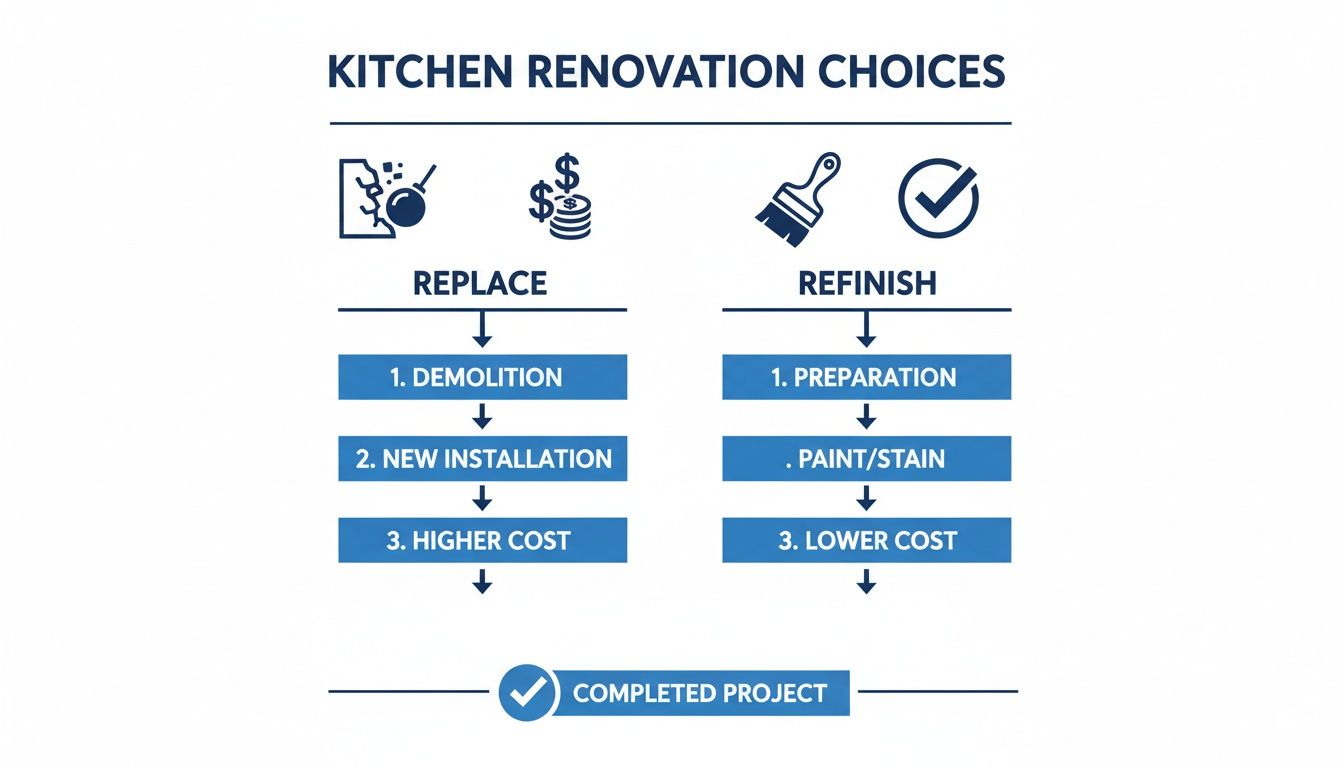
As you can see, refinishing lets you sidestep the massive cost, mess, and demolition of a total replacement by zeroing in on preparation and application.
The Essential Toolkit for Cabinet Refinishing
Your complete checklist of tools and materials, organized by project phase, to ensure you're ready for success.
| Phase | Essential Items | Pro-Tip |
|---|---|---|
| Disassembly & Cleaning | Drill/driver, labeled plastic bags, TSP or a strong degreaser, scrub brushes, shop towels. | Label bags with the specific door number for hinges and screws. "Upper Left," "Under Sink Right." This makes reassembly foolproof. |
| Sanding & Stripping | Random orbital sander, sandpaper (80, 120, 220 grits), sanding block, chemical stripper, plastic scraper. | For detailed door profiles, a contoured sanding grip is a lifesaver. It gets into crevices without accidentally rounding over the sharp edges. |
| Painting & Finishing | High-quality angled brush, mini foam roller, painter’s tape, tack cloths, paint sprayer (optional), primer, your chosen finish, topcoat. | Invest in painter's pyramids! These little cones elevate your doors, letting you paint both sides without waiting for one to be bone-dry. |
| Reassembly | Drill/driver, new hardware (optional), felt pads for door bumpers. | A cabinet hardware jig is your best friend for installing new knobs. It guarantees perfect, consistent placement on every single door. |
Having these items ready from the get-go is what separates a frustrating experience from a satisfying one. You can move seamlessly from one step to the next, keeping your momentum and focus right where they need to be. An organized toolkit really is the foundation of a project you'll be proud of.
The Unskippable Work of Surface Preparation
Let's be honest, the stunning kitchen cabinet transformations you see online all share a secret: a perfect foundation. This is the unglamorous, patient work that separates a DIY job that lasts from one that starts peeling in six months. Rushing the prep is the single biggest mistake you can make.
Think of it this way: you can't expect a new finish to stick to a surface coated in years of grease, grime, and old varnish. The new paint or stain needs a clean, stable surface to grab onto. Taking your time here is what ensures all your hard work pays off with a durable, professional-looking result.
The Great Degreasing
Kitchens are workhorses, and that wear-and-tear shows. Over the years, a fine layer of aerosolized cooking oil, steam, and dust creates a sticky, stubborn film on everything. This grime is your first enemy, and it has to go.
Your first move is a serious cleaning session with a powerful degreaser. A solution of Trisodium Phosphate (TSP) mixed with warm water is the go-to for a reason—it just plain works, cutting through grease like nothing else. Get your chemical-resistant gloves and eye protection on, then use a scrub sponge to wash every square inch of the cabinet boxes, doors, and drawer fronts.
Don’t forget to give extra attention to the cabinets nearest your stove and microwave; that’s where the buildup is always the worst. You’ll be shocked at what comes off. Once everything is scrubbed, wipe it all down with a clean, damp cloth to get rid of any TSP residue, then let the wood dry completely.
Stripping Versus Sanding
With the grime gone, it's time to deal with the old finish. You’ve got two main routes: chemical stripping or mechanical sanding. The right path really depends on what’s on your cabinets now and what kind of wood you're working with. Understanding the https://kitchenrenovationsperfected.com/best-kitchen-cabinet-materials/ can give you some clues about how your specific cabinets might handle each method.
When to Use a Chemical Stripper:
- Thick Varnish or Lacquer: If you're dealing with a heavy, glossy topcoat, a chemical stripper will dissolve it way more efficiently than sandpaper ever could.
- Intricate Details: For doors with deep grooves, routed edges, or other complex profiles, a gel stripper can get into crevices a sander can't reach without ruining the details.
- Lead Paint Concerns: If you're in an older home, a stripper (used with proper safety gear) can be a safer way to remove old paint without sending lead dust into the air.
Using a stripper is a messy but effective job. You'll apply a thick coat with a cheap brush, let it do its thing according to the directions, and then gently scrape away the goop with a plastic putty knife.
Pro-Tip: Always, and I mean always, work in a well-ventilated space like an open garage when using chemical strippers. The fumes are no joke. A respirator with organic vapor cartridges is absolutely non-negotiable for your safety.
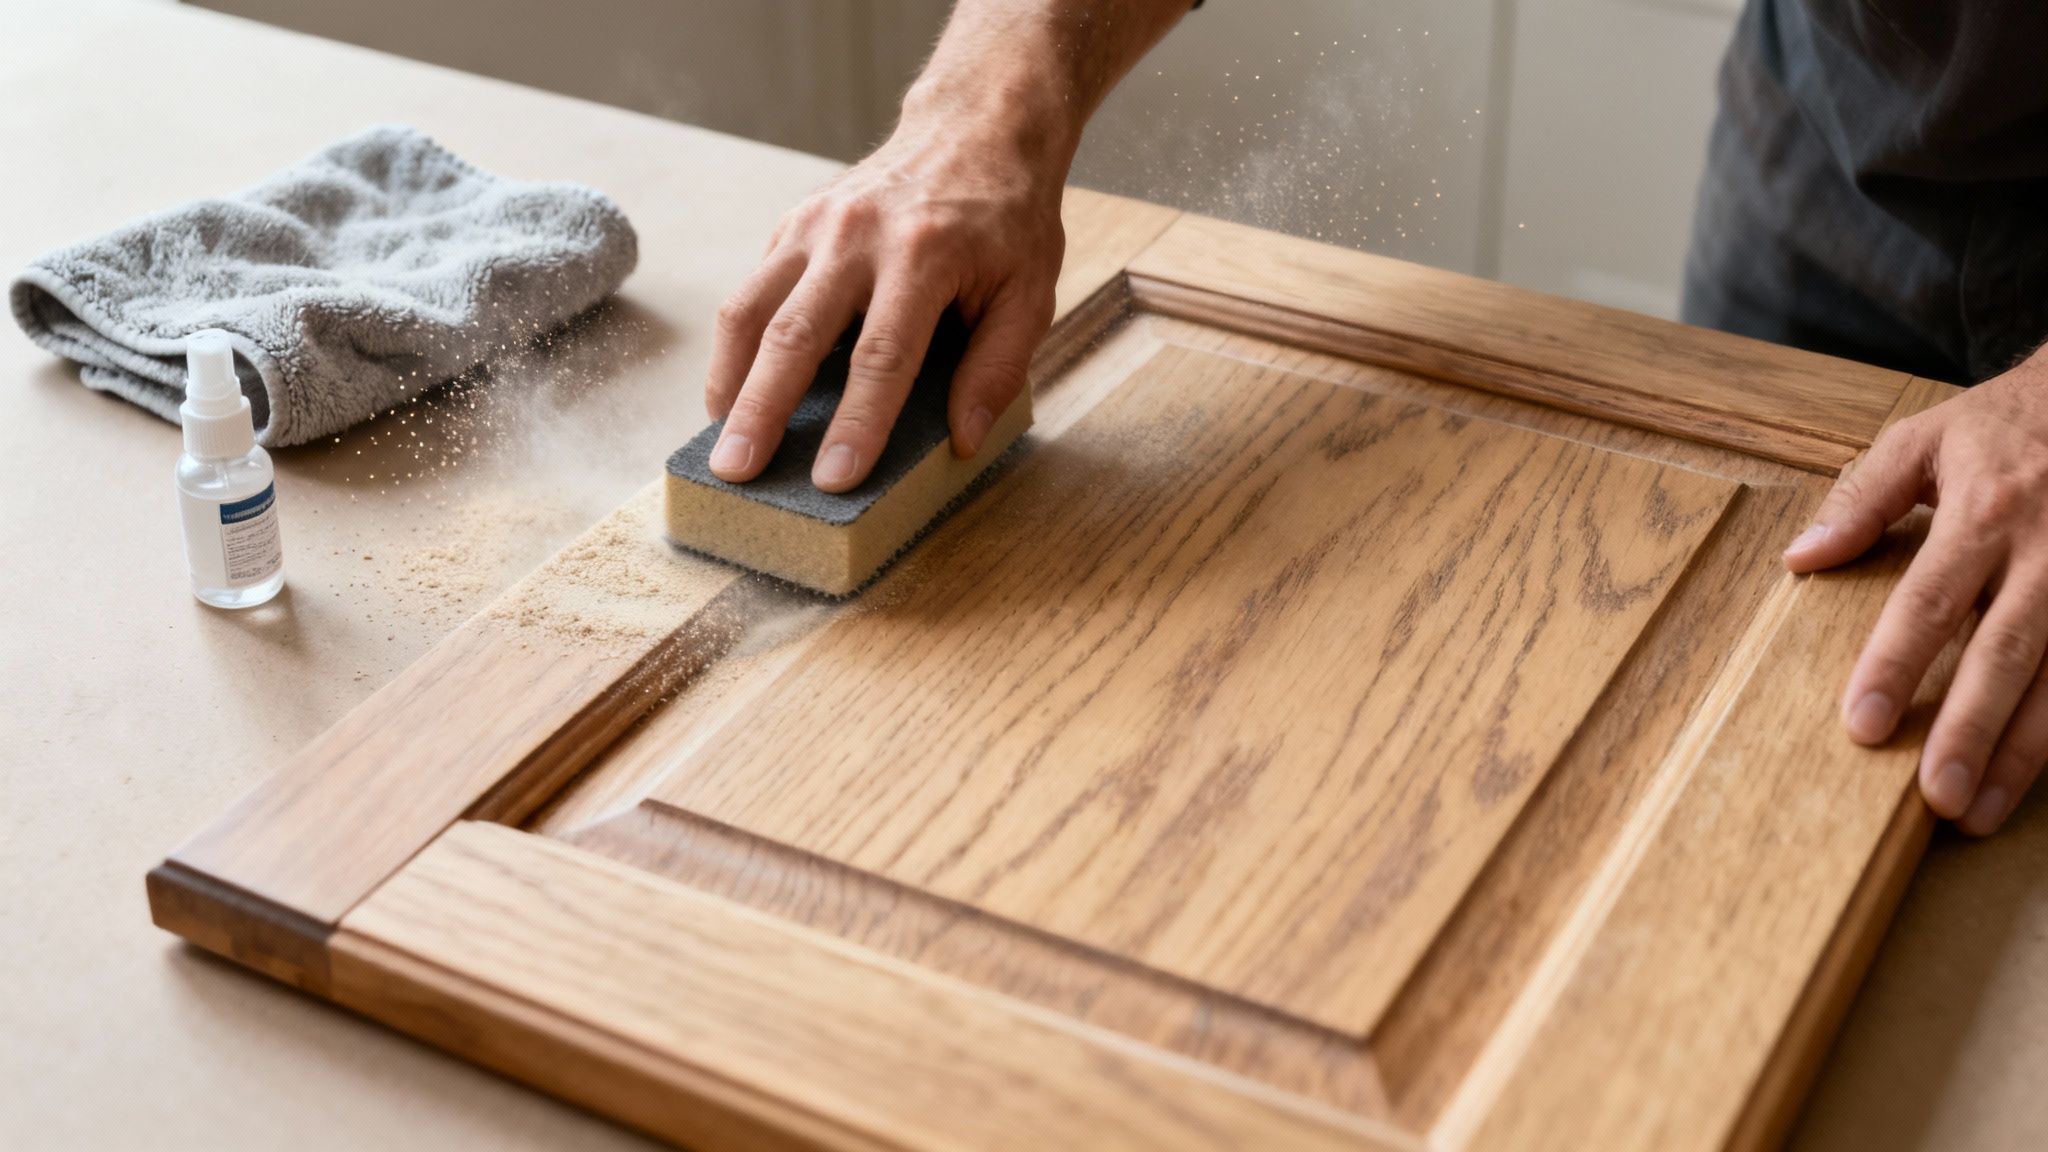
The Art of Sanding for a Smooth Finish
Whether you used a stripper or not, sanding is the final step to creating that perfectly smooth, porous surface that will accept your new primer and finish. This isn't about brute force; it's about being methodical.
Start with a medium-grit sandpaper, something like 120-grit. Use a random orbital sander for the big flat areas and a sanding block for the edges. The goal is to scuff the entire surface and knock down any remaining finish, creating a uniform, dull look. For those detailed door panels, a contoured sanding sponge is a lifesaver—it'll conform to the curves without rounding over the crisp edges.
From there, move on to a finer grit, like 180 or 220-grit. This step smooths out the tiny scratches left by the first pass and really preps the wood for primer. This is the secret to getting that buttery-smooth feel in your final finish.
After your final sanding pass, the surface will be covered in fine dust. Get the bulk of it off with a shop vac and brush attachment, then follow up with a tack cloth. A tack cloth is a slightly sticky piece of cheesecloth that grabs every last particle, leaving you with a perfectly clean canvas. It's a critical step—any dust left behind will create a gritty, bumpy texture under your primer. A huge part of any great finish is knowing how to prep wood for painting properly, and this resource offers fantastic guidance for getting it right.
Finding the Right Finish for Your Kitchen's New Look
You've done all the hard prep work, and now comes the fun part—the decision that completely transforms your kitchen's personality. Choosing a finish is about more than just picking a color. It's about finding a look that fits your home's style and a durability that can stand up to your family's daily life.
You’ve got three main roads you can go down: paint, stain, or a specialty finish like glaze. Each has its own vibe and set of benefits, so the right one for you really depends on the final look you're imagining.
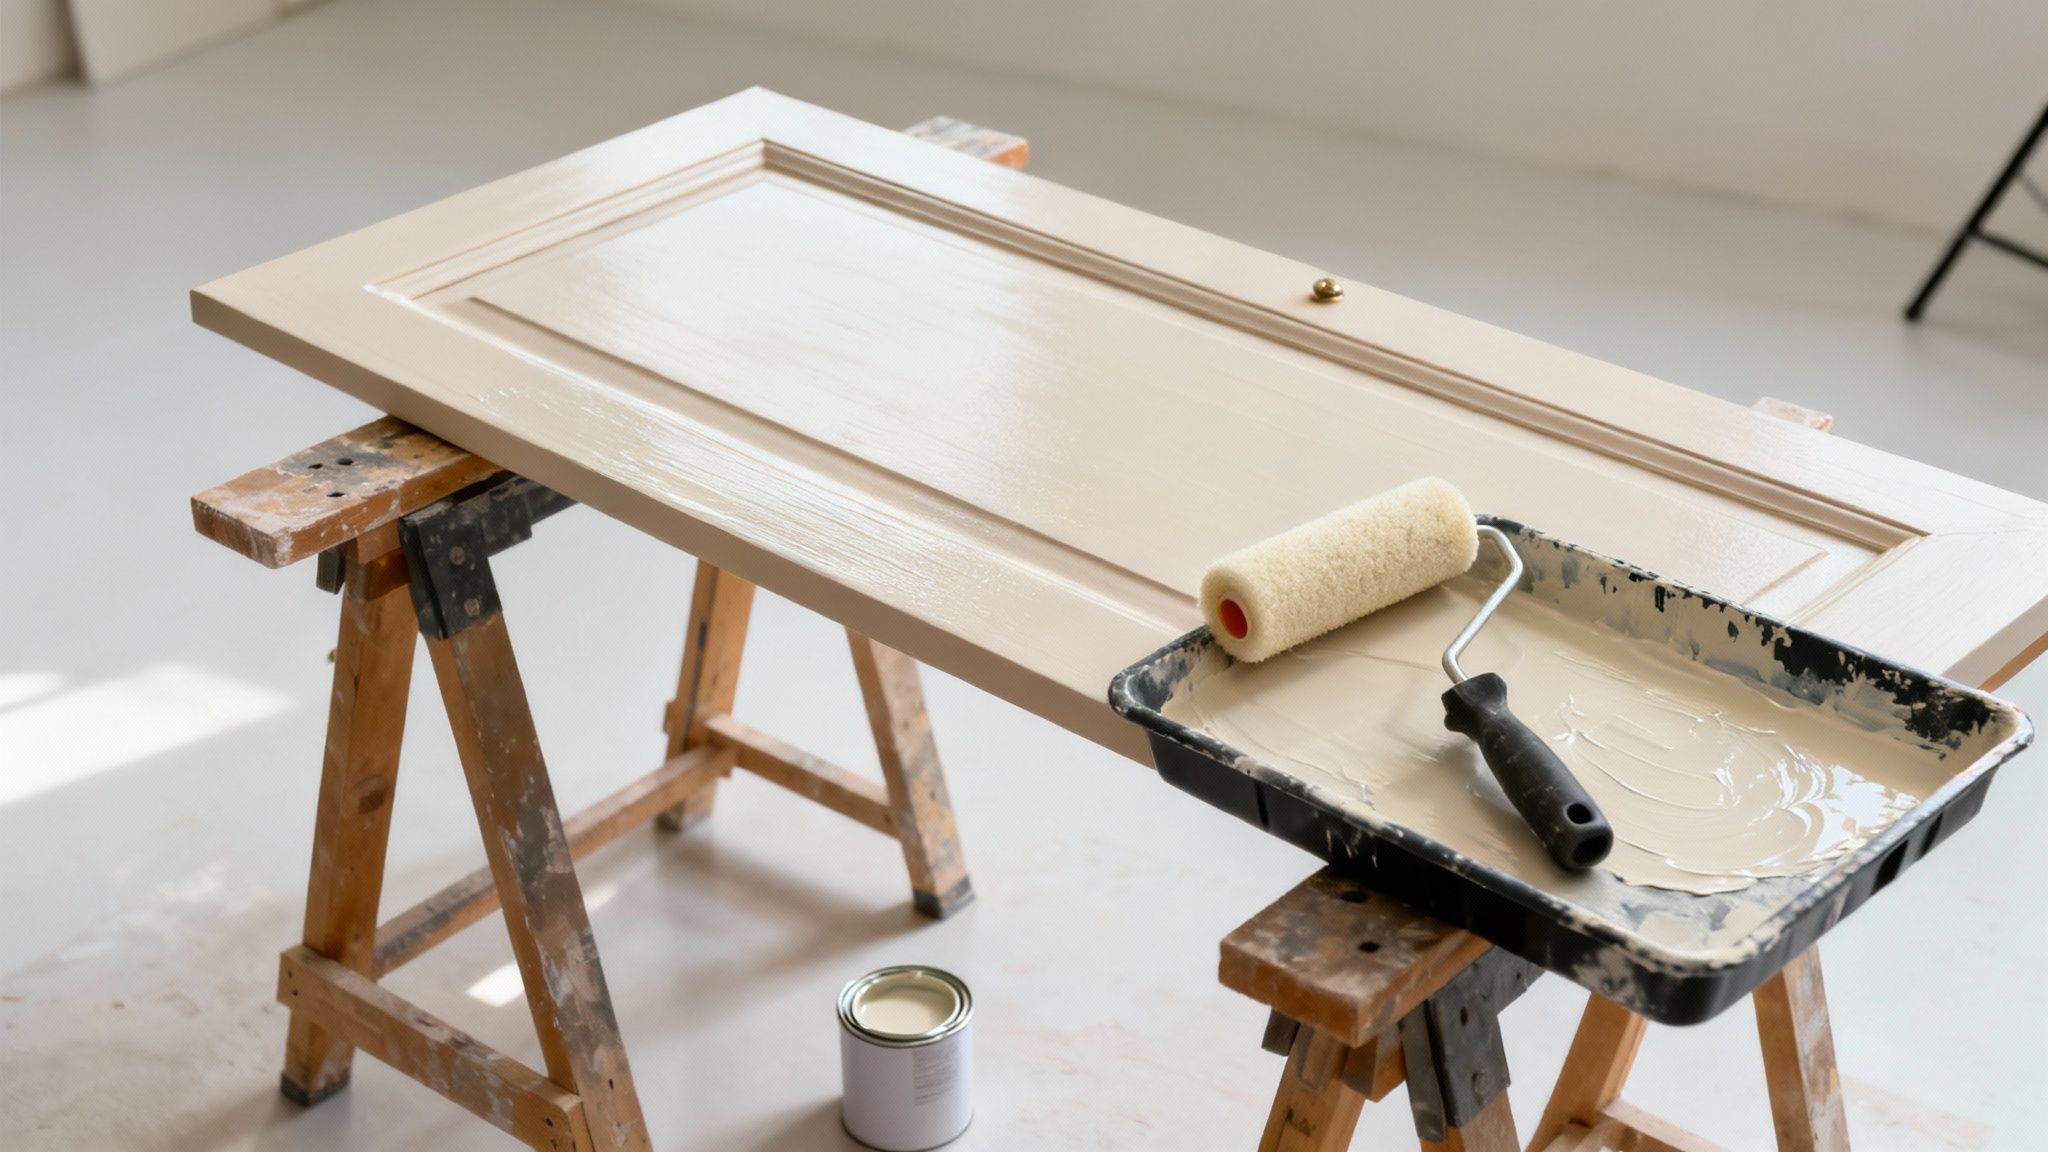
The Clean, Modern Look of Paint
If you're after a total transformation, paint is your best friend. It’s the go-to choice for covering up old, tired wood grain, brightening a gloomy kitchen, or making a bold statement with a new color. A fresh coat of paint delivers a clean, seamless finish that can make even the most dated kitchen feel brand new.
But don't just grab a can of wall paint! That stuff is way too soft for a high-traffic area like a kitchen. You need something tougher. Look for a water-based acrylic enamel or a urethane-alkyd hybrid. These paints are engineered to cure to a rock-hard, scrubbable finish that laughs at chipping, stains, and daily abuse.
Paint is probably your best bet if:
- You're over the oak. Tired of that heavy, '90s oak grain? Paint will hide it completely, giving you that smooth, contemporary surface you’ve been dreaming of.
- Your kitchen feels like a cave. A crisp white or a light gray paint can work wonders, making a small or dark kitchen feel instantly brighter and more spacious.
- You've got a specific color in mind. From moody navy blues to earthy sage greens, paint offers an endless color palette to express your personal style.
The Timeless Charm of Wood Stain
Love the natural character of your wood cabinets? If you just want to refresh their color or take them a shade darker, staining is the way to go. Unlike paint, which coats the surface, stain soaks into the wood fibers, enhancing the grain and bringing out its natural beauty. It's the perfect way to add richness and depth while letting the organic texture shine through.
Staining works best on solid wood cabinets where the grain is something you want to show off. You can take a tired honey oak to a deep, rich walnut or bring a faded cherry finish back to life. The trick is making sure you’ve sanded off every last bit of the old finish so the new stain can soak in evenly.
Choosing to restain is also a great move for the planet. You’re not tossing perfectly good cabinets into a landfill; you're giving quality materials a second act. It's a sustainable choice that’s becoming more and more popular in home renovations.
This eco-conscious shift has also pushed manufacturers to create healthier products. Recent research on cabinet trends highlights a growing demand for low-VOC (volatile organic compound) finishes. In fact, eco-friendly cabinetry has seen a 34% increase in demand from homeowners. By opting for water-based stains and topcoats, you're not just getting a beautiful finish—you're also improving your home's indoor air quality. You can find more details about popular cabinet finishes on elementskbf.com.
Adding a Custom Touch with Glaze
Glaze isn't really a finish on its own. Think of it as an artistic top layer that you apply over paint or stain to add depth and character. It’s a thin, semi-transparent color that you brush on and then carefully wipe away, letting it settle into the corners, crevices, and details of the cabinet doors.
Glazing is fantastic for creating a custom, slightly aged, or "antique" look. It can soften the look of stark white cabinets or add a layer of complexity to a stained finish. For instance, a dark brown glaze over creamy white paint creates that warm, "French country" vibe. It's a more advanced technique that takes a bit of practice to get right, but the payoff is a truly one-of-a-kind kitchen that doesn't look like it came straight out of a box.
5. Applying the Finish for a Flawless, Professional Look
After all that prep work—the cleaning, the stripping, the sanding—this is the moment you’ve been waiting for. It’s incredibly satisfying to finally lay down that first coat of paint or primer and see the transformation begin. But don't rush this part. The application stage is all about technique and patience. This is where you create that smooth, durable finish that looks like it came straight from a factory.
The first real decision you'll make here is what tool to use. Will it be a brush, a roller, a sprayer, or some combination? Each has its place, and for most people learning how to refinish wood cabinets, using a couple of different tools is the smartest way to get the best results.
Picking the Right Tool for the Job
Let's look at the big three: brushes, rollers, and sprayers. I often find myself using a high-quality brush for the tricky spots and a roller or sprayer for the big, flat areas. It’s a very effective one-two punch.
| Applicator | Best For | The Good | The Bad |
|---|---|---|---|
| Brush | Cutting in, navigating detailed door profiles, and painting face frames. | Gives you pinpoint control for crisp lines. | Can leave brush marks if your technique isn't right. |
| Roller | Large, flat surfaces like slab doors and cabinet side panels. | Covers ground quickly and can give a super-smooth finish. | The wrong roller cover can leave a stippled, "orange peel" texture. |
| Sprayer | The whole project, but especially doors and drawer fronts. | Delivers the absolute smoothest, most professional finish possible. | Has a real learning curve and requires a ton of prep and ventilation. |
If this is your first cabinet project, my advice is to keep it simple. Grab a good 2-inch angled brush for your cabinet frames and a 4-inch mini foam roller for the flat surfaces of your doors. This combo gives you a fantastic balance of control and smoothness without the setup and cleanup headache of a sprayer.
Mastering Your Brush and Roller Technique
Even the most expensive tools won't save you from a bad technique. When you’re using a brush, the whole game is about making the strokes disappear. Apply the paint to an area, then go back over it with long, light strokes, all in the same direction. We call this "tipping off," and it helps the paint level out into a beautiful, smooth surface.
With a foam roller, the biggest mistake people make is pushing too hard. That pressure is what causes that bumpy, stippled texture. Just let the roller do the work, gliding it over the surface to apply a thin, even coat. Remember, it's always better to apply two thin coats than one thick, goopy one.
My Biggest Piece of Advice: Your patience is more important than your paintbrush. Thin coats are non-negotiable. Slapping on a thick coat might feel faster, but it's a recipe for disaster. It won't dry or cure correctly, leaving you with drips, sags, and a soft finish that will scratch if you look at it wrong.
Following the recoat times on the can is just as important. If you jump the gun and apply a second coat too soon, you'll just re-wet the first layer, causing it to drag and pull up. It creates a gummy mess that’s a real pain to fix.
The Lowdown on Using a Paint Sprayer
If you're chasing that perfectly uniform, glass-smooth finish, a sprayer is the only way to get it. They look intimidating, but the basics are pretty simple. The number one rule is thinning your paint correctly based on the sprayer’s manual; this is what creates that fine, even mist.
When spraying, hold the nozzle a consistent 6-8 inches from the surface and keep it moving in a steady, overlapping pattern. A great pro tip is to start the spray before the edge of the door and stop it after you’ve passed the other side. This prevents a thick buildup of paint at the start and end of each pass.
Quick Tips for Spraying:
- Always Practice: Grab a big piece of cardboard and spray it first to get your paint consistency and spray pattern dialed in.
- Work Clean: A sprayer can kick up every speck of dust in a five-mile radius. Make sure your work area is completely clean before you pull the trigger.
- Wear a Respirator: You absolutely must wear proper respiratory protection. Atomized paint is no joke and you don’t want that in your lungs.
No matter which method you land on, the core principles don't change: work in a clean, well-lit space, apply thin and even coats, and let things dry properly. This is what separates a frustrating DIY project from a flawless, pro-level finish you’ll be proud of for years.
Finishing Up and Knowing When to Call in the Cavalry
With the curing time behind you, it’s time for the most rewarding part: putting it all back together. This is where your vision finally clicks into place as you install that beautiful new hardware you’ve been waiting to unbox.
When you start re-hanging the doors, patience is your best friend. Fiddling with hinge adjustments can be a bit of a grind, but getting those gaps perfectly even is what separates a good job from a great one. This is also the perfect time for a small but mighty upgrade—swapping out old, clunky hinges for new soft-close models can totally change the feel of your kitchen.
When Your DIY Project Needs a Professional Touch
There's nothing quite like the pride that comes from standing back and admiring a massive project you’ve completed with your own two hands. But it’s equally important to know when a project has gotten too big or complex to handle. A successful renovation is one that looks fantastic in the end, no matter who crosses the finish line.
You might want to pick up the phone and call a pro if you run into any of these common roadblocks:
- You've uncovered some nasty surprises. If stripping away old paint reveals water damage, soft wood, or other structural problems with the cabinet boxes, it’s best to get an expert assessment before going any further.
- The prep work is a monster. Some factory finishes, particularly stubborn lacquers, can feel nearly impossible to remove without professional-grade chemical strippers and equipment.
- You’re chasing a flawless, factory-like finish. That perfectly smooth, glass-like surface you see on high-end cabinets is typically achieved with a sprayer in a dust-free environment. It's a tough look to replicate in a garage workshop.
The whole point of learning how to refinish wood cabinets is to get a beautiful, long-lasting result. If you find yourself in over your head, hiring a pro isn't admitting defeat—it's making a savvy choice to protect your investment.
Sometimes, the smartest move is to pass the baton to a trusted local contractor. If you've decided the job is better left to the experts, our guide to finding the best cabinet refinishing services near you can help connect you with qualified pros who will nail the final look.
Common Questions About Refinishing Cabinets
Even the best-laid plans hit a snag or two. When you're learning how to refinish wood cabinets, a few common questions always seem to come up right in the middle of the project. We’ve been there, so we’ve pulled together answers to the things homeowners ask us most often.
Think of this as advice from someone who's made the mistakes so you don't have to. Getting these details sorted out can be the difference between a frustrating mess and a finish you’re proud of.
How Long Does This Project Usually Take?
Let's be realistic: this isn't a single-weekend job. For an average-sized kitchen, you’re looking at 40 to 80 hours of hands-on work. Because you absolutely cannot rush the drying process, that time gets spread out over one to two weeks.
Cutting corners on drying time for primer or paint is a classic rookie error. It leaves you with a gummy, tacky finish that will get damaged the first time you touch it.
Here’s a practical breakdown of how that time is spent:
- Disassembly and Prep: Plan on 1-2 full days just for taking doors off, labeling everything, cleaning all the surfaces, and getting your work area set up properly.
- Sanding/Stripping: This can take 1-2 days. The state of your old finish really dictates the timeline here—some come off easily, others will fight you every step of the way.
- Priming and Painting: Give yourself 3-5 days for this. This schedule allows for two coats of primer and at least two coats of paint, with critical drying time between each application.
- Curing and Reassembly: After your final topcoat, you need to wait 1-3 days for the finish to cure enough to handle. Only then can you safely re-hang doors and put your new hardware on.
Can You Refinish Laminate or Thermofoil Cabinets?
No, not in the traditional sense. You can’t strip or sand laminate or thermofoil cabinets like you would with wood. These materials are essentially a thin layer of plastic bonded to a particleboard or MDF core. If you try to sand them aggressively, you'll just chew right through the surface and ruin them.
The entire game plan for these surfaces is different. Your goal is to create a surface that a specialized primer can grab onto. It starts with a serious degreasing, followed by a very light scuff-sand using fine-grit sandpaper. You're not trying to remove the finish, just dulling the gloss so the primer has something to bite into.
Key Takeaway: With non-wood cabinets, your project's success completely depends on using the right bonding primer. You need a product specifically made for slick, non-porous surfaces like plastic or laminate. This is non-negotiable if you want the paint to stick around.
What Is the Most Durable Cabinet Paint?
This is where you don't want to cheap out. Your standard latex wall paint is a terrible choice for cabinets. It's too soft and will start to peel, chip, and feel sticky almost immediately in a high-traffic kitchen.
For a finish that will actually last, you need a product designed for the job. The best options on the market today are high-quality water-based acrylic enamels or the newer urethane-alkyd hybrid paints. These formulas are engineered to dry to a tough, hard-wearing finish that resists yellowing and can be scrubbed clean. They give you the easy, water-based cleanup with the kind of durability that used to only come from smelly, oil-based paints.
At Kitchen Renovations Perfected, we believe a beautiful kitchen starts with expert guidance. Whether you’re tackling a DIY project or seeking a full-service remodel in the Boca Raton area, our team is here to help you achieve the perfect finish. Explore our services and book a complimentary consultation.