The dream of a perfectly organized walk-in closet—where every shirt, shoe, and accessory has its place—doesn't start with picking out fancy hardware. It starts with a tape measure and a brutally honest look at your wardrobe.
This first step is the most critical part of the entire project. Rushing it is like building a house on a shaky foundation. Get the measurements and inventory right, and every decision that follows will be grounded in reality, ensuring your new closet is not just beautiful, but perfectly functional for you.
Start with Smart Planning and Measurement
Before you even think about cabinetry or lighting, you need to understand the raw space you're working with and exactly what needs to fit inside it. This isn't just about avoiding mistakes; it's about unlocking your closet's true potential. It's the difference between a generic box with some shelves and a personalized dressing room that genuinely makes your daily routine easier.
Get to Know Your Space: Accurate Measurements are Non-Negotiable
First things first: you need to become intimately familiar with the physical boundaries of your closet. Grab a good tape measure, a notepad, and get ready to document everything. I'm not just talking about the basic length and width—we need the full picture.
Here’s what you absolutely must measure:
- Wall-to-Wall Dimensions: Measure each wall from corner to corner. Do this at three different heights (bottom, middle, top) to catch any bows or variations. You'd be surprised how often walls aren't perfectly straight.
- Ceiling Height: Again, measure this in a few different spots. Old houses, especially, can have dips and sags.
- Obstructions and Features: Note the precise location and size of every single thing that isn't a flat wall. This includes windows, doors (and the direction they swing!), light fixtures, outlets, switches, and any vents or access panels.
- Architectural Quirks: If you have sloped ceilings, soffits, or weird niches, measure their height, depth, and angle with care. These aren't problems; they're opportunities for creative design.
A great tip I picked up over the years is to sketch out the room on graph paper or use a simple digital tool to create a to-scale drawing. A visual map of the space helps you account for every inch and is invaluable when you start playing with layouts.
Take a Full Wardrobe Inventory
Once you know the size of your canvas, you need to figure out what you're going to put on it. This means taking a complete inventory of everything you own. And I don't mean just counting shirts—you need to understand the type of storage each category requires.
Sort everything into logical groups:
- Long-Hanging: Dresses, long coats, robes.
- Medium-Hanging: Pants folded over a hanger, longer skirts.
- Short-Hanging: Shirts, blouses, jackets (this is usually the biggest category!).
- Folded Items: Sweaters, denim, t-shirts.
- Shoes: Heels, boots, flats, sneakers.
- Accessories: Belts, scarves, ties, handbags.
- Drawered Items: Undergarments, socks, activewear.
For hanging items, physically bunch them together on a rod and measure the linear feet they currently take up. This number is gold—it tells you exactly how much rod space you need to plan for. The principles behind this kind of detailed project planning apply to any renovation. We cover this more broadly in our guide to planning a home remodeling project.
Pro Tip: When measuring your hanging clothes, a good rule of thumb is to allow 2-3 inches of width per item. A rod that's packed too tight makes it impossible to see what you have and can wrinkle or damage your clothes. Giving your wardrobe room to breathe is a small detail that makes a world of difference.
To help you get precise, use a checklist like the one below. Go through your belongings and fill in the last column to calculate exactly what your new design needs to accommodate.
Essential Measurements for Your Wardrobe Inventory
| Item Category | Storage Type Needed | Space per Item/Pair | Your Total Required Space |
|---|---|---|---|
| Short-Hanging Clothes | Single Rod (double-stacked) | ~1 inch per hanger | ________________ ft |
| Medium-Hanging Clothes | Single Rod | ~1.5 inches per hanger | ________________ ft |
| Long-Hanging Clothes | Single Rod | ~2-3 inches per hanger | ________________ ft |
| Folded Sweaters/Jeans | Open Shelves or Cubbies | Stack of 5 = ~12" H x 12" W | ________________ # of stacks |
| Shoes (Flats/Heels) | Slanted or Flat Shoe Shelves | ~8-10 inches per pair | ________________ # of pairs |
| Boots | Tall Cubby or Boot Shelf | ~12 inches per pair | ________________ # of pairs |
| Handbags | Cubbies or Display Shelves | Varies by size | ________________ # of bags |
| Small Drawer Items | Shallow Drawers w/ Dividers | ~4-6 inches high | ________________ # of drawers |
Taking the time to complete this inventory is the secret to a closet that truly works. It moves your design from guesswork to a data-driven plan tailored perfectly to your life.
Choose the Right Closet Layout and Flow
Now that you've got your measurements and a full inventory of your wardrobe, the fun part begins. This is where we turn those numbers and lists into a beautiful, functional space that just works with your daily routine. Think of the layout as the blueprint for your closet—get this right, and everything else will fall into place.
The goal here is to create a natural flow. You’ll want to choose a foundational shape that fits your room and then assign specific 'zones' for different parts of your wardrobe. It’s all about making your most-used items easy to grab, while giving everything else—from seasonal wear to that fancy tuxedo—a logical home.
Exploring Common Walk-In Closet Shapes
The shape and size of your room will be the biggest factor in determining which layout makes the most sense. Most walk-in closets fall into one of four common configurations, each with its own strengths.
- Single-Sided: This is your classic, straightforward layout with all storage built along one long wall. It’s a great fit for narrow closets that are at least 5 feet wide, as it keeps the walkway open and uncluttered.
- Galley (or Double-Sided): A very popular and efficient choice, the galley layout features storage on two parallel walls. For this to work without feeling cramped, you really need a closet that’s at least 6.5 to 7 feet wide. This gives you 24 inches of storage depth on each side plus a comfortable 36-inch path down the middle.
- L-Shaped: I love this layout for square-ish rooms or those with a tricky corner. It uses two adjoining walls for storage, which leaves a generous amount of open floor space. This can make a smaller walk-in feel surprisingly airy and even leaves room for a small bench or a full-length mirror.
- U-Shaped: When you want to max out every last inch of storage, the U-shaped layout is the way to go. It utilizes three full walls, but it demands a wider room—I typically recommend a space that’s at least 7 feet wide by 10 feet long. This ensures you can maintain that crucial 36-inch clearance in the center and move around freely.
The Importance of Walkway Clearance
If there's one rule I tell every client, it's this: do not skimp on walkway space. The industry standard is a clearance of at least 36 inches, and for good reason.
Anything less than that, and your beautiful new closet will instantly feel tight and awkward. You have to account for opening drawers and cabinet doors without having to squeeze past them. If you’re dreaming of a center island, you’ll need to plan for 30-36 inches of clearance on all sides to keep it functional.
Your layout's success isn't just about how much you can fit in; it's about how the space feels. Sacrificing walkway clearance for a tiny bit more shelf space is a mistake you'll regret every time you try to get dressed. Always prioritize an open, accessible flow.
This simple flowchart breaks down those first crucial steps, guiding you from measuring the room to designing a layout that fits.
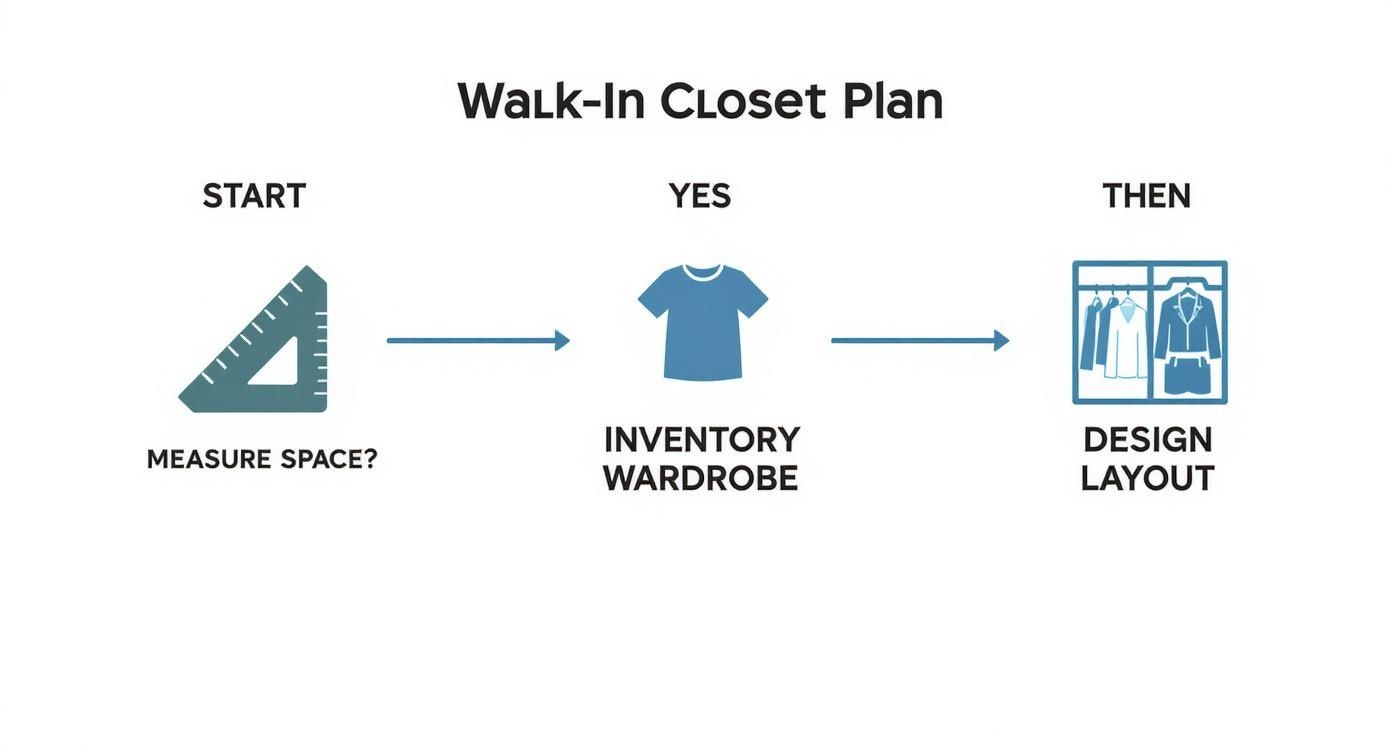
As you can see, a great layout is built on the hard work you’ve already done—measuring the space and taking stock of what you actually own.
Creating Smart Zones for Your Wardrobe
With a layout locked in, it’s time to get strategic and map out your zones. I like to think of a closet like a well-organized kitchen pantry: the things you reach for every day are right at the front, while the specialty ingredients have their own spot.
Let's apply that same logic to your clothes:
- Prime Real Estate: The items you wear constantly—work clothes, your favorite jeans, go-to shoes—should be front and center, at eye level, and near the entrance. No digging required.
- Secondary Storage: Things you use less often, like bulky winter sweaters, formalwear, or extra luggage, can be placed on higher shelves or tucked into the back corners.
- Vertical Space: Don't forget to think up and down. High shelves are perfect for out-of-season items stored in clear, labeled bins. The floor space is ideal for shoes or even pull-out drawers.
Visualize with Simple Elevations
Planning your floor layout is just the first step. To really bring it to life, you need to sketch out the walls. We call these "elevation" drawings, and they are invaluable for visualizing how your vertical storage will work. It’s the best way to make sure every inch is pulling its weight.
For instance, a quick sketch of one wall might look something like this:
| Vertical Zone | Common Use | Height Guideline |
|---|---|---|
| Top Shelf | Out-of-season storage, luggage | ~84 inches from the floor |
| Upper Hanging Rod | Shirts, blouses, jackets | ~80-82 inches from the floor |
| Lower Hanging Rod | Shirts, folded pants, skirts | ~40-42 inches from the floor |
| Mid-Level Shelves | Folded sweaters, jeans | 30-70 inches from the floor |
| Shoe Storage | Heels, flats, sneakers | Bottom 24 inches of wall space |
This is where the magic happens. By mapping it out visually, you might suddenly realize you have room for a double-hang rod system, which literally doubles your hanging space for shirts and pants. Or you might spot the perfect nook for slanted shoe shelves, turning your collection into a stunning display. These simple drawings are the key to refining your plan before you commit to anything.
Select Your Ideal Storage Systems and Finishes
With a solid layout in hand, you’ve arrived at the fun part—bringing your walk-in closet to life. This is where you get to layer in personality and style, choosing the systems, materials, and hardware that will truly define the space. It’s a process that transforms a functional blueprint into your own personal dressing room.
The desire for well-designed storage is huge. The global market for custom closets was valued at over USD 31 billion and continues to climb, which tells you just how much people value a space that's both beautiful and functional.
Navigating Closet System Options
Your first big decision is the type of closet system to install. This choice sets the stage for everything, from the final aesthetic to your total budget. Each option has its own set of pros and cons, so it’s all about matching the system to what matters most to you.
- Wire Shelving: This is by far the most budget-friendly route. Wire systems are lightweight, promote great air circulation, and are relatively easy for a DIY installation. They're a practical pick for secondary closets or when cost is your main concern, but they don't offer that high-end, built-in feel and can leave indentations on sweaters.
- Modular Systems: A fantastic middle-ground choice, these systems hit the sweet spot between customization and affordability. You get to mix and match pre-made components—like drawer units, shelves, and hanging rods—to fit your space. They give you a polished, built-in look without the hefty price tag of full custom work.
- Fully Custom Cabinetry: For a completely seamless, high-end result, nothing compares to custom-built cabinetry. It's designed and built to the exact dimensions of your closet, maximizing every single inch. You get total control over the materials, finishes, and features. While it's the most expensive option, the quality and bespoke finish are truly second to none.
A Closer Look at Materials and Finishes
The materials you choose for your closet system will set the entire mood of the space. It's a balancing act between durability, looks, and cost.
Material Comparison
| Material | Pros | Cons | Best For |
|---|---|---|---|
| Laminate/Melamine | Very durable, scratch-resistant, easy to clean, huge range of colors/textures. | Can look less premium than real wood, low-quality versions might chip. | High-traffic closets that need a practical, stylish, and cost-effective fix. |
| Plywood | Strong, stable, holds screws well, great base for paint or veneer. | Raw edges need finishing, can be pricier than particleboard-core laminates. | Sturdy, paintable custom builds or as a solid core for wood veneers. |
| Solid Wood | Beautiful natural grain, can be sanded/refinished, adds timeless value. | Most expensive, can warp in humid areas, susceptible to scratches. | Luxury closets where the warmth and classic look of real wood is a priority. |
The finish is just as crucial. A crisp white or a soft gray can make a smaller closet feel airy and bright. On the other hand, a deep wood grain adds a sense of warmth and sophistication. For a bit more inspiration, our gallery of custom closet design ideas has tons of layouts and finishes to explore.
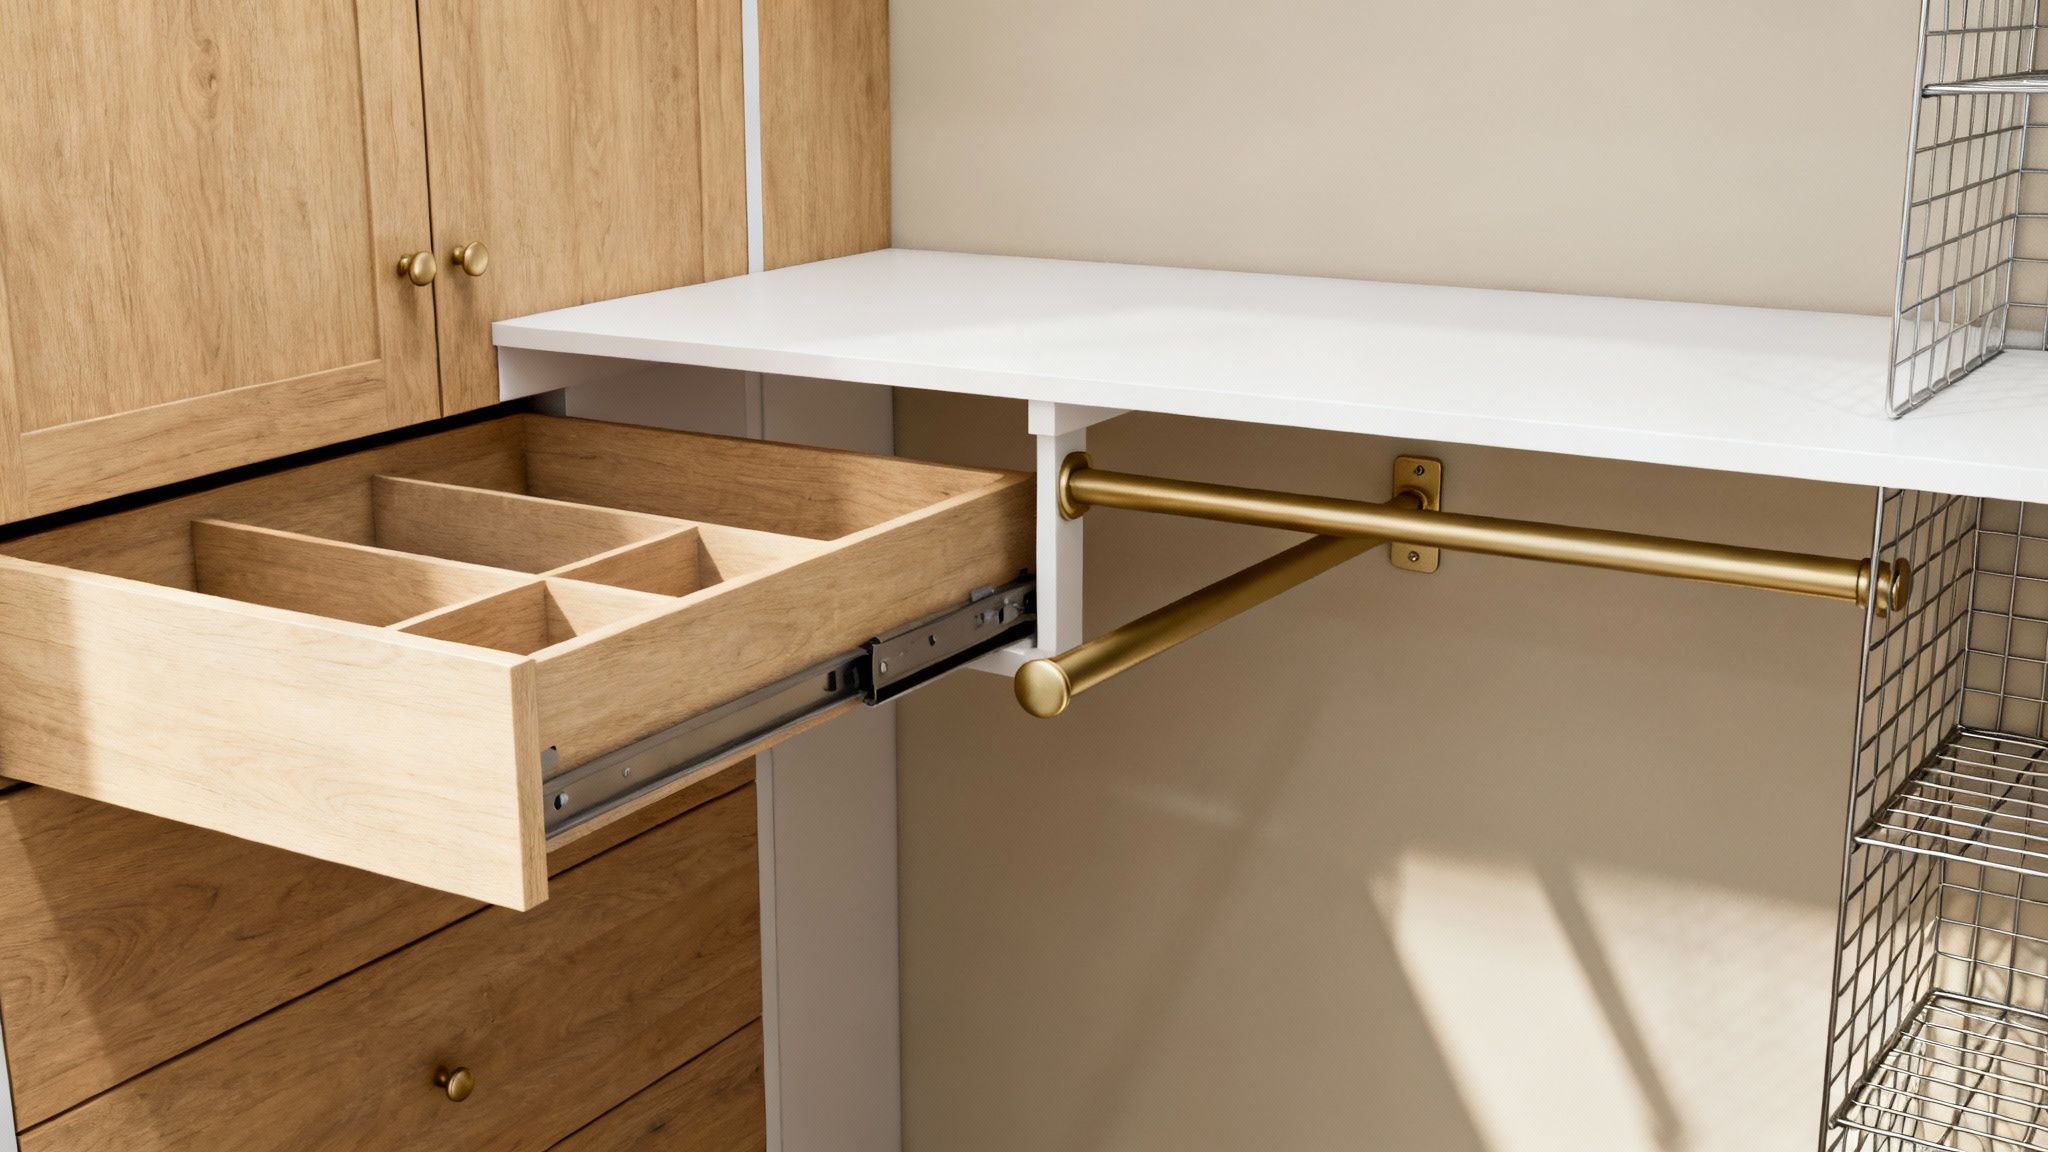
The Details That Make a Difference
What really elevates a closet from basic storage to a personal sanctuary are the thoughtful little details that make your daily routine easier. These are the small upgrades that pack a big punch.
Think about working in special features like:
- Drawer Dividers: Perfect for keeping jewelry, ties, socks, and other accessories from becoming a jumbled mess.
- Pull-Out Valet Rods: A handy temporary hook for planning an outfit or packing for a trip.
- Integrated Hampers: A tilt-out or pull-out hamper keeps your laundry basket hidden away and off the floor.
- Sliding Belt and Tie Racks: These specialized racks keep everything neat, visible, and easy to grab.
Expert Insight: If I had to pick the single most impactful upgrade, it would be adding a bank of drawers. Shelves are great, but drawers offer concealed storage that instantly makes a closet feel cleaner and more serene. They also protect your delicate items from dust.
Finally, don't forget the hardware. Knobs, handles, and rods are the jewelry of your closet. When it comes to hanging space, make sure you choose quality; check out some heavy duty wardrobe rail solutions to ensure your rods can handle the weight without bowing. Selecting hardware that ties into your home's existing style—whether that's modern matte black, classic polished nickel, or warm brushed brass—is the finishing touch that pulls the whole design together.
Illuminate Your Closet with Strategic Lighting
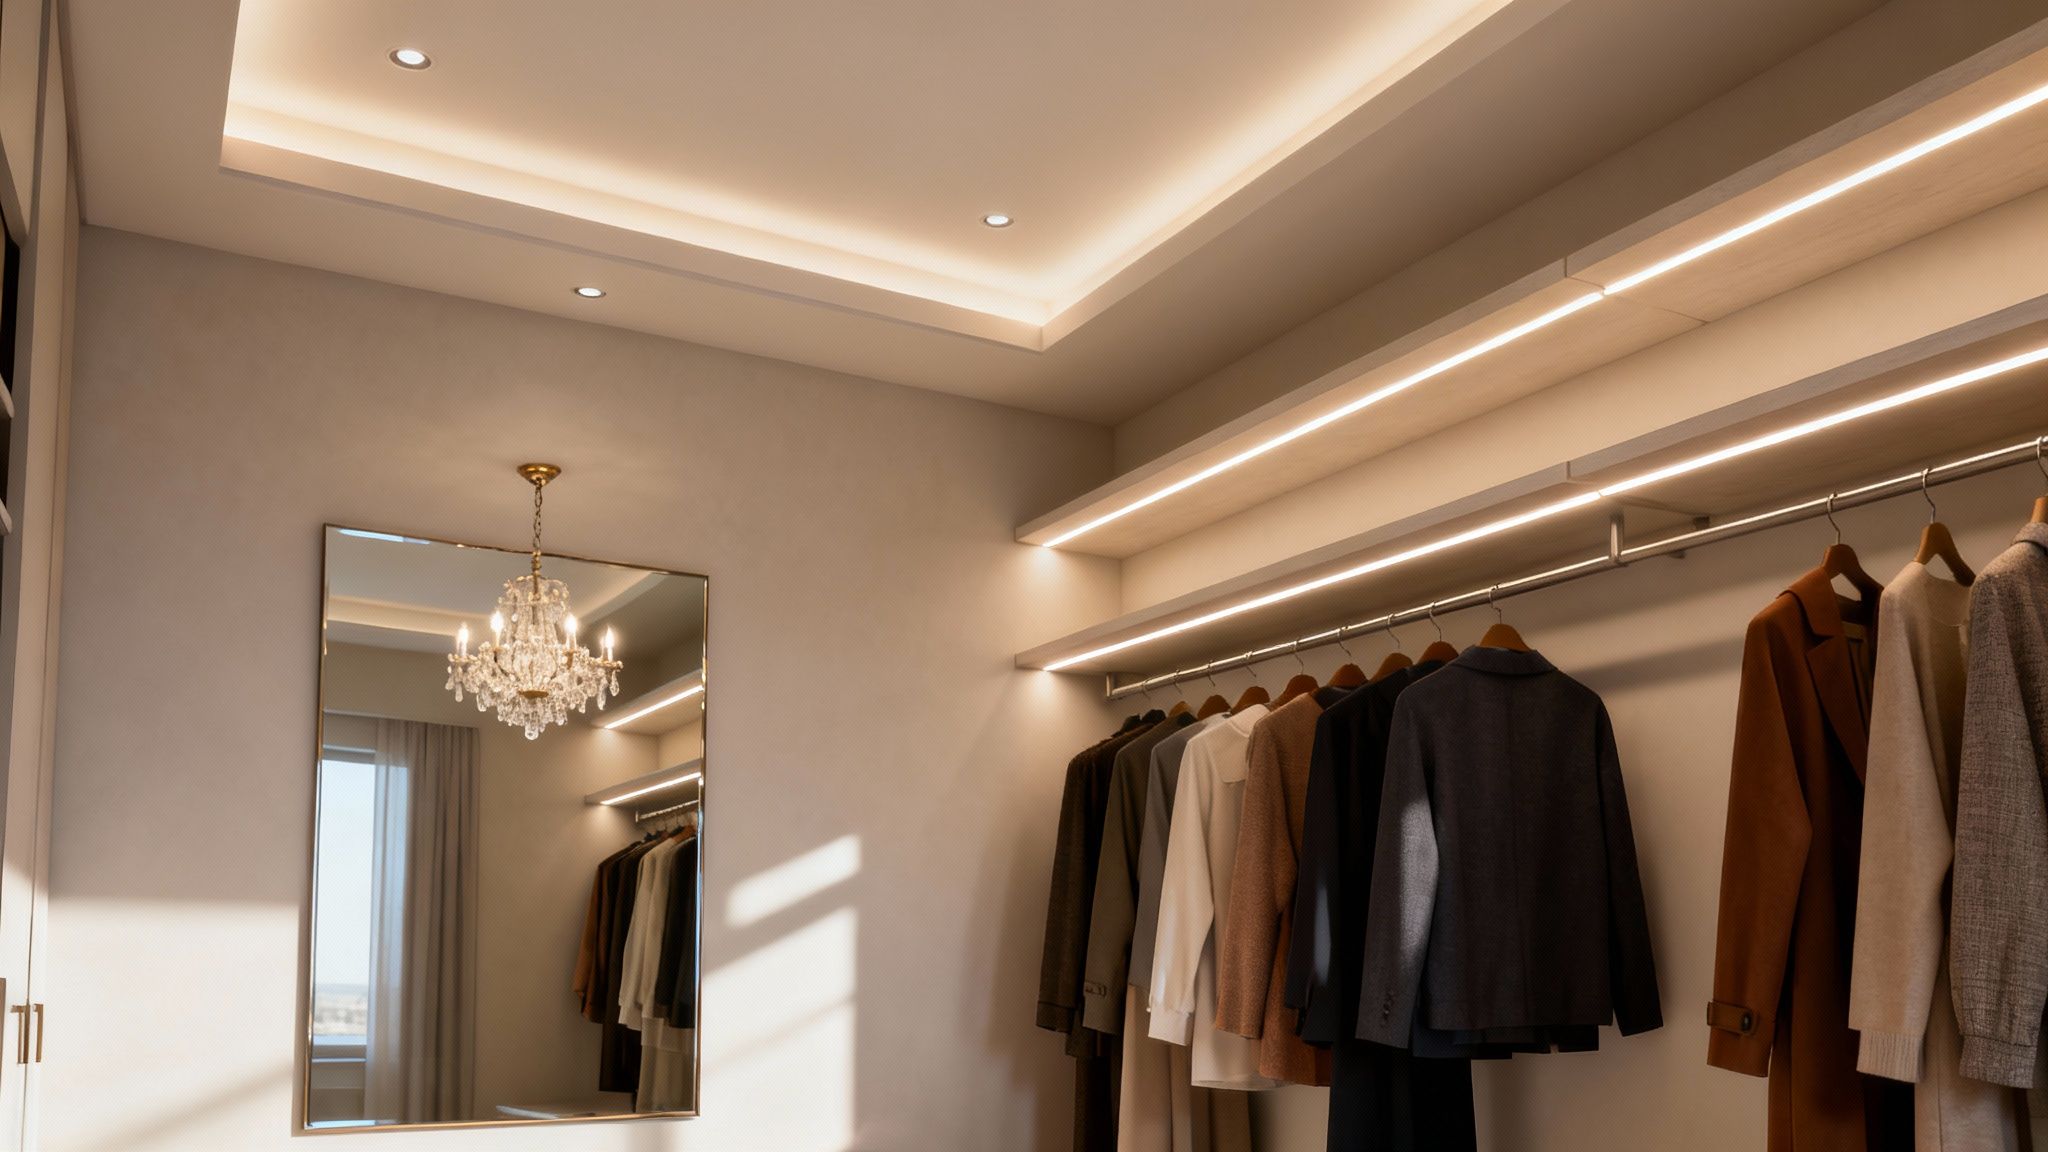
You can have the most brilliant closet system in the world, but if you can't see what's in it, what's the point? This is where strategic lighting comes in. It’s the single detail that elevates a walk-in closet from a simple storage box to a luxurious, boutique-like dressing room.
Good lighting isn’t just about flicking on a switch. It’s about creating an experience that makes getting dressed easier and more enjoyable. The right light helps you distinguish navy from black, find that one specific belt, and makes the whole space feel more inviting. The secret is to think in layers, just like a professional lighting designer.
The Three Essential Layers of Closet Lighting
A truly effective lighting plan isn't about one single, harsh overhead light. It’s a carefully balanced mix of three distinct types of light working in harmony to create a bright, shadow-free space. Each layer has a specific job to do.
This layered approach is a fundamental principle of good design. We talk about it in other areas of the home, too—you can see how lighting creates the perfect ambiance in kitchen design in our related guide.
Here’s the breakdown for your closet:
- Ambient Lighting: This is your foundation. It’s the main source of general light that fills the entire room, allowing you to walk in and navigate safely. Think of it as a stand-in for natural daylight.
- Task Lighting: This is your workhorse. It’s focused, functional light aimed directly at specific areas—illuminating hanging rods, shelves, and drawers so you can actually see your clothes and accessories.
- Accent Lighting: This is the fun part! Accent lighting adds personality and a touch of drama. It’s used to highlight special features, like a beautiful handbag collection or a favorite pair of shoes.
Choosing the Right Fixtures for Each Layer
Once you understand the three layers, picking the right fixtures becomes much clearer.
For your ambient lighting, recessed can lights are a fantastic, modern choice. They provide clean, even illumination without cluttering the ceiling. A stylish flush-mount fixture or even a semi-flush-mount chandelier can also do the trick, pulling double duty as a decorative element.
When it comes to task lighting, your mission is to kill the shadows cast by shelves and hanging clothes. Nothing beats integrated LED strip lighting here. We install these constantly—under shelves, inside drawers, and vertically along the inside of cabinet partitions. It puts bright, even light exactly where you need it most.
Finally, have some fun with accent lighting. A small, elegant chandelier can become a stunning focal point in a larger closet. We also love using puck lights inside glass-front cabinets or open cubbies to spotlight a treasured collection, turning everyday items into a work of art.
A Critical Detail: Color Temperature
If you take away only one tip, let it be this: pay attention to color temperature. Measured in Kelvin (K), it determines whether light appears warm (yellowish) or cool (bluish). That cozy, 2700K light you love in your living room will wreak havoc in your closet, making it impossible to tell your colors apart. For a closet, you absolutely need a neutral, daylight-like light in the 4000K to 5000K range. This ensures your clothes look the same inside your closet as they do out in the real world.
To dive deeper into all the options, a comprehensive design guide on the best lighting for walk-in closets is an excellent resource for exploring more fixtures and placement ideas. A little extra planning on the lighting front will pay off every single day, making your new closet as functional as it is beautiful.
Set a Realistic Budget and Know When to Hire a Pro
Let's talk about the part where your dream closet design meets the real world: the budget. A brilliant plan is only as good as your ability to actually build it, and getting the numbers right from the start is the key to a stress-free project. This is where you decide if you’re going to roll up your sleeves and DIY or bring in an expert to handle the heavy lifting.
Getting this step right is everything. It prevents those heart-stopping moments when you realize you're over budget and ensures your finished closet is a source of daily joy, not a reminder of a project gone wrong. It’s all about planning your investment wisely.
And make no mistake, it is an investment. The global clothes closet market was valued at nearly US$ 20 billion in 2024, and walk-in closets are expected to grow at a healthy 7.5% annual rate through 2034. That surge shows just how much people value beautiful, functional storage. You can dive deeper into the growth of the closet market on FactMr.com.
Breaking Down Your Walk-In Closet Budget
To build an accurate budget, you have to think beyond just the shelving. Costs can swing wildly depending on the size of your space, the materials you choose, and who does the work.
Here’s a realistic look at where your money will go:
- The Closet System: This is your biggest ticket item. A simple wire system from a big-box retailer might run $500-$1,500. A more robust modular system could be anywhere from $2,000-$7,000, and a fully custom, professionally installed closet often starts around $5,000 and can easily top $15,000.
- Labor and Installation: If you're not doing the work yourself, professional installation usually adds 20-30% to the material cost.
- Lighting and Electrical: Bringing in an electrician for recessed lights, a new outlet for a steamer, or integrated LEDs can cost between $400 and $2,000, depending on how complex the job is.
- Finishing Touches: Don't forget the details that pull it all together. Paint, new flooring, a full-length mirror, and beautiful hardware can add another $500-$2,500+ to the final tally.
Budgeting Takeaway: Always, always add a 10-15% contingency fund to your total estimate. Every renovation project has its surprises—maybe you discover some old water damage behind the drywall or realize a wall isn't perfectly straight. This buffer keeps a small hiccup from derailing your entire project.
Deciding Between DIY and Hiring a Professional
So, the big question: can you tackle this yourself? A DIY approach can save you a bundle on labor costs, but it isn't for everyone. The right answer really comes down to your skills, your tools, and your time.
DIY-Friendly Tasks
Some parts of a closet renovation are perfect for a weekend warrior.
- Prep and Paint: Patching old holes, sanding, and giving the walls a fresh coat of paint are straightforward tasks most people can handle.
- Simple System Installation: If you're using a basic wire or modular closet kit, the assembly is often very manageable with standard household tools.
- Demo Work: Tearing out old shelving and baseboards is a great way to save a little on labor costs right off the bat.
When to Call a Pro
On the other hand, some jobs are definite red flags that it's time to bring in an expert.
- Electrical Work: This is non-negotiable. Any new wiring, outlets, or hardwired light fixtures always require a licensed electrician. It’s about safety and being up to code.
- Complex Custom Cabinetry: Installing high-end, custom-built cabinetry is a game of precision. One wrong cut can be a very expensive mistake, and pros have the specialized tools to get that seamless, built-in finish.
- Structural Changes: Thinking of moving a wall or changing the doorway? That's a job for a qualified general contractor, no question.
Finding and Vetting the Right Professionals
If you decide to hire out some or all of the work, finding the right person is crucial. Start by asking friends, neighbors, or local online groups for recommendations. Look for closet design companies or contractors who have a strong portfolio and solid reviews.
When you meet for a consultation, be prepared. Have your measurements, your inventory list, and your inspiration photos ready to go. A true professional will listen to your needs and offer creative solutions, not just push their most expensive system.
Be sure to ask these key questions:
- Are you licensed and insured?
- Can you provide references from a few recent clients?
- What does your process look like from design to installation?
- How do you handle changes or unexpected problems that come up?
Finally, when you get a quote, make sure it’s itemized. It should clearly break down the costs for materials, labor, and any other fees. This transparency helps you compare apples to apples and ensures there are no nasty surprises on the final invoice.
Answering Your Top Walk-In Closet Design Questions
Once you’ve got the big picture sorted out—the general layout, the budget—the smaller, more specific questions start to bubble up. This is perfectly normal. In fact, getting these details right is what separates a good closet from a truly great one.
Let's dive into some of the most common questions I hear from clients during the design process. Answering them now will help you dodge common mistakes and create a space that’s as smart as it is beautiful.
What’s the Smallest a Walk-In Closet Can Realistically Be?
For a walk-in to actually feel like a walk-in and not just a tight squeeze, you really need it to be at least 6.5 feet wide. This is the magic number because it lets you have 24 inches of storage depth on both sides and still leaves a comfortable 36-inch aisle down the middle.
As for length, think 4 to 5 feet as a decent minimum. Now, what if your space is a bit narrower, say around 5 feet wide? You can absolutely still make it work. The trick is to go with an L-shaped design, running storage along one long wall and one short wall. This keeps the floor space open so you don't feel boxed in.
If you’re working with anything smaller than that, you’re often better off designing a highly efficient reach-in closet. Trying to force a walk-in into too small a space just leads to frustration.
Should I Get Drawers or Stick with Open Shelves?
Honestly, the best closets I’ve designed always feature a smart mix of hanging rods, open shelving, and drawers. Each one plays a unique role, and you’ll miss out if you skip one.
Rods are a given for hanging clothes, and shelves are fantastic for folded sweaters and shoes. But drawers? They’re the unsung heroes of closet organization. They give you a clean, concealed spot for all the small stuff—socks, underwear, scarves, belts—that would just look messy and cluttered sitting out on a shelf. Plus, they keep everything dust-free.
My Go-To Advice: Try to work at least one bank of drawers into your plan. If the budget is feeling tight, you can get a similar look and function by using a set of matching, high-quality bins or baskets on your open shelves.
How Can I Make My Small Walk-In Feel Bigger?
Even a modest walk-in can feel spacious and luxurious if you know a few tricks of the trade. It’s all about playing with light and perception.
Here are a few strategies I always recommend:
- Go Light and Bright: Stick with a light color palette. Whites, soft grays, and pale beiges are your best friends here, for both the walls and the cabinetry. Lighter colors are masters at reflecting light, which instantly makes any room feel more open and airy.
- Add a Big Mirror: A full-length mirror is a non-negotiable in a small closet. Placing one on a spare wall or on the back of the door creates an illusion of depth that can visually double the space.
- Layer Your Lighting: A single ceiling light just won't cut it. As we talked about earlier, using a combination of ambient and task lighting—especially LED strips tucked under shelves—banishes shadows and gets rid of that cramped, cave-like feeling.
- Embrace Organization: Nothing makes a space feel smaller than clutter. A tidy, well-organized closet will always feel bigger and more calming, regardless of its actual footprint.
Do I Have Room for a Bench or an Island?
A center island or a chic built-in bench can be a game-changer, but only if you have the square footage to pull it off. An island is incredible for adding drawer storage and giving you a surface to fold laundry or pack for a trip. But it demands space.
The golden rule is that you need at least 30 to 36 inches of clear walkway on all sides of an island. If adding one means you’ll be doing a side-shuffle to get around it, skip it. A better option for a tighter space is a small upholstered bench placed against an open wall. It gives you that perfect spot to sit and put on your shoes without eating up all your precious floor space.
At Kitchen Renovations Perfected, we specialize in transforming ordinary spaces into beautifully functional closets, kitchens, and baths tailored to your life. If you're in the Boca Raton area and ready to create the walk-in closet of your dreams, we invite you to schedule a complimentary design consultation with our expert team.