So, can you tile over tile in a shower? The short answer is yes, you technically can. But the real-world answer is a bit more complicated and comes with some serious warnings.
Think of it this way: it’s like putting a brand-new roof on your house without ever checking the condition of the rafters underneath. It might look great for a while, but if the foundation is weak, you’re just covering up a bigger problem that’s bound to surface later. Success depends entirely on the existing structure being absolutely flawless.
A Realistic Look at Tiling Over Shower Tile
The idea of skipping demolition is what tempts most people. Tiling directly over the old tile seems like a fantastic way to avoid the dust, noise, and sheer effort of a full tear-out. It feels like a shortcut that saves both time and money.
But that convenience comes at a price: risk. For this to work, your current shower walls have to be the perfect canvas. We're talking perfectly level, with every single tile bonded solid to the wall and, most importantly, the hidden waterproofing layer behind it still 100% effective.
Even one loose tile, a few hairline cracks in the grout, or the tiniest bit of moisture that has crept in behind the scenes means you're building a beautiful new wall on a crumbling foundation. This decision tree gives you a quick visual on where you stand.
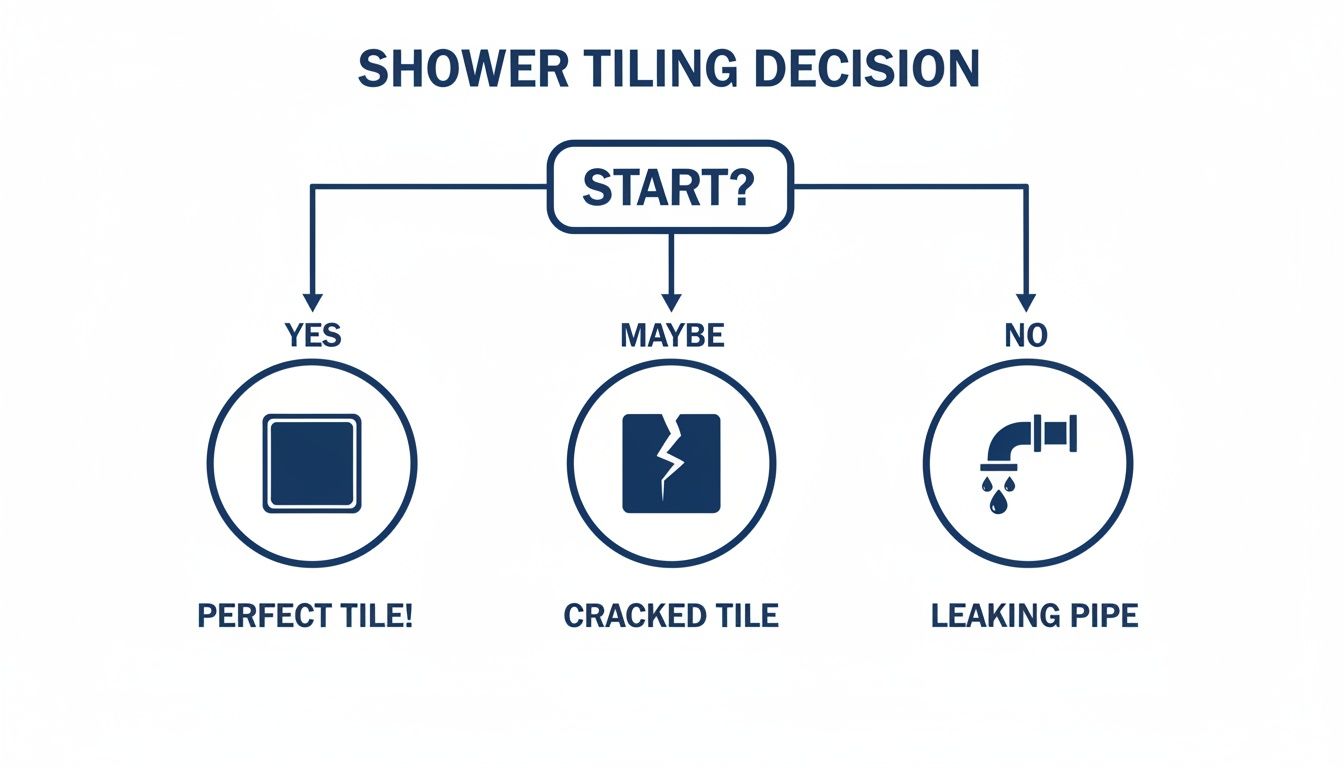
As you can see, the only real "go" signal is a shower that’s in near-perfect condition already. Anything less, and you're stepping into a minefield of potential problems.
The Trade-Off Between Speed and Certainty
Going the tile-over-tile route is essentially a gamble that your existing shower has no hidden secrets. The biggest issue? The most destructive problems, like a slow drip behind the wall or a waterlogged backer board, are completely invisible from the outside.
A full demolition is messy, no doubt. But it’s the only way to get a clear look at what’s really going on. It lets you inspect the wall studs, fix any water damage, and install a modern, reliable waterproofing system that you can trust for years to come.
The decision isn't just about the tile you can see; it's about the wall you can't. A shortcut on the surface can easily lead to a catastrophic failure inside the wall, turning a cosmetic update into a massive and expensive repair.
This quick-glance table can help you weigh the risks. If you find yourself in the "Strongly Reconsider" column for any of these factors, a tear-out is almost certainly the smarter, safer bet.
Tiling Over Tile in a Shower At a Glance
| Factor | Proceed with Caution If | Strongly Reconsider If |
|---|---|---|
| Existing Tile Condition | Tiles are perfectly flat, level, and show no cracks or chips. | Any tiles are cracked, loose, or sound hollow when tapped. |
| Grout & Caulk Integrity | Grout is fully intact with no stains or crumbling areas. | Grout is missing, cracked, or shows signs of mold/mildew. |
| Plumbing & Fixtures | No history of leaks and fixtures are modern and functional. | There are any signs of past or present leaks around fixtures. |
| Structural Soundness | The wall feels completely solid with no flexing or movement. | The wall flexes when pushed or feels soft in any areas. |
Ultimately, you have to decide if the upfront savings are worth the long-term gamble. In a high-moisture area like a shower, cutting corners rarely pays off.
What’s Really Going On Behind Your Shower Wall?
When you’re thinking about tiling over existing tile in a shower, what you see on the surface is only a tiny part of the picture. The real make-or-break issues are lurking behind that old tile—things like the wall's structural strength and, most importantly, the waterproofing. If you get this wrong, you’re not just looking at a bad tile job; you’re looking at a complete tear-out down the road.
Imagine your shower wall is a big, layered cake. The wall studs are the cake stand, the backer board is the first cake layer, the waterproofing is the sealant layer of jam, and the original tile is the frosting. Tiling over tile is like deciding to slap another heavy layer of frosting on top. If any of those bottom layers are weak, soggy, or crumbling, the whole thing is destined to fail.
The Hidden Burden of Extra Weight
Let's start with simple physics. Tile is heavy. Once you add in the mortar, a typical porcelain tile job weighs somewhere between 4 to 6 pounds per square foot. When you add a second layer, you're literally doubling the weight that your wall structure has to support.
All that extra weight puts a serious strain on the original tile adhesive, the backer board, and the wall studs themselves. Was the wall framed to handle that kind of load in the first place? Probably not. It's like trying to hang a giant, heavy piece of art using a thumbtack meant for a poster—eventually, something is going to give. The wall could start to bow or flex, leading to a total failure.
This is exactly why a professional has to take a look. They can assess whether the structure can handle the stress. Without that green light, you're just gambling with your bathroom's integrity. If you're curious about how much different materials weigh, our guide on bathroom tile types can give you a better idea.
Trapped Moisture: The Silent Killer
Even more critical than the weight is the unseen threat of moisture. Showers are brutal environments. Over years of use, tiny hairline cracks in the grout or a bit of failed caulk can let water sneak in behind the tiles. This is, without a doubt, the biggest risk in any tile-over-tile project.
When you install a new layer of tile, you’re creating a "tile sandwich." Any moisture that’s already trapped behind the original tile is now sealed in permanently. It has absolutely nowhere to go.
Trapping moisture between two waterproof tile layers is a recipe for disaster. It creates a dark, damp space perfect for mold and mildew to thrive, and it will eventually rot the wood studs in your wall. This moisture also destroys the old tile’s bond, causing both layers to fall right off the wall.
This isn't just a small problem—it’s a catastrophic failure waiting to happen. The success of this kind of project completely depends on the old surface being perfectly dry and sound. In our experience, this is rarely the case. We find that approximately 60-70% of showers we inspect have underlying moisture issues that make tiling over them impossible.
Don't Skip the "Tap Test"
Finally, the bond of the old tile has to be rock-solid. Over time, the adhesive used to install tile can break down. A tile might look perfectly fine, but if you tap on it and hear a hollow sound, it means it has separated from the wall.
We do a simple "tap test" on every single tile before even considering a project like this. The sound tells you everything you need to know.
- A solid thud means the tile is firmly bonded. That's what you want to hear.
- A hollow, empty sound is a major red flag. It means the tile is loose and provides no structural support.
Tiling over a loose tile is like building a house on a foundation of sand. The new mortar can't fix the old problem. It just adds more weight to a failing tile, guaranteeing that it—and your brand new tile—will eventually come crashing down.
Getting the Surface Ready: The Make-or-Break Stage of the Project
So, your shower passed the initial inspection. Great! But this is where the real work begins. Getting the green light is one thing, but actually pulling this off so it lasts is a whole different ball game.
Think of it like painting a car. You can't just spray new paint over the old, glossy finish. You have to sand it down, clean it, and prime it first. Any shortcuts at this stage will ruin everything you put on top, no matter how nice your new tile is. This prep work is what separates a job that lasts from one that fails in a year.
Creating the Perfect Canvas for Your New Tile
The number one reason these projects go south is bad prep. You absolutely cannot just slap thin-set mortar onto a slick, glossy tile surface and hope for the best. The new mortar needs something to physically grab onto, what we call a mechanical bond.
Imagine trying to glue two panes of smooth glass together—the glue has nothing to latch onto. Now, what if you scuffed up both surfaces with sandpaper first? All those tiny grooves and scratches give the glue a place to lock in, creating a bond that’s incredibly strong. That’s exactly what we have to do to the old tile.
This all comes down to a few non-negotiable steps:
- Deep Cleaning: First, every speck of soap scum, body oil, and hard water scale has to go. I'm not talking about a quick wipe-down; this takes heavy-duty cleaners and some serious elbow grease.
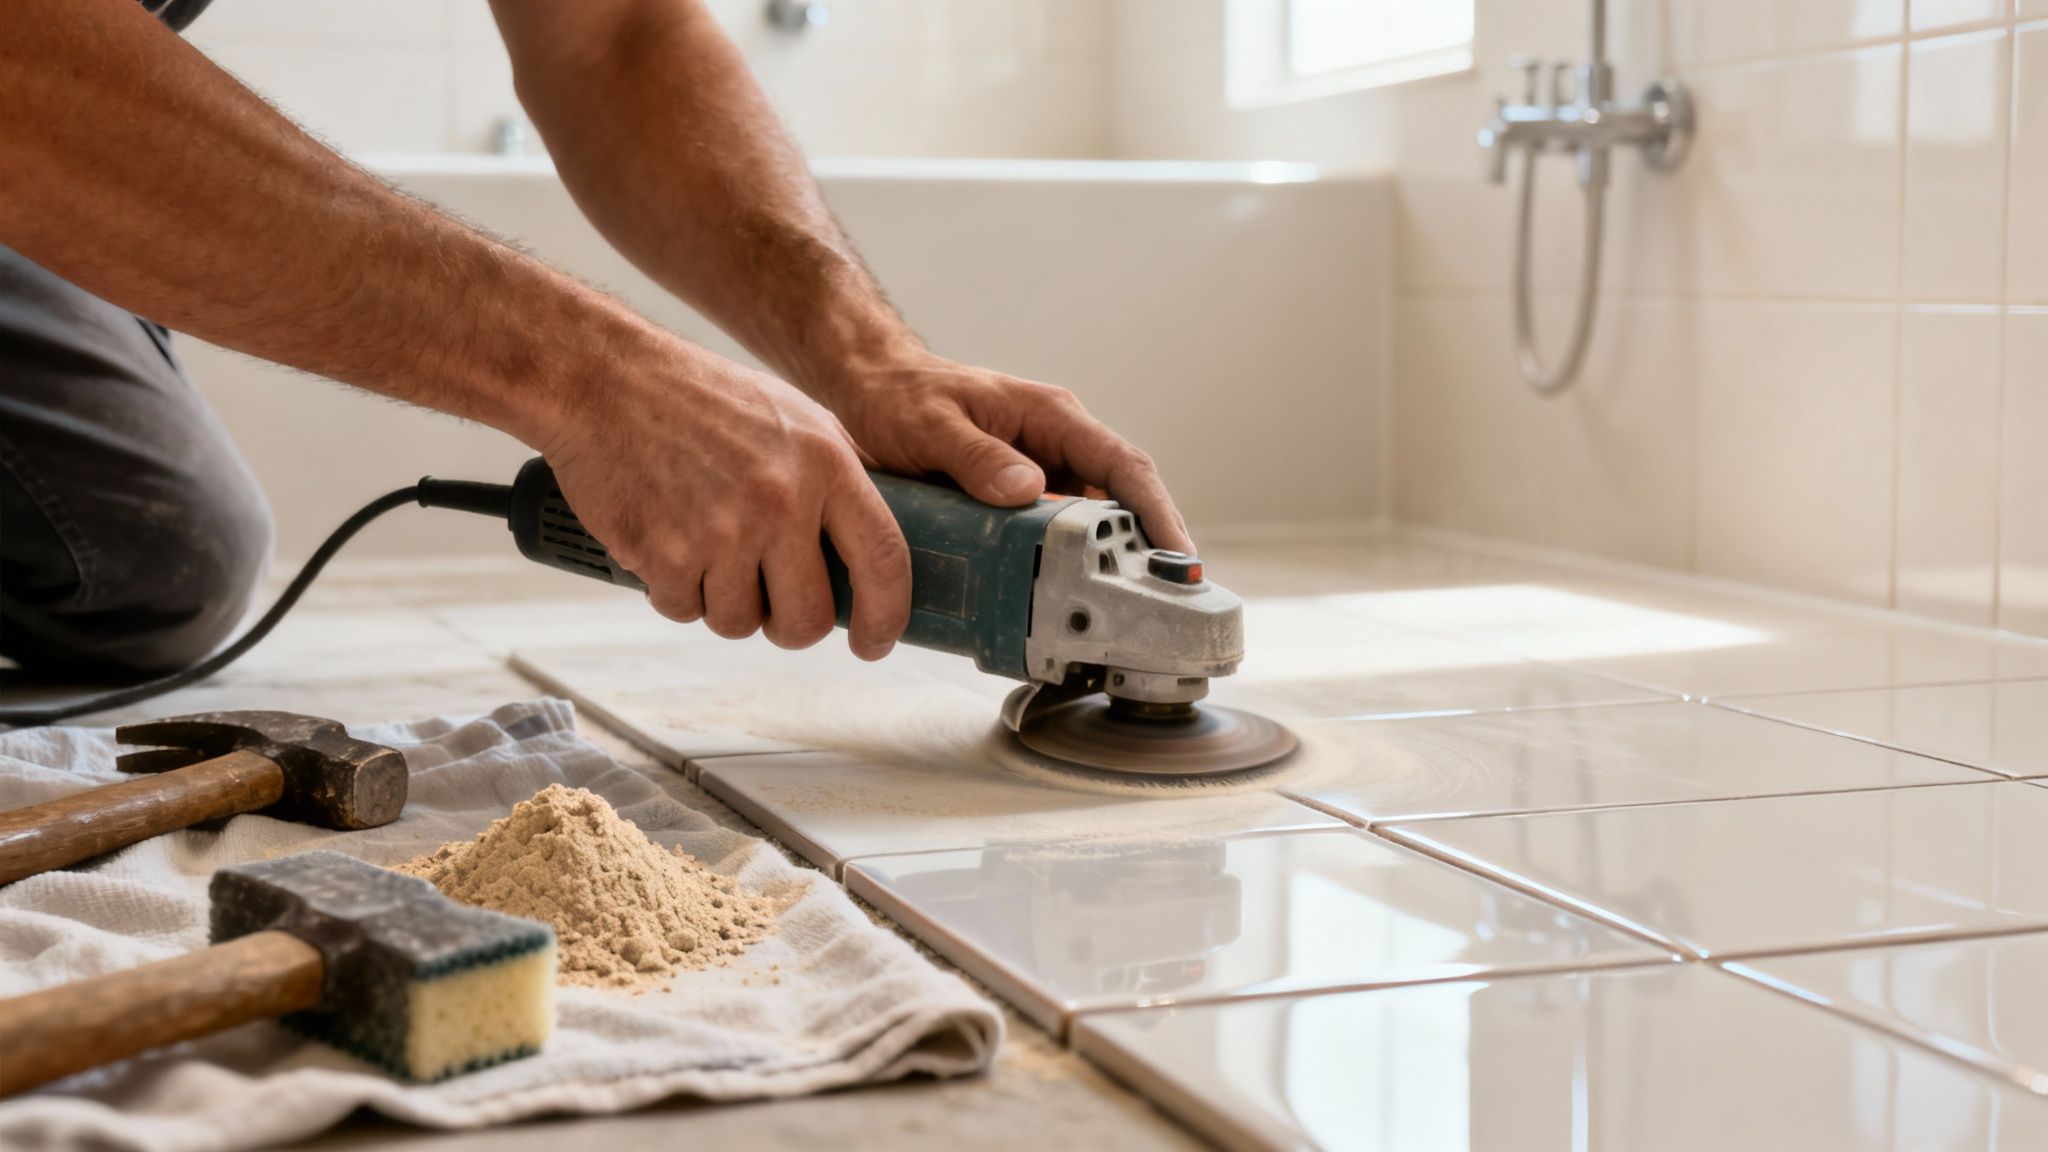
- Scuffing the Surface: Next, that shiny glaze on every single tile needs to be ground off. We use an angle grinder with a diamond cup wheel to methodically rough up the entire surface, turning those slick tiles into a dull, porous canvas that’s ready for mortar.
- Final Cleanup: After grinding, the whole area gets a meticulous vacuum and a final wipe-down with a solvent like acetone. This removes all the fine dust and guarantees a perfectly clean surface for the adhesive.
Let me be crystal clear: skipping any of these steps is asking for failure. Even a tiny bit of soap residue or tile dust will act as a "bond-breaker," preventing the mortar from sticking and causing your beautiful new tiles to pop right off.
The Final Sound Check and Repair
Once the surface is clean and rough, it's time for one last critical inspection. We go back and do the "tap test" again, tapping every single original tile with a mallet or the handle of a screwdriver. This isn't just for show—we're listening for that distinct hollow sound that tells us a tile is loose.
Any tile that sounds hollow has to be dealt with. Sometimes we can inject an epoxy adhesive behind it to lock it back into place. If it's too far gone, we'll carefully pop it out and fill the void with a rapid-setting patch mortar, troweling it perfectly flush with the surrounding tiles. This ensures the new tile layer has a solid, unbroken foundation.
Adding a Modern Waterproofing Safety Net
Even with a rock-solid base, a lot of pros (myself included) will add a new layer of waterproofing as an insurance policy. This means applying a modern liquid or sheet membrane right over the old, prepped tile.
When you install a top-notch waterproofing system—like the industry-standard Schluter-Kerdi—over the scored tiles and let it cure for the full 24-hour period, you create an incredibly strong and permanent bond. We’ve seen jobs done this way last indefinitely, especially when finished with high-quality sealers. If you're curious about long-term results, you can explore more insights on tile-over-tile projects.
This step adds a little more time and cost, but it creates a brand-new, seamless waterproof barrier. It essentially isolates your new tile from any potential problems with the old grout or substrate down the road, turning what could be a risky shortcut into a genuinely durable solution.
Solving the Practical and Aesthetic Headaches
Adding a new layer of tile seems like a simple shortcut, but it kicks off a domino effect of practical and visual problems. Think about it like putting a thick new coat on over your clothes—suddenly, nothing fits quite right. The same thing happens in your shower, where adding even a half-inch of thickness to the walls and floor creates a whole host of awkward situations that need fixing.
This small change means your existing plumbing fixtures won't sit flush anymore. The handle for your shower valve, for example, is now buried deeper in the wall. You'll likely need to track down a special extender kit just to make it work properly. If you don't, the handle might scrape against the new tile or not even turn all the way, making for a pretty frustrating morning routine.
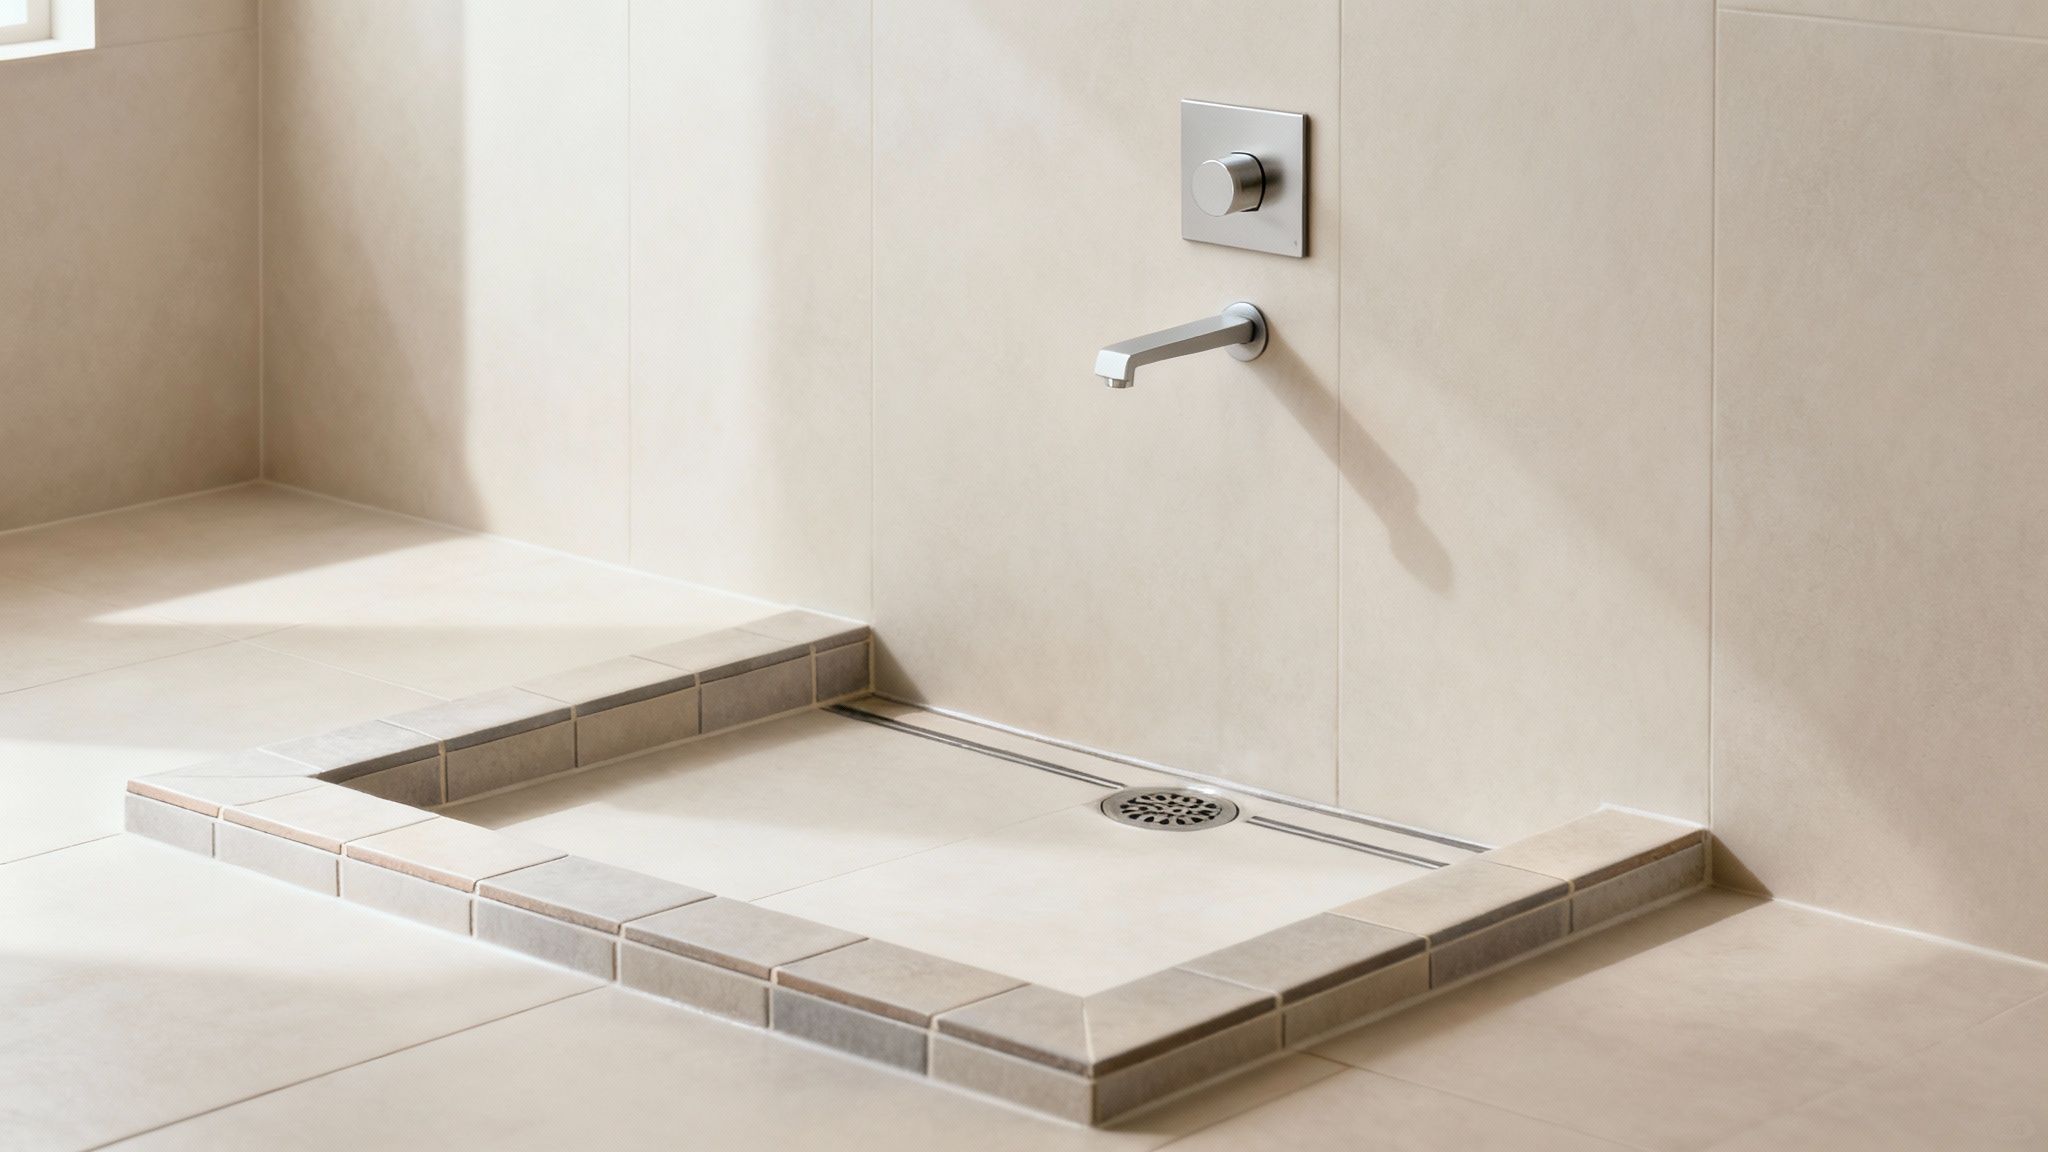
Addressing Sunken Fixtures and Drains
Down on the shower floor, you've got the same problem with the drain. The new, higher floor level leaves the drain grate sitting in a hole, which looks odd and doesn't drain efficiently. This isn't just about looks; it can cause standing water, which is a perfect recipe for mold and can eat away at your grout over time. The only fix is to install a specialized drain extension or coupling to bring the drain up to the new tile level.
It's not just the main fixtures, either. All the little details get thrown off.
- Shower Niches: Those handy built-in shelves for your shampoo will suddenly look deep-set and awkward, not to mention you'll lose a bit of usable space.
- Windows and Trim: If you have a window in your shower, its frame will now be partially covered by the new tile, creating a clunky, sunken-in appearance that screams "DIY shortcut."
- Shower Doors: The extra thickness can mess with the swing or slide of your shower doors. You might get away with an adjustment, but you could also be looking at a full replacement to fit the new dimensions.
These are the kinds of dimensional headaches that make professionals wary of this method. Stacking tile on tile adds roughly one-third of an inch to a full inch to the surface, setting off a chain reaction of adjustments. This extra layer interferes with everything from plumbing to drains, often requiring specialized hardware just to make it all work together. You can find more details about tackling these issues from a pro perspective on ContractorsDirect.com.
Creating a Seamless Transition
One of the most overlooked—and ugliest—problems is the transition from the shower back to the main bathroom floor. The shower curb is now taller, creating an awkward lip that's a trip hazard waiting to happen. Just stopping the new tile at the edge looks unfinished and amateur.
A clean, safe transition is non-negotiable for a professional-looking result. This often means fabricating a custom threshold piece from stone or solid surface material to gracefully slope from the new curb height down to the existing bathroom floor.
This is where the supposed "savings" of skipping demolition can quickly vanish. What you thought was a cost-cutting move now requires extra materials and skilled labor to solve the very problems it created. Getting a beautiful result means planning for these ripple effects and making sure every single element, from the drain to the door, is adjusted perfectly.
If you're in the planning stages, it’s worth exploring all your options. For instance, our guide on how to choose shower tile can help ensure your material choices fit your long-term goals. At the end of the day, making everything fit and look right is a detailed process that demands a lot more than just sticking new tile on top of old.
Exploring Smarter Long-Term Shower Solutions
After weighing all the risks of tiling over tile in a shower, you can see why this "shortcut" often isn't the best path. It's tempting, for sure. But it's really just putting a brand-new bandage on a problem you can't see, hoping it will go away on its own. It won't.
Instead, let’s look at some reliable, long-term solutions that genuinely protect your home and your investment.
The most bulletproof alternative is a complete demolition and replacement. I know "demolition" sounds like a huge, messy headache, but think of it as a smart investment in your home's long-term health. It’s the only way to know for sure what’s going on behind your shower walls.
This approach lets you do a full diagnostic. You can check for hidden leaks, get rid of any mold or mildew, upgrade ancient plumbing, and—most importantly—install a modern, high-performance waterproofing system. It’s the difference between patching a leaky roof and building a new one correctly from the ground up.
The Gold Standard: Demolition and Replacement
Starting from the studs gives you total peace of mind and complete freedom to design whatever you want. It ensures your new shower isn't just stunning but is also built to last for decades, free from the nagging worry of what might be lurking behind the tile. A big part of this process is choosing the best tile for shower walls, focusing on materials that can handle constant moisture and wear.
A full tear-out isn't just about getting rid of old tile; it's about gaining certainty. You’re guaranteeing a flawless foundation, modern waterproofing, and the chance to fix any structural or plumbing issues before they turn into a nightmare.
Cosmetic Fixes: A Temporary Refresh
What if a full remodel just isn't in the budget or timeline right now? You still have options. There are a couple of cosmetic alternatives that can give your shower a temporary facelift. These are much better suited for a guest bathroom that rarely gets used than a primary shower that's in action every single day.
Two common choices are tile reglazing and tile painting.
- Tile Reglazing: This is a professional job where a special finish, like an epoxy or polymer resin, is sprayed over your existing tile. It creates a smooth, new-looking surface, but the prep work has to be perfect. Even then, its lifespan is limited—you’ll likely see wear and tear within 3-5 years.
- Tile Painting: A more DIY-friendly option using specialized tile paint kits. It’s cheap, but painted tile on a shower floor that's constantly wet and walked on is asking for trouble. It's notorious for chipping and peeling, sometimes in less than a year. It holds up a bit better on walls that don't get a direct blast of water.
It's critical to see these methods for what they are: short-term fixes. They can definitely mask an outdated look for a few years, but they do absolutely nothing to address the real structural or waterproofing issues. Eventually, that new finish will fail, and you’ll be right back where you started.
Ultimately, you have to decide what your goal is. Are you just looking for a quick, temporary update for a bathroom you barely use? Or are you building a primary shower that you want to enjoy, worry-free, for the next twenty years? Your answer will make the choice between a temporary patch and a permanent solution crystal clear.
The Real Cost of Tiling Over Tile vs. Demolition
So, you're weighing your options and wondering if you can tile over tile in a shower. The biggest draw is almost always the idea of saving a little cash. Skipping the messy, back-breaking work of demolition sounds like a guaranteed win for your wallet, right?
Not so fast. This popular shortcut can introduce a whole slew of hidden expenses that can make the final bill surprisingly close to what a full tear-out would have cost in the first place.
Yes, the initial savings from avoiding demo labor and disposal fees are real, but that’s only one line item on the invoice. As we've covered, layering tile creates a thicker wall and floor, which sets off a chain reaction of other modifications you’ll have to make. And these aren't just nice-to-haves; they are 100% necessary to get a functional, professional-looking shower.
Unpacking the Hidden Project Costs
Let's break down where those "savings" actually go. It’s easy to overlook these add-ons, but they are absolutely critical for a tile-over-tile job to work.
- Plumbing Extender Kits: Your shower valve is now buried deeper in the wall. You'll need a valve extender kit to bring the handle out far enough to be usable. That's an extra part and extra labor you weren't planning on.
- Specialty Drain Assemblies: With a higher floor, your old drain is now too low. A special drain extension or coupling is required to raise it to the new level, ensuring water actually goes down the drain instead of pooling around it.
- Custom Thresholds and Trim: You’re left with a thick, awkward curb that’s a major trip hazard and just looks wrong. You'll likely need a custom-cut stone or solid surface threshold to create a safe and clean transition into the main bathroom.
- Premium Adhesives: Standard thin-set mortar won't cut it. You're tiling over a non-porous, slick surface (the old tile), which demands a high-performance, polymer-modified mortar. This specialty adhesive costs significantly more than the conventional stuff.
When you start adding these up, the numbers can be a real eye-opener. Many professional contractors find that once these mandatory items are priced out, the total cost for a tile-over-tile project can creep right up to—and sometimes even surpass—the cost of a proper demolition. To get a handle on your own numbers, a good tile cost calculator and budget guide can be a huge help.
The Unquantifiable Cost of Risk
Beyond the materials and labor, there's another cost you can’t see on a spreadsheet: risk.
A full demolition buys you certainty. It is your one shot to see what’s going on behind the walls. You can spot and fix hidden mold, repair a slow plumbing leak, and install a brand-new, reliable waterproofing system. It's an investment in your home's health and your own peace of mind.
Tiling over tile is always a gamble on an unknown foundation. The money you save upfront is weighed directly against the potential for a catastrophic failure down the road—a failure that would require tearing out both layers of tile and starting from scratch.
When you look at it that way, the value of a demolition becomes crystal clear. It’s not just an expense; it’s an insurance policy for your entire remodeling investment. To see how these costs fit into the bigger picture, take a look at our complete bathroom remodeling cost breakdown.
Getting a Professional Assessment for Your Project
By now, you’ve probably realized that deciding whether to tile over existing tile in a shower is a pretty loaded question. This isn't your average weekend DIY project. It's a high-stakes call where one missed detail—a tiny hidden leak or a couple of tiles that aren't perfectly bonded—can spiral into major water damage, mold, and a complete do-over.
Frankly, this is where you call in a pro.
Think about it this way: if your car started making a weird clunking noise, you wouldn't just ignore it and hope for the best. You'd take it to a mechanic you trust. A professional tile contractor is that mechanic for your bathroom, bringing years of experience to spot problems you'd never see on your own.
Why an Expert Eye Is Non-Negotiable
A seasoned pro doesn't just glance at your shower; they perform a full diagnostic. They know the ins and outs of structural loads, the specifics of waterproofing systems, and what your local building codes demand. Their assessment is the only way to be certain that the "bones" of your shower are solid enough for another layer of tile.
Here’s what a real inspection looks like:
- The Tap Test: They'll meticulously tap each and every tile, listening for the tell-tale hollow sound that screams "bad bond."
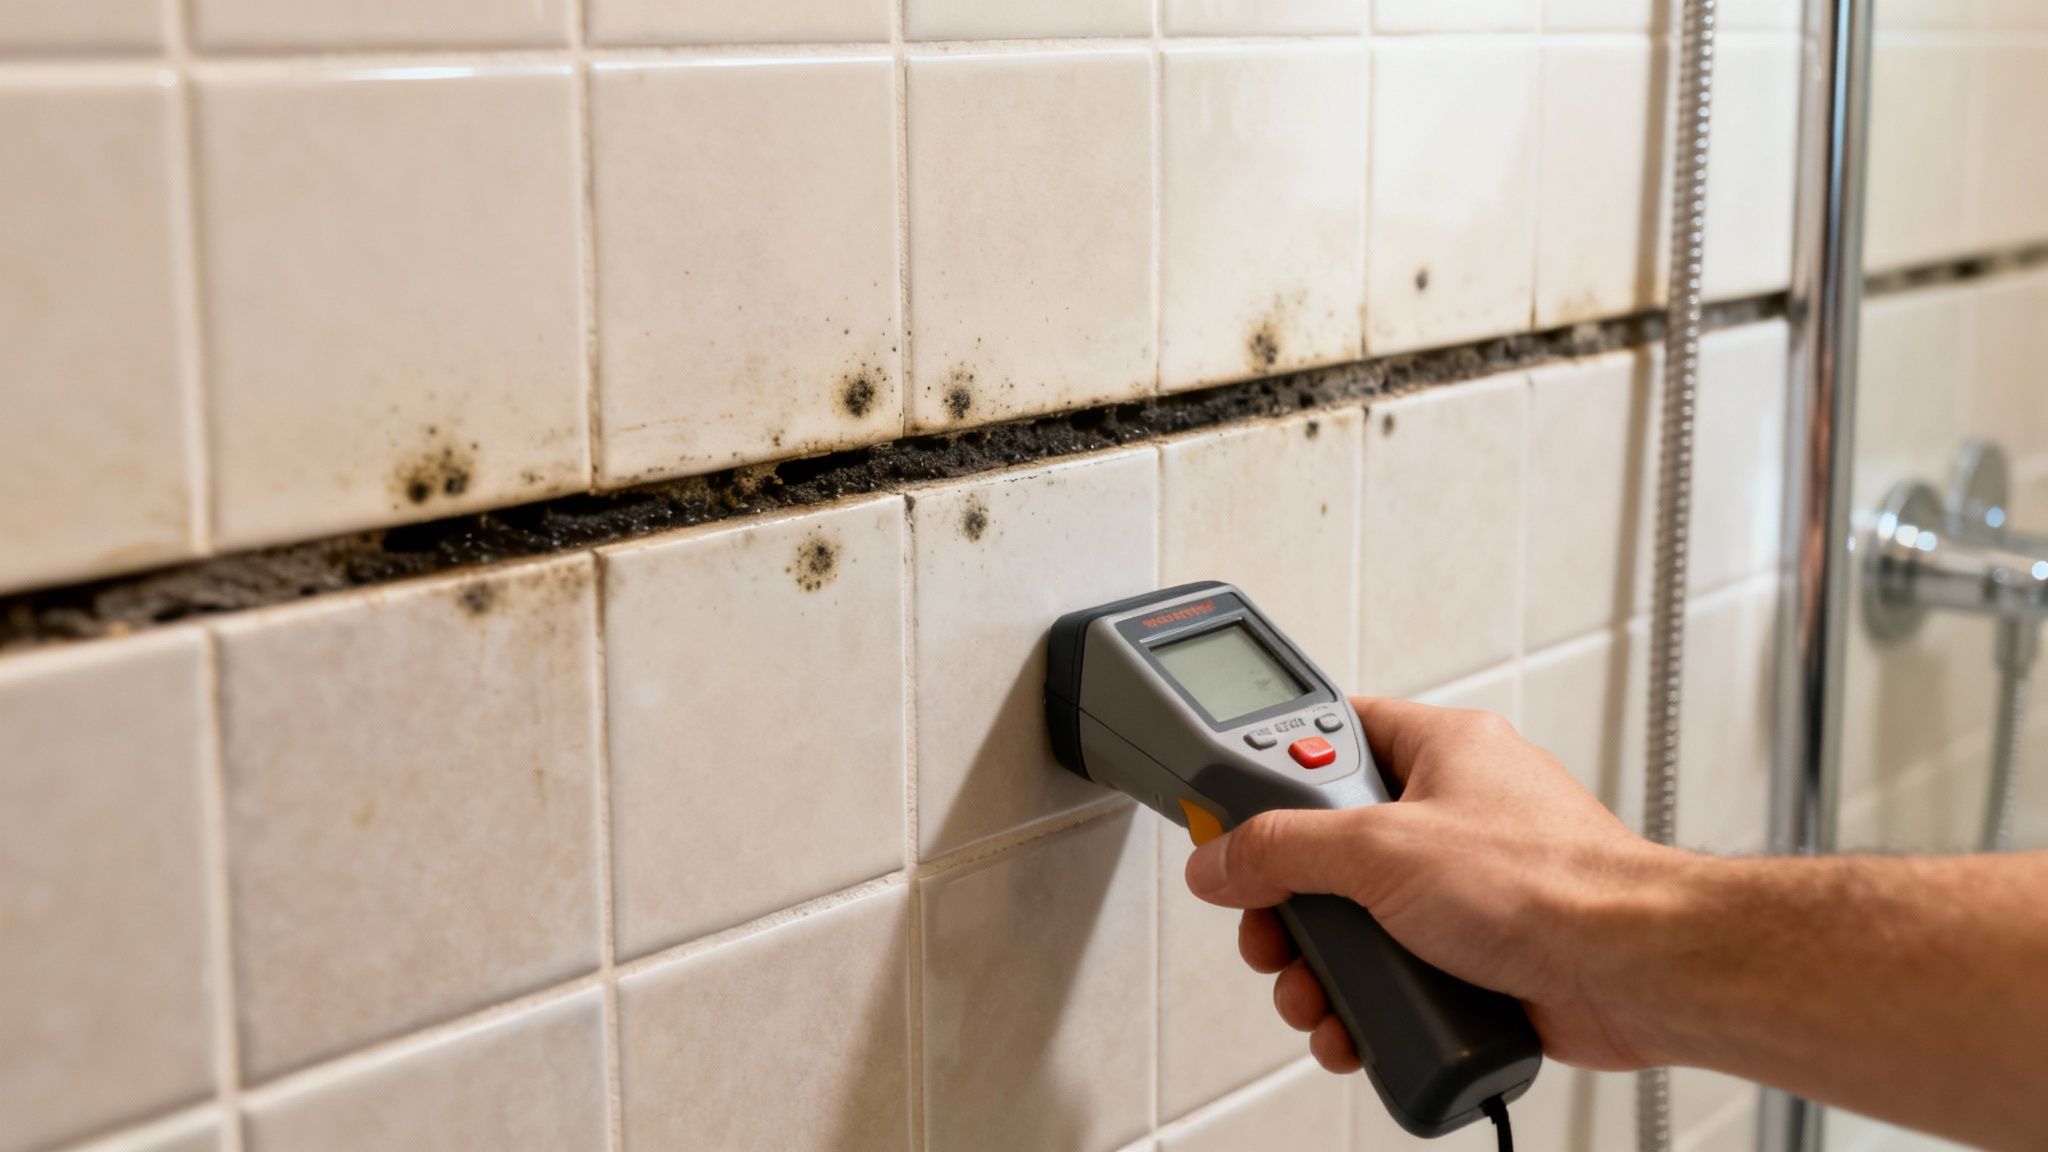
- Moisture Meter Reading: This is a big one. They'll use a moisture meter to check for any dampness lurking behind the walls, which is an absolute deal-breaker.
- Structural Check: They'll evaluate the wall itself for any give, flex, or bowing that suggests the structure is already struggling and can't take more weight.
- Plumbing Assessment: They can spot potential conflicts with your drain, shower valve, and other fixtures before they turn into costly headaches mid-project.
An expert assessment isn't an upsell; it's your most critical investment. It’s the difference between a project built on certainty and one built on a risky guess. It protects your home, your budget, and your peace of mind.
At the end of the day, this is about more than just tile. It's about the long-term health and safety of your home. A reputable contractor will give you the straight scoop based on what they find. They’ll tell you if tiling over is a sound strategy or if tearing everything out is the only smart, safe path forward. That clarity is what lets you move ahead with confidence, knowing you're making an investment that will actually last.
Ready for an expert opinion on your shower renovation? The experienced team at Kitchen Renovations Perfected provides thorough, honest assessments to homeowners in Boca Raton, Delray Beach, and the surrounding communities. We prioritize long-term quality over risky shortcuts.
Schedule your complimentary consultation to protect your home and your investment.