Ready to transform your bathroom into a functional, stylish retreat? This bathroom renovation checklist delivers a clear roadmap tailored to Boca Raton, Delray Beach, and Parkland homeowners. You’ll skip guesswork by following proven steps that address permits, budgeting, and design.
In this listicle you will learn to navigate local condo and HOA rules, choose durable finishes suited to Florida’s climate, and balance contractor work with DIY tasks. Each phase—from planning and demolition to inspections and punch list and maintenance—is broken into actionable items.
We also highlight when to call in professionals, what tasks you can tackle yourself, and how to sequence workstations to stay on schedule. Plus, find CTAs inviting you to our showroom and complimentary design consultations so you can see materials and fixture options in person.
A structured checklist eliminates surprises. It helps you secure permits ahead of time, streamline inspections, and track progress through demolition, rough-in plumbing, tiling, and finishing touches. Address ventilation upgrades and lighting plans early to avoid mid-project hiccups.
Detailed budgeting guidance ensures you allocate funds for flooring, fixtures, and unexpected repairs. Our template factors in Boca Raton’s permit fees and HOA deposit schedules so you can set realistic timelines and avoid budget overruns.
What You’ll Learn
- Permits and local code compliance for Boca Raton, Delray Beach, Parkland
- Budget templates with built-in contingencies
- HOA and condo rule checklists
- Phase-by-phase demolition to finishes
- Contractor vs DIY decision points
- Inspection scheduling tips
- Showroom visit and consultation CTAs
By following this guide, you’ll avoid costly delays and ensure a smoother renovation process from start to finish. Grab your toolbelt and let’s dive into the ultimate bathroom renovation checklist.
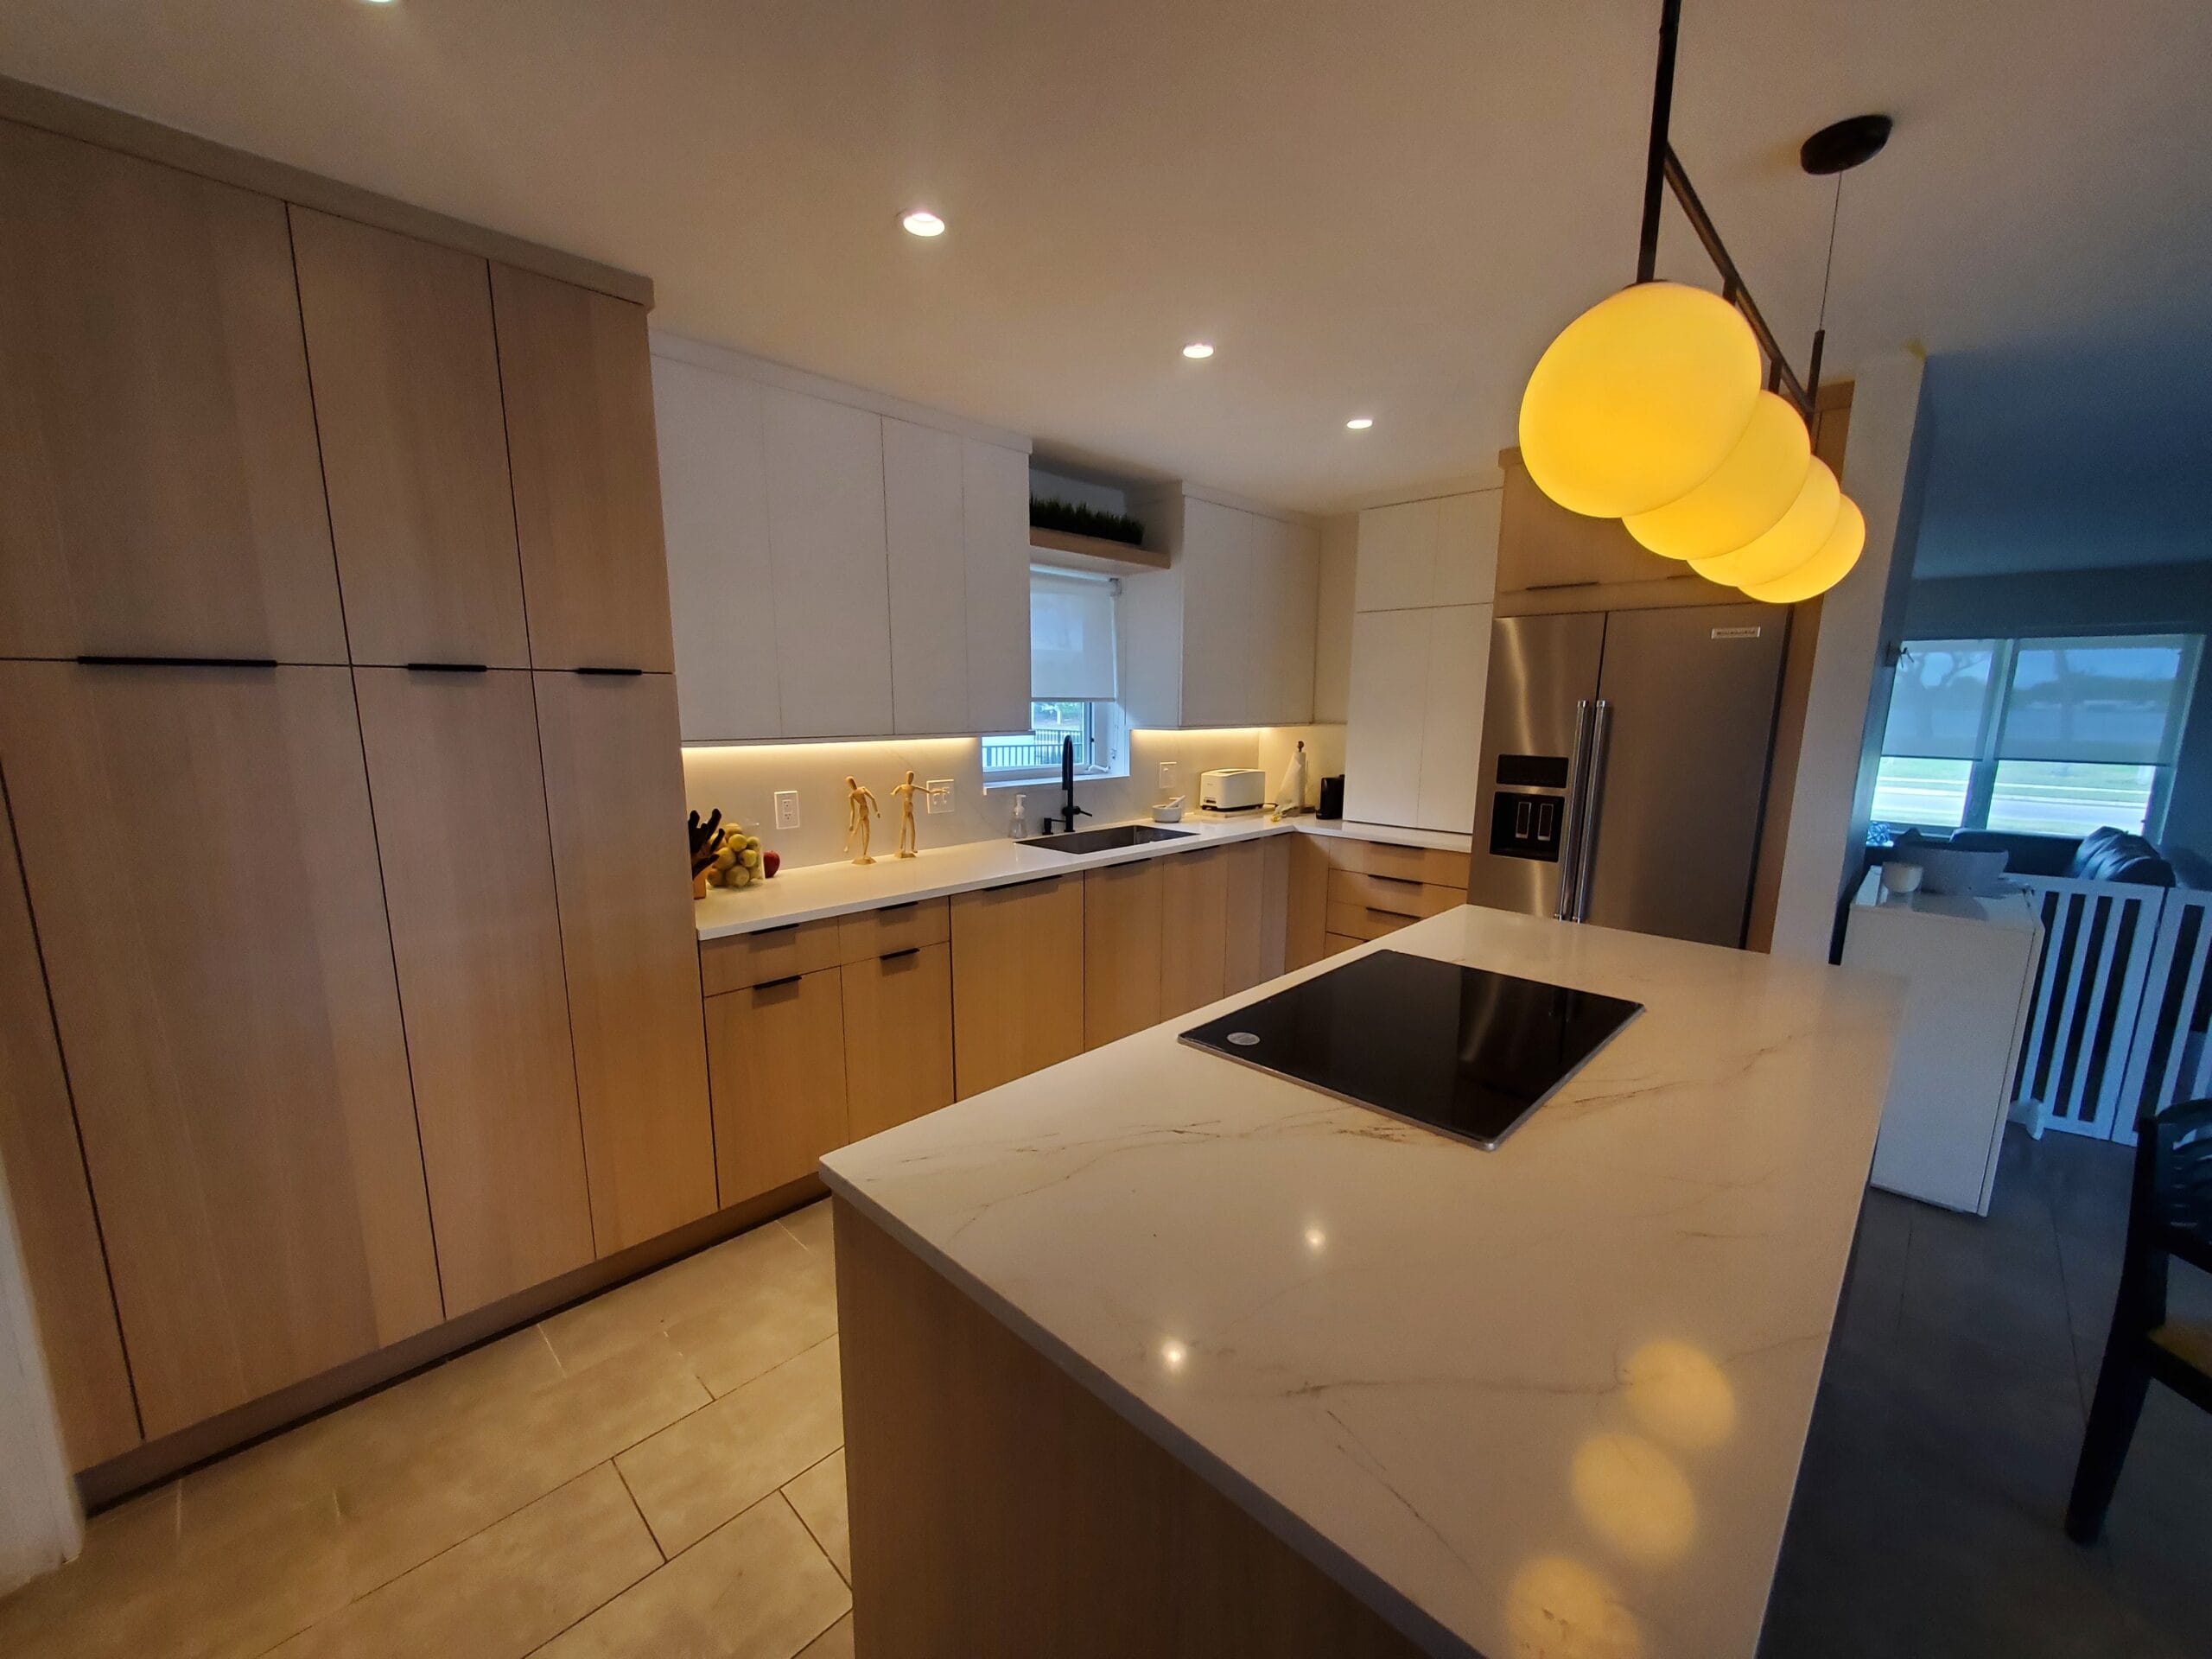
1. Flooring Installation
As the first step in your bathroom renovation checklist, flooring installation sets the stage for both style and durability. Replacing old flooring with materials like porcelain tile, luxury vinyl plank (LVP), or natural stone requires proper waterproofing and underlayment. This foundation task ensures moisture resistance and long-term performance.
What is Flooring Installation?
- Removal of existing flooring and subfloor preparation
- Application of waterproof membrane or underlayment
- Setting tile or plank with the correct mortar or adhesive
- Grouting, sealing, and final cleanup
Examples of Success
- Master bathroom with large-format porcelain tiles offers a seamless, spa-like feel
- Heated tile floors in a Parkland condo combat chilly mornings
- Contemporary homes in Boca Raton featuring 3×6 subway ceramic tiles for a classic yet modern look
- Luxury Vinyl Plank in Delray Beach rentals for a durable, low-maintenance option
Actionable Tips
- Use porcelain over ceramic for high-moisture zones
- Apply a waterproofing membrane before laying tiles
- Choose matte finishes to improve slip resistance
- Ensure a 1/4-inch slope per foot toward the drain
- Seal grout with a quality sealer and reseal every 1-3 years
- Consider radiant heating for added comfort and frost prevention
When and Why to Use This Approach
- Ideal when existing floors show water damage or cracking
- Delivers both aesthetic upgrade and functional moisture control
- Enhances resale value in luxury communities like Highland Beach
- Meets Boca Raton and Parkland building codes for wet areas
For more details on materials and installation, visit our showroom or schedule a complimentary consultation at https://www.outrank.so/showroom.
2. Vanity and Sink Replacement
As the second step in your bathroom renovation checklist, vanity and sink replacement transforms the room’s focal point. Upgrading the cabinet base and fixture involves removing old plumbing, choosing a new design that balances storage and style, and installing sinks and faucets that complement your décor.
What is Vanity and Sink Replacement?
- Removal of the existing vanity and disconnection of plumbing
- Installation of a new cabinet base tailored to storage needs
- Placement and securing of the sink or sinks with proper sealing
- Hookup of faucets and water lines with leak testing and insulation
Examples of Success
- Floating vanity in a Delray Beach condo for an open, modern feel
- Double-sink vanity in a Boca Raton master bath for shared convenience
- Reclaimed wood vanity in a Parkland farmhouse-inspired powder room
- Custom-built vanity with marble countertop in a Highland Beach residence
Actionable Tips
- Measure plumbing rough-in distances before selecting a vanity
- Choose vanity height based on user comfort (standard 30-36 inches)
- Consider faucet spread and hole configuration during selection
- Opt for undermount sinks to simplify cleaning around the basin
- Select quartz or engineered stone tops for durability and stain resistance
- Plan overhead or side lighting to enhance mirror visibility
- Allocate countertop and drawer space for daily essentials
When and Why to Use This Approach
- Ideal when the old vanity shows wear or limits storage
- Elevates functionality with customized drawer and shelf layouts
- Refreshes the room’s centerpiece for improved aesthetics
- Complies with Boca Raton and Parkland HOA style guidelines
- Boosts resale appeal in luxury condo and country club markets
For more details on styles, finishes, and installation, visit our showroom or schedule a complimentary consultation at https://www.outrank.so/showroom.
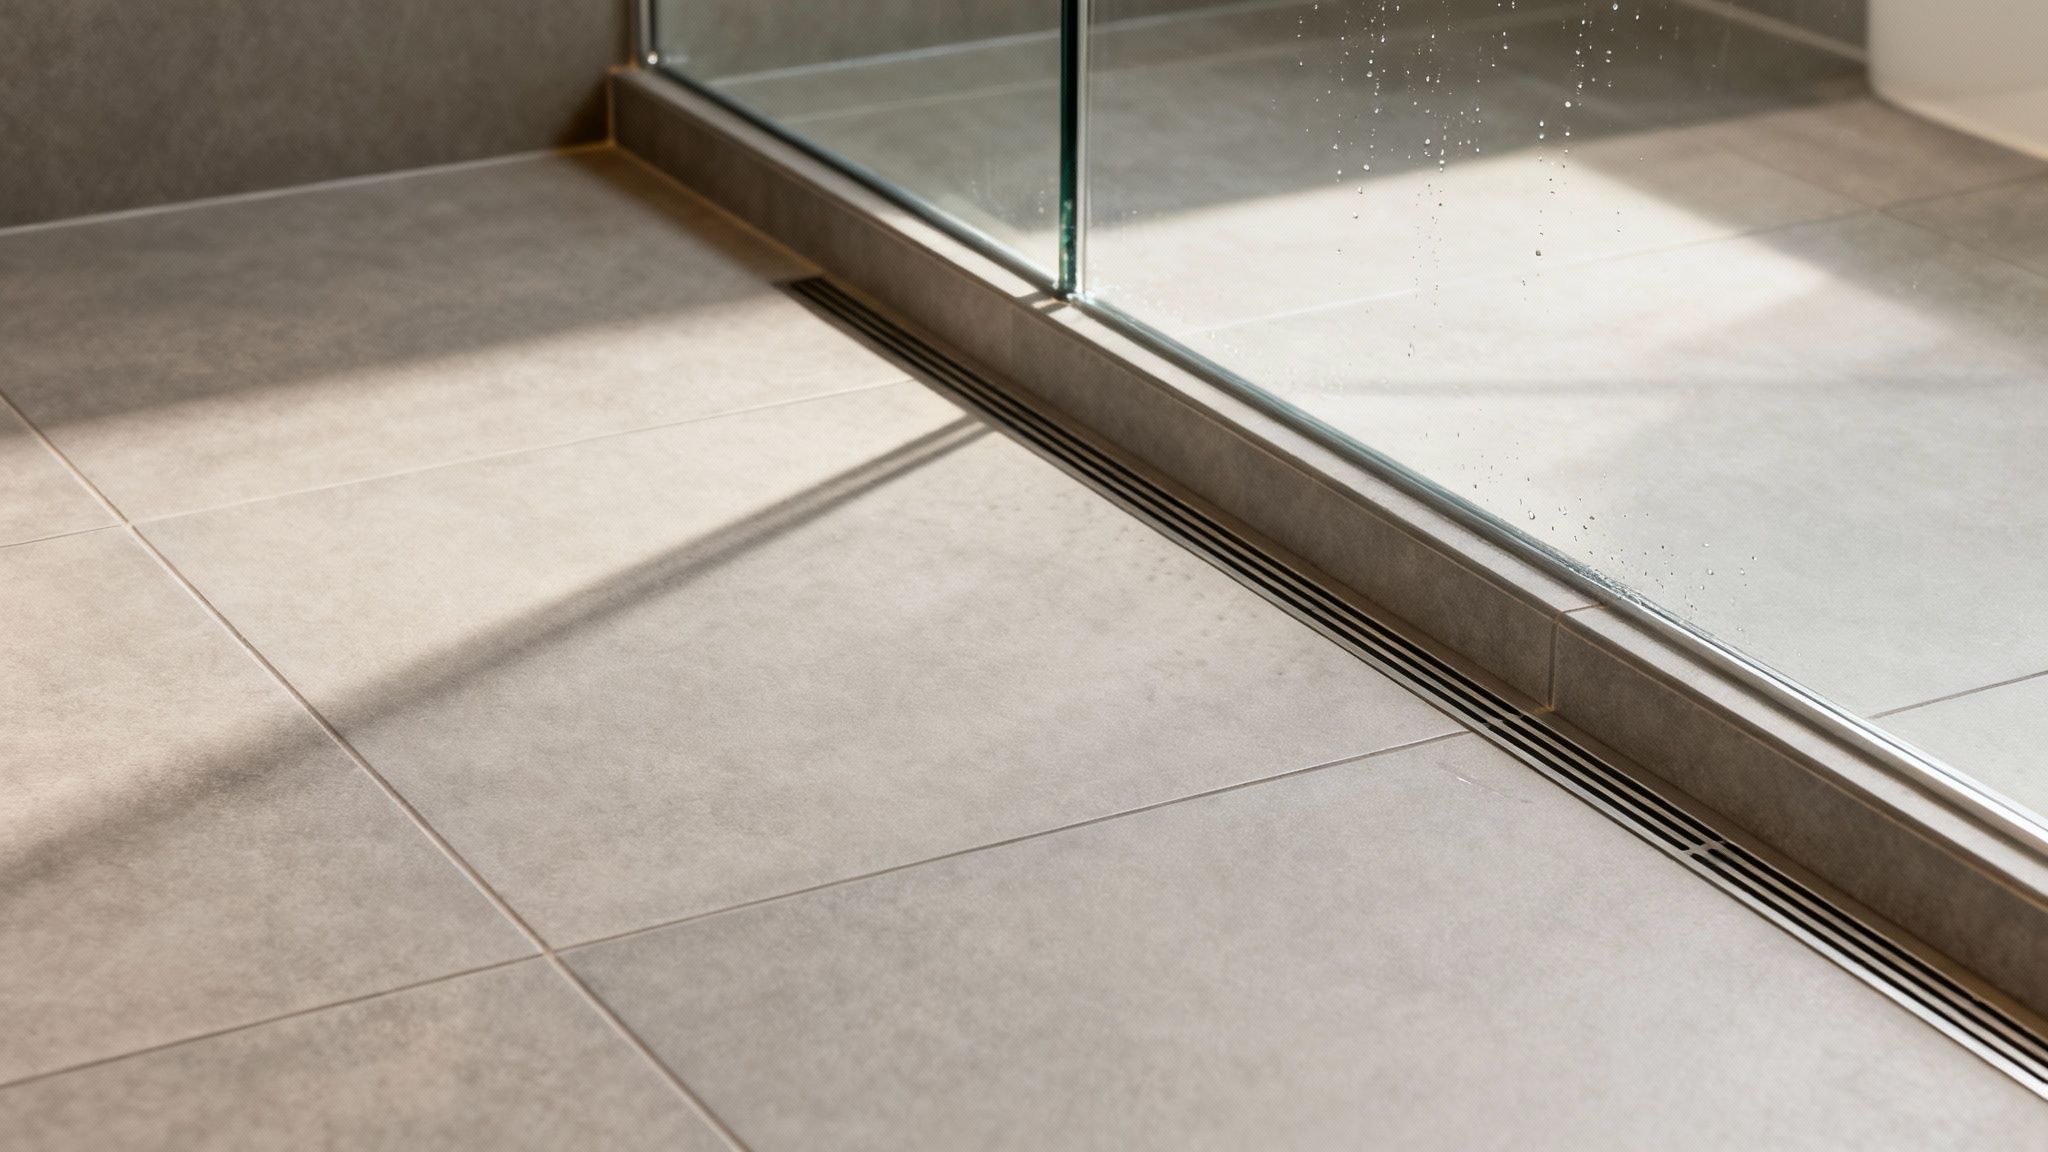
3. Shower/Tub Enclosure and Fixtures
Upgrading your bathroom renovation checklist, Shower/Tub Enclosure and Fixtures bring both style and function to your space. Installing or replacing shower enclosures, bathtubs, showerheads, and plumbing fixtures—from tub-shower combos to freestanding tubs—demands careful waterproofing, precise drain placement, and quality materials.
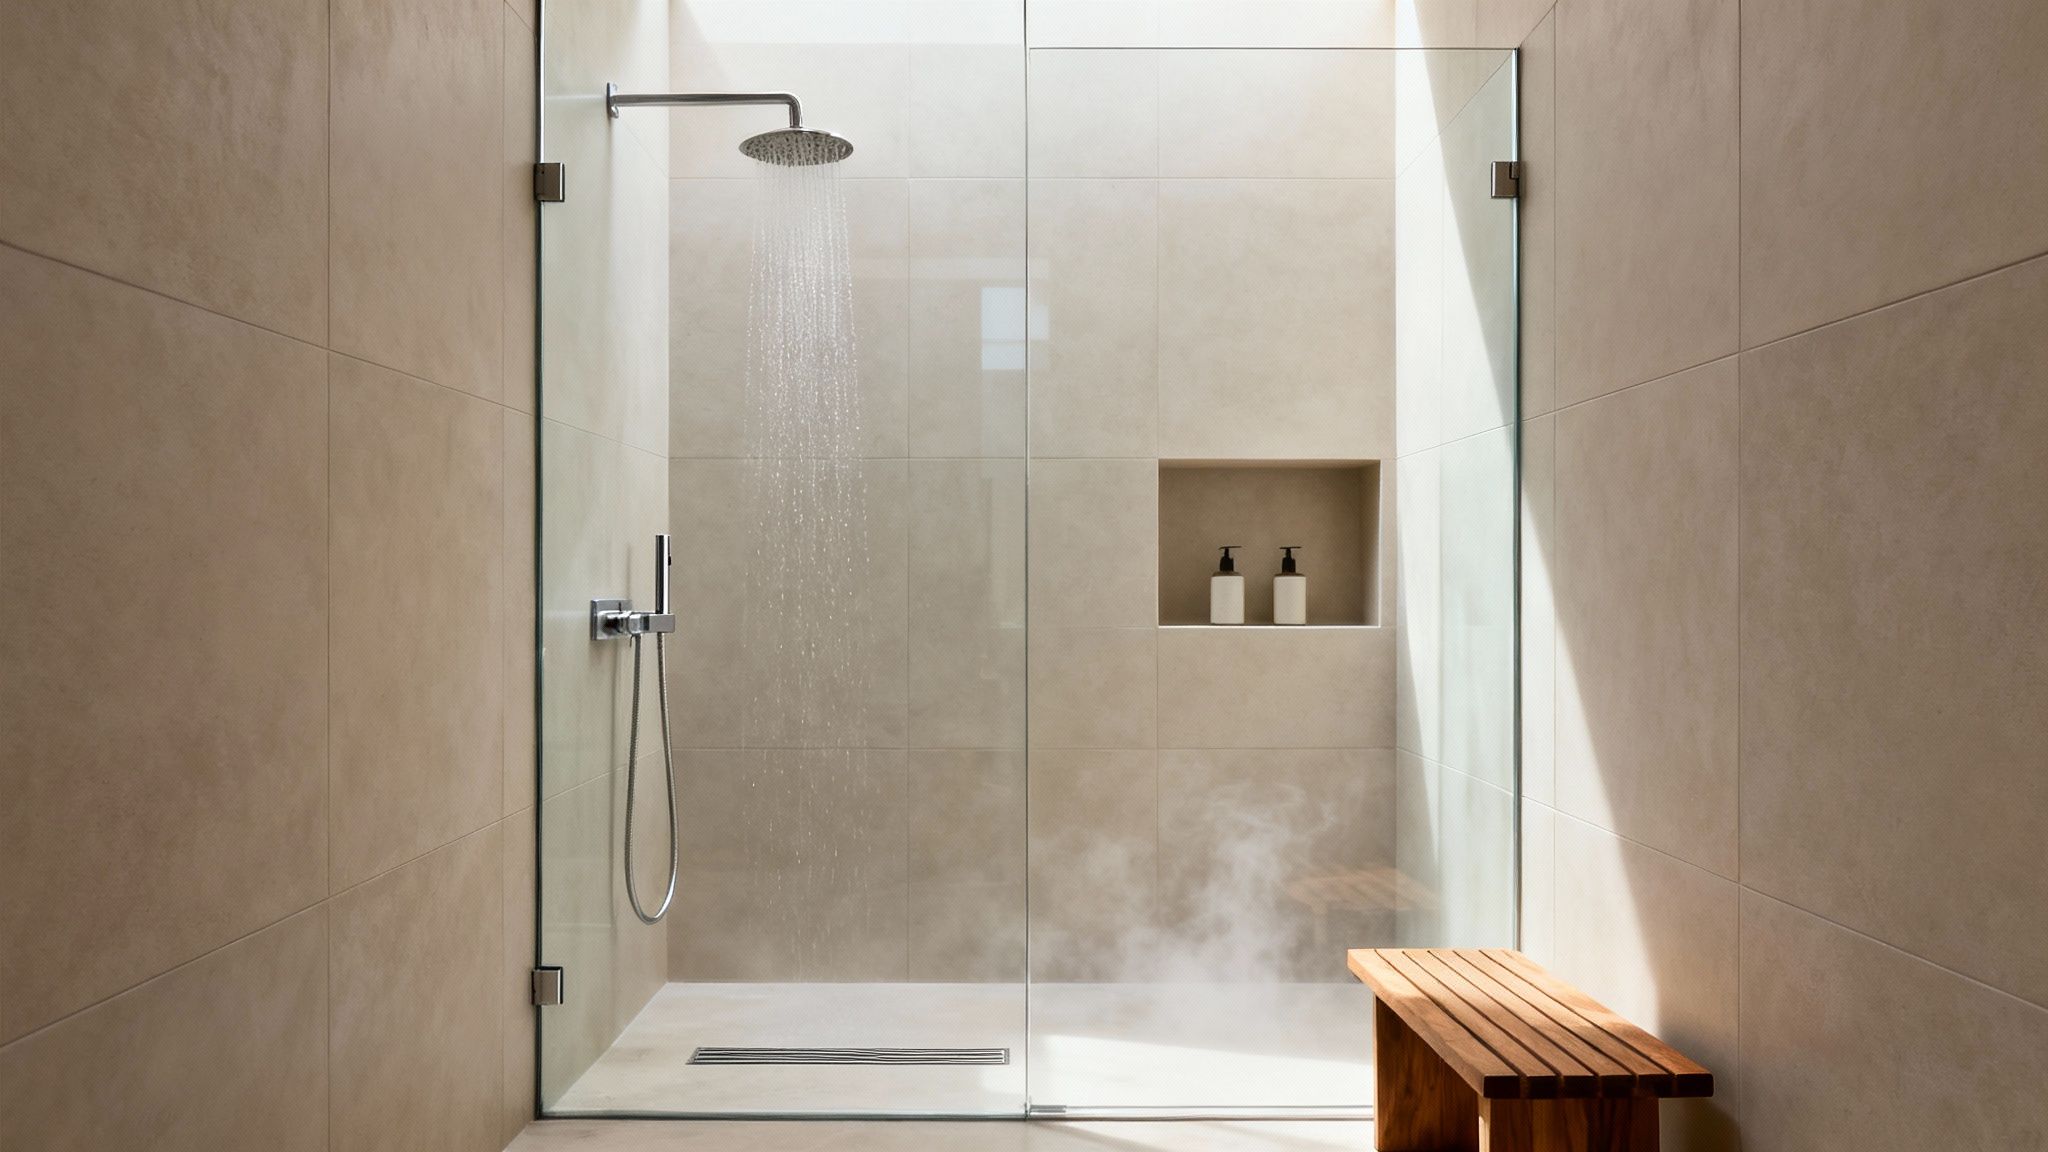
What is Shower/Tub Enclosure and Fixtures?
- Selection between tub-shower combos, standalone shower stalls, or freestanding soaking tubs
- Installation of glass enclosures, framed or frameless panels, and door hardware
- Integration of plumbing systems including valves, showerheads, spouts, and drains
- Application of waterproof membranes, backer boards, and sealants for leak protection
Examples of Success
- Luxury steam shower with multiple body jets in a Highland Beach condo
- Minimalist walk-in shower with large-format porcelain tile in Delray Beach
- Freestanding soaking tub as a centerpiece in Parkland master suites
- Accessible roll-in showers with low-threshold bases for aging-in-place designs
- Deep Japanese ofuro-style soaking tubs for spa-inspired retreats
Actionable Tips
- Ensure proper waterproofing with Schluter or Wedi systems before tile installation
- Use linear or point drains for a sleek, modern look
- Install a thermostatic mixing valve to maintain consistent water temperature
- Choose corrosion-resistant hardware from Kohler or Moen for longevity
- Plan ventilation capacity for steam showers to prevent mold growth
- Consider grab bars and low-threshold entries for future accessibility
- Budget for professional plumbing to avoid leaks and code violations
When and Why to Use This Approach
- Ideal when outdated fixtures show wear or leak risks
- Elevates home value in Boca Raton, Delray Beach, and Parkland markets
- Supports water efficiency and local building code compliance
- Enhances user comfort with custom features like steam or body sprays
Learn more about Shower/Tub Enclosure and Fixtures on kitchenrenovationsperfected.com/
4. Toilet Installation and Upgrade
Upgrading your toilet is a key step in our bathroom renovation checklist that delivers both comfort and sustainability. Swapping an old, inefficient fixture for a modern, water-efficient model can cut water usage by up to 60 percent. Today’s options include dual-flush systems, soft-close seats, integrated bidets and high-performance flush technology. This practical upgrade provides immediate utility savings, enhanced hygiene and a touch of luxury in Boca Raton, Delray Beach and Parkland homes.
What is Toilet Installation and Upgrade?
- Removal of the existing toilet and careful flange inspection
- Measurement of rough-in distance (commonly 12 inches)
- Placement of a new wax or rubber ring seal for leak prevention
- Securing bowl and tank with bolts, gaskets and anti-slip washers
- Connection of water supply, testing flush cycles and checking for leaks
Examples of Success
- A Parkland master bath fitted with a Toto Washlet for built-in bidet functionality
- Delray Beach condo featuring an American Standard dual-flush model to meet HOA water restrictions
- A Highland Beach retirement home using comfort-height, elongated toilets for accessibility
- Luxury Gulf-front villas in Boca Raton installing Japanese-style toilets with heated seats and automated lids
Actionable Tips
- Choose WaterSense certified models for optimal water savings
- Accurately measure the rough-in distance before purchasing
- Select comfort-height units for elderly or mobility-impaired users
- Opt for elongated bowls to improve seating comfort
- Use a soft wax ring or rubber gasket to ensure a durable seal
- Ensure adequate ventilation to minimize moisture buildup
- Test your home water pressure for full flush performance
When and Why to Use This Approach
- Ideal when old fixtures leak, clog or fail frequent repairs
- Delivers immediate utility bill reductions and eco-friendly operation
- Enhances user comfort in luxury communities and family homes
- Ensures compliance with Boca Raton building codes and HOA guidelines
For more details on models and professional installation, visit our showroom or schedule a complimentary consultation at https://www.outrank.so/showroom.
5. Lighting and Mirror Installation
As the fifth step in your bathroom renovation checklist, proper lighting and mirror installation enhances safety, functionality, and style. Choosing the right fixtures ensures optimal illumination for grooming tasks while creating the desired spa-like or modern ambiance.
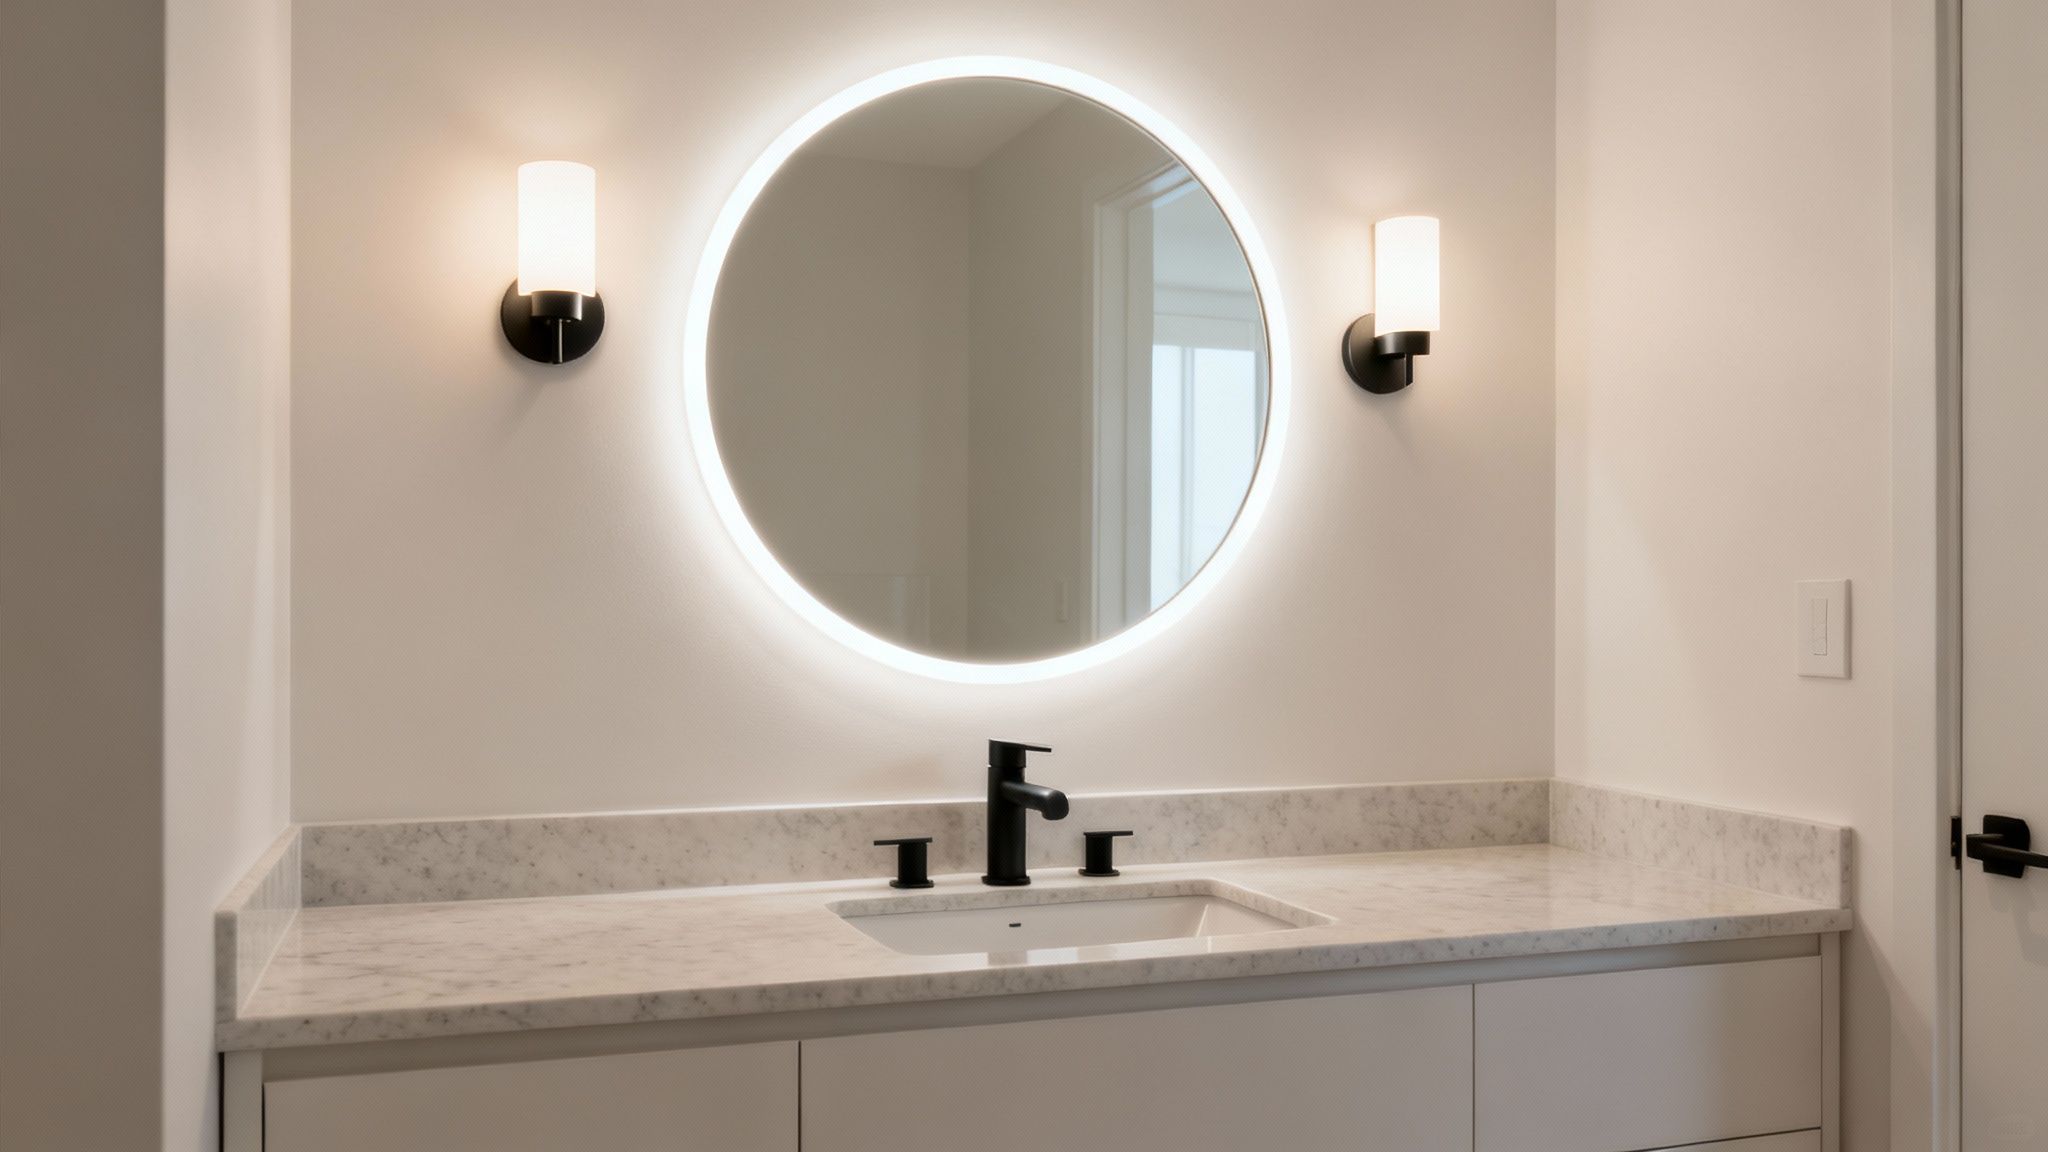
What is Lighting and Mirror Installation?
- Selection of vanity, ambient, and accent lighting fixtures
- Positioning and wiring for balanced illumination
- Mounting mirrors, including heated or smart models
- Integration with dimmers, sensors, and exhaust fans
Examples of Success
- Spa-style bathroom in Boca Raton featuring backlit LED round mirrors
- Hollywood-inspired vanity mirror with globe lights in a Parkland ensuite
- Minimalist frameless mirror with integrated LED strips in Delray Beach condo
- Smart mirror with Bluetooth speakers and touch controls in a Highland Beach home
Actionable Tips
- Place vanity lights at eye level on both sides of the mirror
- Use 4000K neutral white bulbs for accurate color rendering
- Install IP65-rated fixtures in shower and wet zones
- Add dimmer switches to adjust brightness for tasks or ambiance
- Position mirrors to reflect natural light and visually expand the space
- Choose LED bulbs for energy efficiency and reduced heat output
When and Why to Use This Approach
- Ideal when upgrading from outdated or insufficient lighting
- Enhances daily routines by improving visibility and reducing shadows
- Creates layered lighting zones for versatility in mood and function
- Meets local Boca Raton and Delray Beach codes for safety and moisture protection
- Perfect for luxury condos to achieve design-forward lighting aesthetics
For more details on lighting options and showroom visits, schedule a complimentary consultation at https://www.outrank.so/showroom.
6. Ventilation and Exhaust Fan Installation
Proper ventilation and exhaust fan installation is a pivotal step in your bathroom renovation checklist. Upgrading or installing a new exhaust system controls moisture, prevents mold growth, and preserves structural integrity. Modern fans boast features like humidity sensors, timer controls, and whisper-quiet operation, making them ideal for luxury condos in Boca Raton and Parkland homes alike.
What is Ventilation and Exhaust Fan Installation?
- Selection of an exhaust fan sized by cubic feet per minute (CFM)
- Installing ductwork from the fan housing to an exterior vent
- Integrating humidity-sensing or timer-controlled switches
- Sealing and insulating ducts in unconditioned spaces
- Mounting the fan housing and grille flush with the ceiling
Examples of Success
- A Delray Beach master bath fitted with a Panasonic WhisperCeiling fan reduced condensation on marble surrounds
- Highland Beach condo kitchens using Broan-NuTone light-and-fan combos for dual functionality
- A Parkland apartment deploying ductless bathroom fans where exterior venting is restricted
- Smart home integration in Boca Raton villas, syncing exhaust fans to humidity sensors and voice control
Actionable Tips
- Calculate required airflow: 1 CFM per square foot of bathroom space
- For moisture control, aim for at least 1 CFM per 2 square feet during peak use
- Route ducts straight to an external vent—avoid attic termination
- Use rigid metal ductwork and install a back-draft damper
- Insulate ducts in unconditioned attics to prevent condensation
- Program fans to run 20–30 minutes after showers
- Clean or replace filters every 6 months for optimal efficiency
When and Why to Use This Approach
- Essential in high-humidity coastal climates to avoid mold and mildew
- Required by Boca Raton and Parkland building codes for wet areas
- Improves indoor air quality and occupant comfort
- Protects paint, fixtures, and structural elements from moisture damage
- Adds resale value by demonstrating adherence to Energy Star ventilation standards
For personalized guidance on choosing the right exhaust system, visit our showroom or schedule a complimentary consultation at https://www.outrank.so/showroom.
7. Wall Finishing (Tile, Paint, and Waterproofing)
As the seventh step in your bathroom renovation checklist, wall finishing covers the selection and installation of tile, waterproof paint, or decorative wainscoting, combined with critical behind-the-scenes waterproofing. Properly finished walls protect against mold and moisture damage while delivering the style you envision.
What is Wall Finishing (Tile, Paint, and Waterproofing)?
- Installing ceramic, porcelain, natural stone, or engineered tiles on walls
- Applying moisture-resistant paints or specialty coatings
- Incorporating wainscoting, beadboard, or accent panels above wet zones
- Laying waterproof membrane or sealant behind backer board in showers and tub surrounds
Examples of Success
- Full-height marble feature wall in a Parkland master bath
- Subway tile wainscoting with contrasting paint above in a Delray Beach condo
- Spa-like retreat using large-format porcelain slabs around the shower
- Geometric patterned tiles in a Boca Raton powder room for visual impact
Actionable Tips
- Apply a waterproofing membrane to all shower walls and tub decks
- Use cement backer board instead of drywall behind tiles
- Waterproof behind the toilet tank and vanity base
- Choose unsanded grout in narrow joints and seal within 72 hours
- Plan tile layout and wet cuts before installation
- Select thin-set mortar compatible with your tile material
- Leave 1/8-inch expansion joints and fill corners with silicone caulk
- Integrate accent tiles or decorative borders for focal points
- Inspect wall plane with a level and adjust substrate as needed
When and Why to Use This Approach
- Essential in all wet areas to comply with Boca Raton and Parkland building codes
- Prevents structural damage and mold growth in high-moisture zones
- Enhances resale value in luxury condos and country club communities
- Provides design flexibility, from classic subway to modern geometric styles
For detailed guidance and product selection, visit our showroom or schedule a complimentary consultation. Learn more about bathroom tile types on kitchenrenovationsperfected.com/.
8. Countertop Selection and Installation
As part of your bathroom renovation checklist, countertops play a pivotal role in both aesthetics and function. Choosing the right material – from budget-friendly laminate to luxury marble and engineered quartz – ensures durability, water resistance, and stain control. Proper installation ties together vanities, sinks, and backsplash for a cohesive design.
What is Countertop Selection and Installation?
- Evaluating material options (laminate, quartz, marble, solid surface)
- Measuring vanity footprint and overhang requirements
- Cutting and fabricating edge profiles to match design
- Applying sealants or waterproof membranes before setting
- Aligning and securing countertop to cabinetry
- Finishing edges around sink cutouts with quality silicone
Examples of Success
- White quartz countertops in modern Boca Raton master baths for a seamless, low-maintenance look
- Honed marble vanity tops in Delray Beach luxury suites adding timeless elegance
- Butcher block counters in Parkland farmhouse-style bathrooms for warm natural texture
- Concrete slab tops in industrial-inspired condos blending raw appeal with durability
Actionable Tips
- Choose non-porous materials like quartz or solid surface to minimize staining
- Seal natural stone within 30 days of install to lock out moisture
- Maintain a 1.5-inch backsplash to protect walls from splashes
- Use edge profiles (beveled, ogee) to enhance visual interest
- Coordinate color tones with cabinetry and flooring for balanced design
- Install a slight slope toward sink to aid water drainage
- Apply consistent, mold-resistant silicone around sink edges
When and Why to Use This Approach
- Ideal when upgrading vanity focal points for high resale value
- Essential for humid climates in coastal areas like Highland Beach
- Offers tailored aesthetics from entry-level to luxury budgets
- Ensures waterproof performance in wet zones per local codes
For personalized countertop options and expert installation guidance, visit our showroom at https://www.outrank.so/showroom.
9. Storage and Organization Solutions
In your bathroom renovation checklist, storage and organization solutions transform a functional space into a clutter-free sanctuary. Properly planned medicine cabinets, shelving, towel racks, and custom cabinetry boost usability while elevating style. By integrating smart storage systems, you can maximize every inch of your bathroom in Boca Raton, Delray Beach, or Parkland.
What is Storage and Organization Solutions?
- Design and installation of medicine cabinets, recessed niches, and floating shelves
- Custom-built vanity drawers with organizers and dividers
- Towel racks, hooks, and heated bars for combined storage and luxury
- Corner carousels or niche shelving to utilize awkward spaces
Examples of Success
- Recessed shower niches framed with marble tiles in a Highland Beach spa bath
- Floating oak shelves above the toilet in a modern Delray Beach condo
- Custom drawer inserts in a Boca Raton master vanity for grooming essentials
- Heated towel racks in Parkland homes adding warmth and tidiness
- Corner carousel organizers in guest baths to keep toiletries accessible
Actionable Tips
- Install medicine cabinets at 48-54 inches above the floor for easy reach
- Use labeled containers in drawers to separate cosmetics, first aid, and grooming tools
- Mount heavy shelves and racks into studs to secure weighty items
- Keep daily-use items at eye level and less-used goods higher or lower
- Add ventilation or moisture-resistant materials in compartments for damp linens
- Consider slim profiles and vertical units for small powder rooms
When and Why to Use This Approach
- Ideal when countertop clutter disrupts the look and flow of your bathroom
- Perfect for condo bathrooms with limited square footage
- Enhances resale value by showcasing efficient, high-end organization
- Meets HOA guidelines requiring neat, built-in cabinetry in luxury communities
- Provides a tailored solution that complements your overall design
For more custom storage ideas and professional guidance, visit our showroom or schedule a complimentary consultation at https://www.outrank.so/showroom.
10. Hardware and Fixtures Finishes Upgrade
Upgrading hardware and fixtures finishes is a key step in your bathroom renovation checklist, turning functional elements into design highlights. Selecting coordinated finishes for faucets, towel bars, toilet paper holders, and cabinet handles creates a polished, professional look. Whether you prefer brushed nickel, chrome, oil-rubbed bronze, or matte black, consistent hardware ties the entire space together.
What is Hardware and Fixtures Finishes Upgrade?
- Choosing a primary finish family (brushed nickel, chrome, etc.)
- Sourcing matching faucets, bars, handles, and accessories
- Verifying compatibility within the same manufacturer’s collection
- Planning layout and placement before installation
- Installing hardware with the correct fasteners and tools
- Inspecting all finishes for scratches and uniformity
Examples of Success
- All brushed nickel throughout for a modern, cohesive feel
- Oil-rubbed bronze in a traditional farmhouse bathroom
- Matte black fixtures in a contemporary minimalist retreat
- Polished chrome in a classic, clean upscale condo
- Intentional mixed metals in an eclectic Parkland powder room
Actionable Tips
- Choose one primary finish and stick with it to avoid visual clutter
- Match your faucet finish with towel bars and cabinet handles
- Test finish samples under actual bathroom lighting before ordering
- Plan hardware placement and measure precisely before drilling
- Select corrosion-resistant finishes for South Florida’s humid climate
- Source all pieces from the same collection to ensure a unified look
- Avoid overly trendy finishes that may date your design quickly
When and Why to Use This Approach
- Ideal during the final finish phase to ensure all elements align
- Enhances aesthetic cohesion and adds a refined touch
- Boosts resale value in luxury markets like Boca Raton and Highland Beach
- Complies with condo and HOA guidelines for material consistency
Learn more about Hardware and Fixtures Finishes Upgrade on kitchenrenovationsperfected.com/
Bathroom Renovation: 10-Item Comparison
| Item | 🔄 Implementation complexity | ⚡ Resource requirements (cost/time/expertise) | 📊 Expected outcomes / impact | 💡 Ideal use cases | ⭐ Key advantages |
|---|---|---|---|---|---|
| Flooring Installation | High — skilled tiling, waterproofing, precise grout work | Mid–High cost ($1,500–$5,000+); materials (tile/LVP/stone), waterproof membrane, professional installer, longer timeline | Durable, moisture-resistant floor; improves aesthetics and home value; 10–25+ years | Full bathroom remodels; high-moisture zones; long-term upgrades | Prevents water damage; wide style range; low maintenance when sealed |
| Vanity and Sink Replacement | Medium — plumbing disconnect/reconnect, cabinet fitting | Low–Mid cost ($500–$3,000+); cabinet, countertop, sink/faucet; plumber may be needed | Greater storage and organization; strong visual focal point; improved water efficiency | Update appearance, add storage, reconfigure layout | Big aesthetic impact; customizable; improves daily function |
| Shower/Tub Enclosure and Fixtures | High — complex plumbing, waterproofing, glass installation | High cost ($2,000–$10,000+); specialized fixtures, waterproofing, pro plumbing and glasswork, longer install time | Significantly improved functionality and luxury (steam/jets); increases home value; better water efficiency | Luxury remodels, accessibility upgrades, replacing tub/shower | Adds spa features and safety (thermostatic valves); dramatic functional upgrade |
| Toilet Installation and Upgrade | Low–Medium — straightforward swap; bidet/heated seats add electrical work | Low cost fixture ($150–$800); install $200–$500; possible minor plumbing/electrical | Major water savings and improved hygiene; comfort upgrades (heated/bidet features) | Efficiency upgrades, aging-in-place, quick replacements | Affordable water savings; easy upgrade; potential rebates |
| Lighting and Mirror Installation | Medium — electrical work and strategic placement required | Low–Mid cost ($300–$1,500); fixtures, LED or smart controls, possible electrician | Better visibility, safer grooming, energy savings with LEDs; enhanced ambiance | Improve grooming/ambiance, integrate smart home, update style | Improves functionality and mood; energy-efficient; relatively affordable |
| Ventilation and Exhaust Fan Installation | Medium — ductwork routing and correct placement essential | Low–Mid cost ($150–$500 incl. install); ducting, possible roof work, electrician | Controls humidity, prevents mold/mildew, improves air quality and longevity of finishes | Bathrooms with poor ventilation or mold issues; new builds | Prevents moisture damage; quiet automated options; energy-efficient |
| Wall Finishing (Tile, Paint, Waterproofing) | High — careful waterproofing and tile work required | Mid–High cost ($1,000–$4,000+); backer board, membranes, tiles, skilled labor | Protects structure from moisture; durable, easy-to-clean surfaces; major aesthetic transformation | Shower walls, wet areas, full aesthetic refreshes | Protects against mold; wide design versatility; long-lasting finish |
| Countertop Selection and Installation | Medium — templating and professional installation for heavy materials | Mid cost ($500–$2,500+); quartz/stone fabrication, installers, possible reinforcement | Durable, water-resistant work surface; enhances vanity aesthetics and resale value | Vanity upgrades, coordinating finishes, durability-focused remodels | Durable surfaces (quartz low maintenance); customizable edges and colors |
| Storage and Organization Solutions | Low–Medium — simple installs to custom cabinetry | Low–Mid cost ($200–$1,500); shelving, cabinets, organizers; possible carpentry | Improved organization and daily efficiency; reduces clutter in small spaces | Small bathrooms, families, renters (with modular options) | Maximizes space; affordable; improves usability |
| Hardware and Fixtures Finishes Upgrade | Low — straightforward replacement; minor plumbing tweaks | Low cost ($200–$800); coordinated faucets and hardware; minimal install time | Cohesive, polished aesthetic; modern functionality (touchless options) | Quick aesthetic refreshes, budget-conscious updates | High visual impact for low cost; easy to update and replace |
Next Steps: From Checklist to Your Dream Bathroom
Now that you’ve ticked off every item on your bathroom renovation checklist, you’re standing at the threshold of your brand-new space. This section ties together all the phases—planning, design, demolition, rough-in, finishes, inspections, punch-list, and ongoing care—so you can move forward with confidence.
Recap Your Phases
Review each stage to ensure nothing slipped through the cracks:
- Planning – Confirm final measurements, material orders, and permit applications.
- Design – Double-check fixture placements, lighting layouts, and tile patterns.
- Demolition & Rough-In – Verify new plumbing lines, electrical circuits, and framing adjustments.
- Finishes – Inspect grout work, paint coverage, and sealant integrity.
- Inspections & Punch-List – Address minor touch-ups and code compliance items.
- Ongoing Care – Schedule routine checks for caulking, vents, and hardware upkeep.
Navigate Local Regulations
Your remodeling success hinges on respecting Boca Raton, Delray Beach, and Parkland building codes and HOA guidelines:
- Permits – Apply through local municipalities early to avoid delays.
- Condo & HOA Rules – Review noise restrictions, material approvals, and shared-space protocols.
- Climate & Code – Choose mildew-resistant materials and follow South Florida flood zone requirements.
Plan Your Timeline and Budget
Stay on track by mapping out key milestones and costs:
- Create a master schedule with buffer days for inspections and material lead times.
- Allocate at least 10% of your budget to contingencies.
- Track expenses in a spreadsheet or renovation app to prevent overages.
- Review payment schedules – avoid paying full amounts until final approval.
Engage Your Team
Deciding between DIY tasks and professional services can make or break your project:
“Selecting the right contractor not only guarantees code compliance but also frees you to enjoy the transformation without stress.”
- DIY Opportunities – Tackle painting, tiling accents, or simple fixture swaps if you have basic skills.
- Pro Services – Hire licensed plumbers and electricians for complex plumbing relocations and rewiring.
- Consultations – Book a complimentary design meeting at a local showroom to refine details.
Final Inspections and Fine Tuning
A thorough walkthrough ensures every detail meets your standards:
- Municipal Inspections – Schedule plumbing, electrical, and final building inspections.
- Quality Checks – Examine grout lines, caulk seals, and fixture alignments.
- Punch-List – Compile small fixes—loose screws, grout touch-ups, paint nicks—and assign deadlines.
Embrace Maintenance
Protect your investment with simple care routines:
- Ventilation – Run exhaust fans daily to prevent mold.
- Fixture Care – Clean showerheads, faucets, and drains monthly to maintain water flow.
- Sealant Renewal – Inspect tiles and around sinks every six months, reapply waterproof caulk as needed.
- Hardware Tightening – Check knobs, hinges, and towel bars quarterly to keep everything secure.
Finishing your bathroom renovation checklist doesn’t mean the work stops. With these next steps, you’ll enjoy a luxurious, durable bathroom tailored to South Florida living. Embrace each phase, respect local rules, and lean on professionals when needed to bring your dream bathroom to life.
Ready to turn your checklist into reality? Schedule a complimentary consultation at our Boca Raton showroom with Kitchen Renovations Perfected to explore tailored solutions for your bathroom renovation checklist. Discover how our expert team can streamline permits, design, and installation so you can relax and enjoy the results. Visit Kitchen Renovations Perfected today.