The first question on every homeowner's mind is, "So, how long is my kitchen going to be out of commission?" It’s the million-dollar question, and the answer really depends on the scope of your project. A simple, cosmetic refresh could be wrapped up in 6-8 weeks. But if you're planning a full gut renovation—moving walls, changing layouts—you should realistically budget for 4-6 months, sometimes even longer.
Your kitchen renovation timeline isn't just a single date on the calendar. It’s a chain of interconnected phases, each one needing to happen in the right order.
What to Expect from Your Kitchen Renovation Timeline
I've learned from years of experience that a successful kitchen remodel is less about rushing to the finish line and more about respecting the sequence of events. Understanding this "critical path" is the single best way to keep your project running smoothly and avoid the kind of expensive delays that come from having to redo work.
It's a journey that starts with dreaming and designing and ends with that final, satisfying walkthrough where your new space is finally revealed.
And it’s a journey more homeowners are taking. The kitchen remodeling market is on a serious upswing, projected to hit USD 11.86 billion in 2025 and climb to USD 15.73 billion by 2029. People are investing in their homes, and the kitchen is almost always priority number one.
The Three Core Phases of Renovation
At its heart, any renovation project can be broken down into three fundamental stages. Each has its own rhythm, its own set of critical tasks, and its own time demands.
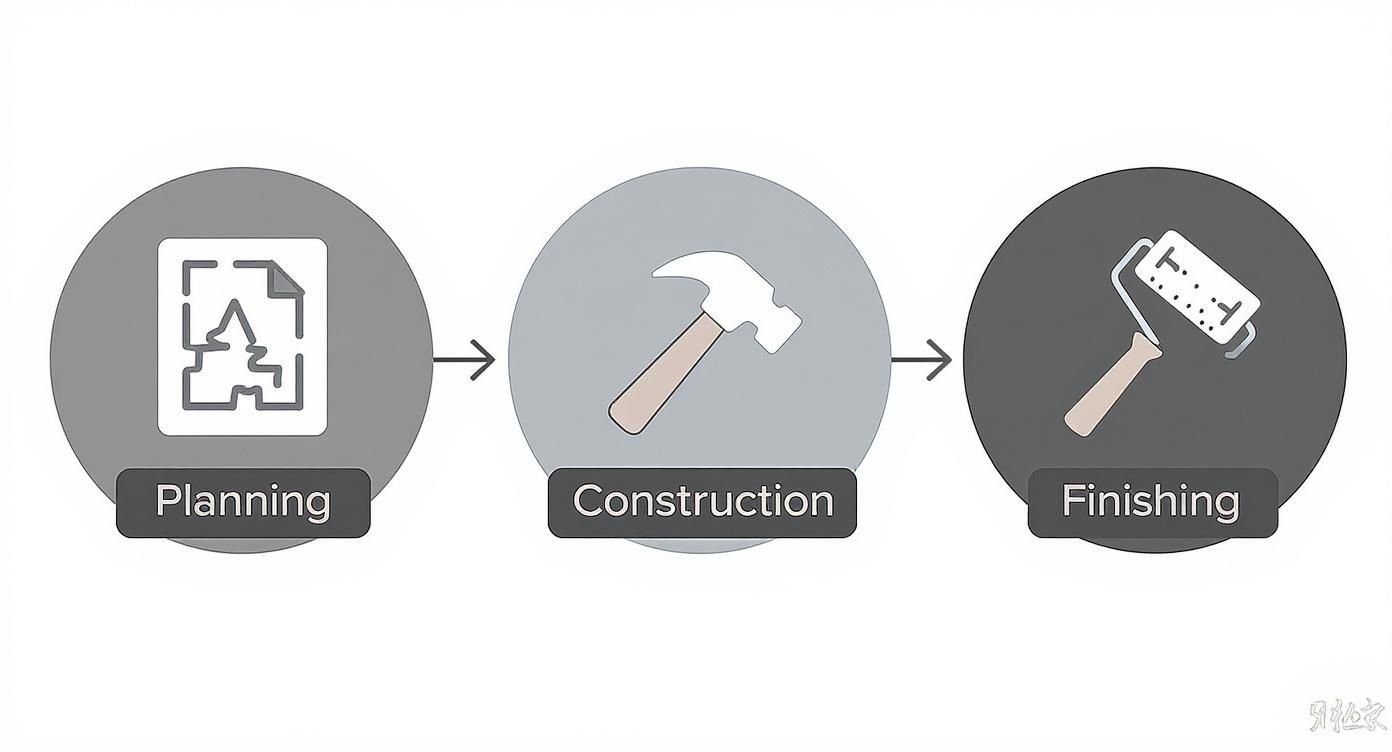
As you can see, everything starts with solid planning. From there, you move into the active construction phase, and finally, it all comes together with the finishing touches that truly make the kitchen yours.
Why the Sequence Matters
Think of it like building with dominoes—each step directly sets up the next one. A delay in one phase will inevitably cascade down the line.
You simply can't install your gorgeous new quartz countertops until the base cabinets are set, leveled, and secured. And you can't even think about tiling that beautiful backsplash until after the countertops are in. Trying to jump ahead is a recipe for frustration and rework.
For a deeper dive into simplifying the renovation puzzle, you can find some great ideas on kitchen makeovers made easy.
Key Takeaway: A well-managed renovation timeline isn't about speed; it's about sequence. Rushing through the early stages like planning or the rough-in work almost guarantees you'll face bigger, more expensive delays later on. A little patience upfront pays huge dividends during construction.
By getting a handle on how everything connects—from pulling the right permits here in Boca Raton to making your final finish selections—you'll be a much more effective partner for your contractor. This guide is your roadmap to navigating the weeks and months ahead with confidence.
Kitchen Renovation Timeline At a Glance
To give you a clearer picture, here’s a quick overview of the major phases and what you can generally expect for a standard, full kitchen remodel. Keep in mind, these are typical durations and can shift based on your project's specific complexity.
| Phase | Typical Duration | Key Activities |
|---|---|---|
| 1. Planning & Design | 4-8 weeks | Finalizing layout, hiring pros, selecting all materials, ordering long-lead items (cabinets, appliances). |
| 2. Permitting | 2-6 weeks | Submitting architectural plans to the City of Boca Raton for review and approval. |
| 3. Demolition & Prep | 1 week | Tearing out old kitchen, setting up dust barriers, temporary kitchen setup. |
| 4. Rough-In Work | 1-2 weeks | Framing, plumbing, electrical, and HVAC changes before drywall goes up. |
| 5. Drywall & Painting | 1-2 weeks | Hanging and finishing drywall, priming, and applying the first coat of paint. |
| 6. Flooring & Cabinets | 1-2 weeks | Installing new flooring, followed by setting and securing base and upper cabinets. |
| 7. Countertops & Backsplash | 1-3 weeks | Templating, fabrication, and installation of countertops, followed by backsplash tiling. |
| 8. Finishes & Fixtures | 1-2 weeks | Installing appliances, plumbing fixtures (sink, faucet), lighting, and hardware. |
| 9. Inspections & Punch List | 1-2 weeks | Final city inspections, contractor walkthrough, and addressing any final fixes or adjustments. |
This table outlines the critical path your project will follow. As you can see, many activities depend on the successful completion of the previous one, which is why sticking to the sequence is so important for keeping things on track.
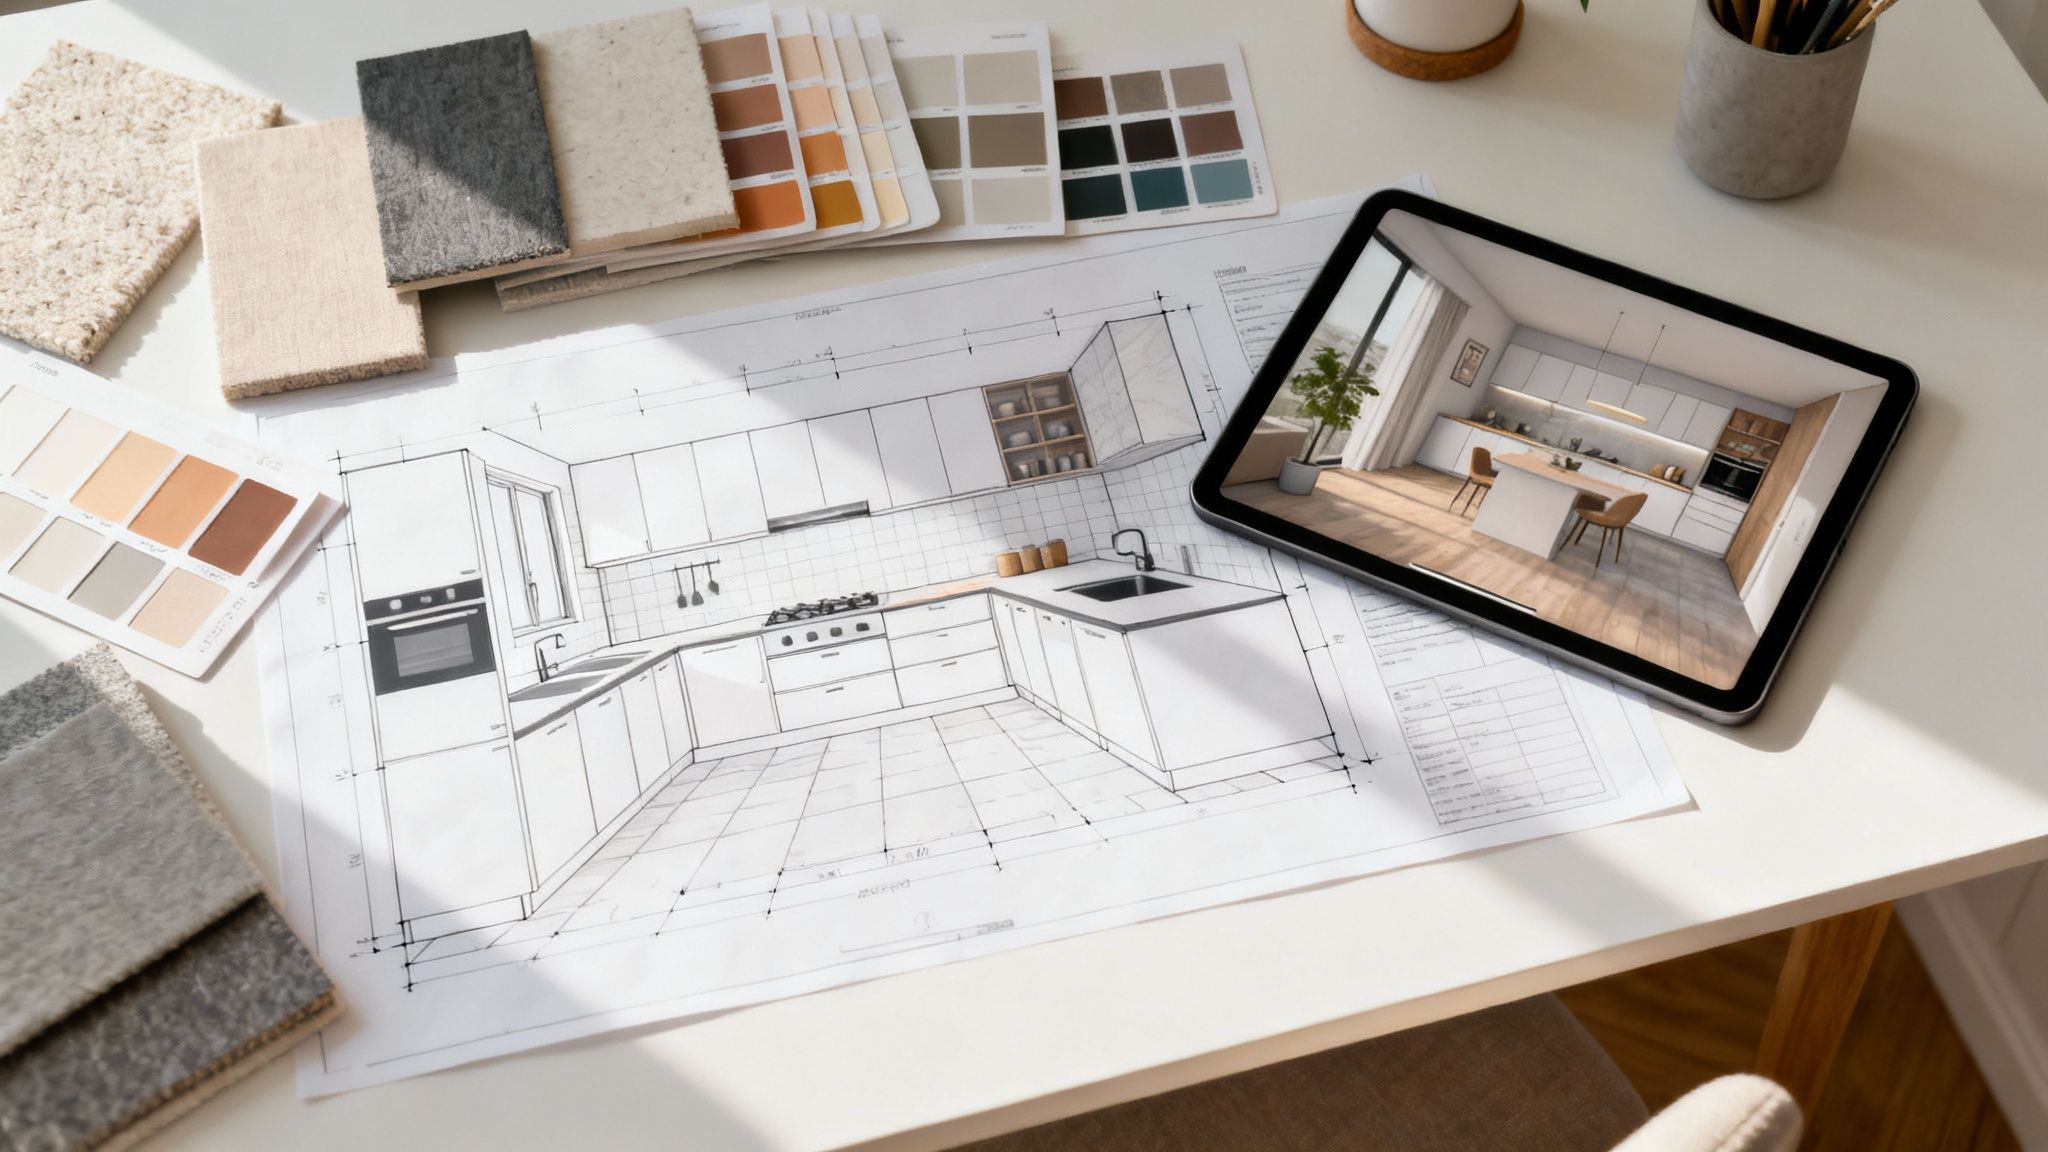
Laying the Groundwork: Planning and Design
Every great kitchen renovation starts long before the first sledgehammer swings. It begins with a solid plan. I can't stress this enough: the planning and design phase is the single most important part of your entire project. It's also the part where you have the most control. Rushing this stage is the biggest mistake I see homeowners make, and it almost always leads to trouble down the road.
Give this phase the time it deserves—anywhere from 4 to 12 weeks is realistic. Think of it as an investment. Every hour you spend and every decision you lock in now will save you a massive amount of time, money, and stress later on.
This is where your dream kitchen starts to take shape on paper. The first thing to nail down is the true scope of your project. Are we talking about a simple cosmetic update with new paint, countertops, and hardware? Or are we planning a full-gut renovation, maybe even moving walls to create an open-concept space? The answer will fundamentally change your timeline and your budget.
Assembling Your Boca Raton Renovation Team
Once you have a clear vision, it's time to build the team that will bring it to life. Here in Boca Raton, that means finding professionals who get the local landscape—from navigating city permits to understanding the specific rules of your condo association or HOA.
Your core team will likely include:
- A Designer: They're the creative force, the one who helps you translate your personal style into a functional, beautiful layout. They'll create the detailed plans and renderings that become the blueprint for everything.
- A General Contractor: This is your project manager. They'll run the entire show, coordinating all the trades, managing the schedule, ordering materials, and making sure the work is done right and up to code.
- Specialized Trades: Your contractor will bring in the experts—plumbers, electricians, tile setters, and more—at just the right moments.
Finding the right people is about more than just a license and a good portfolio. You'll be working closely with this team for months. Make sure their communication style clicks with yours. You absolutely need to feel that sense of trust and rapport.
Finalizing Your Layout and Selections
With your team on board, you can really dive into the nitty-gritty of the design. This is when you'll finalize the kitchen's layout—perfecting the work triangle, deciding on the island's placement, and figuring out where every appliance will live for maximum efficiency. Our guide on the first 5 steps to planning a home remodeling project is a great resource to walk you through this process.
At the same time, you'll be choosing all of your materials, finishes, and fixtures. This is the fun part, but it’s also a common bottleneck. I see it all the time: homeowners want to put off decisions until later. But locking everything in before demolition begins is absolutely critical to keeping your project on track.
Expert Insight: Material lead times are the wild card in any renovation schedule. Custom cabinetry, for instance, can easily take 8-16 weeks from order to delivery. That specialty tile you fell in love with from Italy or a high-end appliance on backorder can have similar wait times. Ordering these big-ticket items as early as possible is non-negotiable.
As you get into the details, looking at fresh renovation ideas for kitchens can provide that spark of inspiration you need to make your final choices with confidence.
The Power of a Detailed Plan
This phase isn't truly finished until you have a complete set of architectural drawings, a signed contract with your builder that details the entire scope of work, and an agreed-upon payment schedule. Every single material, from the cabinet pulls to the backsplash grout, should be selected, specified, and, ideally, ordered.
It's clear that kitchens are a huge priority for homeowners. Recent surveys show that around 51% of Americans are looking to remodel their kitchen in 2025. This focus on the heart of the home really highlights why getting this planning stage right is so crucial. By putting in the work upfront, you create a clear roadmap that makes the entire construction process smoother and helps ensure you end up with a kitchen you'll absolutely love.
Getting Your Hands Dirty: Demolition and Rough-In
Once the plans are signed off and the materials start arriving, things get real. This is the point where your project jumps off the page and into your home—and it gets loud. Welcome to the demolition and rough-in phase, a period of organized chaos that typically takes 1 to 3 weeks. It’s where your old kitchen vanishes and the groundwork for the new one is laid.
Before a single sledgehammer swings, the first order of business is containment. Your contractor’s crew will spend time protecting the rest of your house from the inevitable dust cloud. This involves laying down heavy-duty floor protection, sealing off doorways with plastic sheets and zippers, and sometimes using negative air pressure machines to keep the mess confined.
The Careful Art of Deconstruction
Demolition isn't just about destruction; it's a strategic process. The crew systematically takes out old cabinets, countertops, appliances, and flooring. This is also the moment where we often uncover a few… surprises.
Peeling back the layers of a house, especially an older one, can reveal things that weren't on the original blueprints. We might find:
- Old knob-and-tube wiring that absolutely has to be replaced to meet modern code.
- Signs of an old plumbing leak, complete with water damage or mold.
- Structural framing that wouldn't pass muster by today's standards.
A seasoned contractor always goes in expecting the unexpected, but these discoveries can still affect the schedule and budget. This is exactly why we always advise clients to build a 10-15% contingency into both their timeline and their finances. It’s your project’s safety net.
Building the Bones: The Rough-In Sequence
With the room stripped down to the studs, the "rough-in" work begins. This is all the critical stuff that happens behind the walls—the new skeleton of your kitchen. The order of operations here is non-negotiable, as each trade builds on the last before the drywall goes up.
Our Pro Tip: The rough-in is all about the invisible infrastructure. You won't see the new pipes or wires in your finished kitchen, but they are what makes it all work. Getting this sequence perfect is the key to passing inspections and preventing massive headaches down the road.
First up are any structural changes. This could be framing new walls, adding windows, or—a popular request in many Boca Raton homes—installing a massive support beam to create that wide-open-concept feel.
Then, the specialized trades arrive in a very specific dance:
- Plumbers run new copper and PVC lines for your sink, dishwasher, pot filler, and refrigerator's icemaker.
- HVAC technicians reroute any ductwork that's in the way or add new vents for better airflow.
- Electricians pull all the new wiring for outlets, island pendants, under-cabinet lighting, and dedicated circuits for your high-power appliances.
Passing That First Big Test: The Inspections
After all that work is done, but before a single piece of drywall is hung, everything stops for the city inspector. A Boca Raton official will come to the site to personally check that all the new plumbing and electrical work is up to code.
This is a huge milestone. A green light from the inspector means we can move on to closing up the walls and starting on the pretty stuff. A failed inspection, on the other hand, means delays. Work stops, corrections are made, and we have to wait for a re-inspection. It’s a powerful reminder of why you should only ever work with a licensed, experienced contractor who knows the local codes inside and out.
From Construction Zone to Dream Kitchen: The Finishing Phase
Once the rough-in is complete and the drywall is up, the real magic begins. This is the finishing phase, where all those design choices you agonized over finally start to come together. This part of the timeline is all about precision and sequence, and it typically takes 3 to 6 weeks from start to finish.
This is arguably the most exciting part of the project for homeowners. The mess of demolition gives way to the meticulous work of bringing your vision to life, piece by piece.

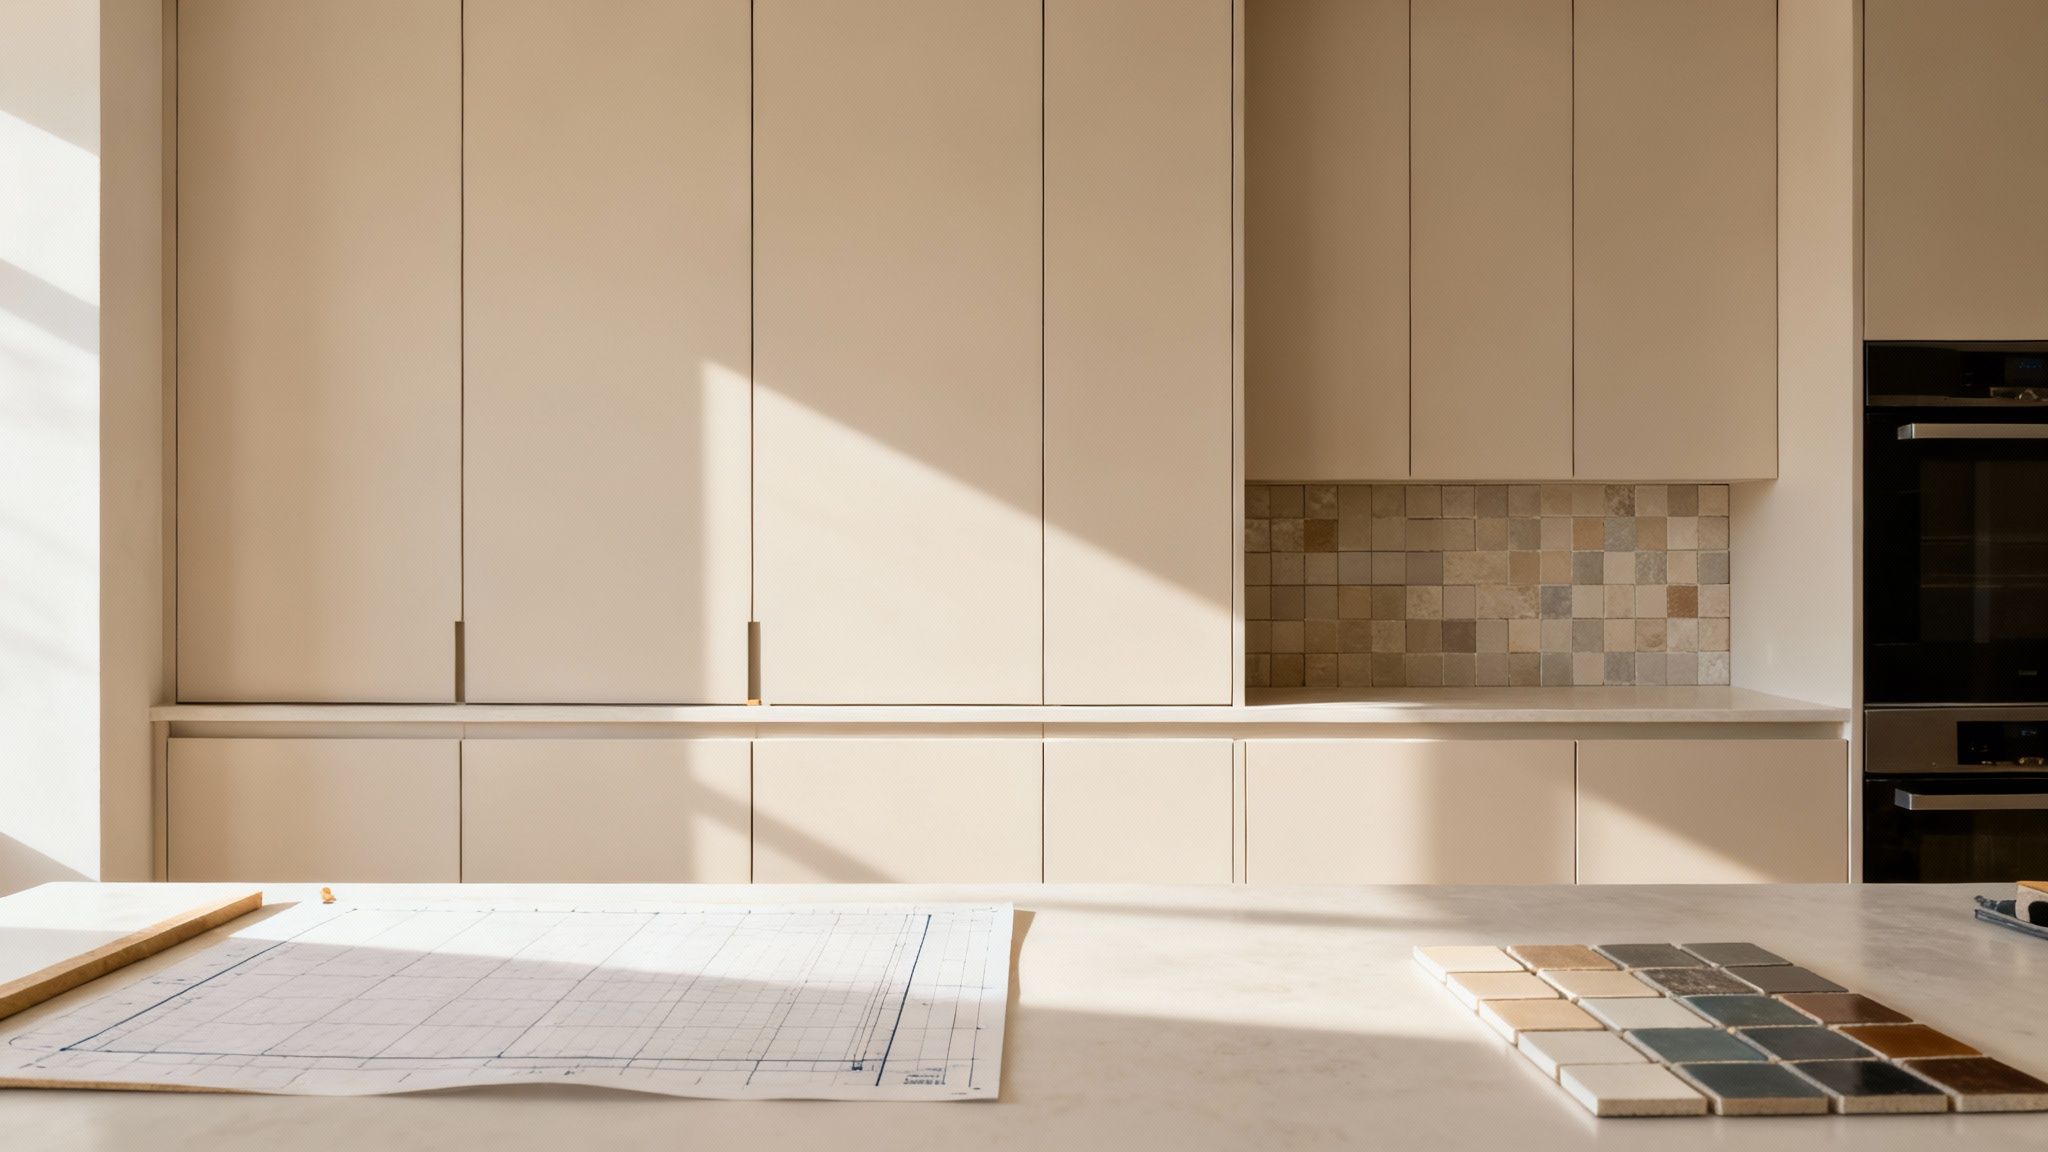
We kick things off by priming and painting the walls. This creates a clean, fresh canvas for everything else. Right after the paint dries, the new flooring goes down. With the walls and floor in place, the space is prepped for the main event: the cabinets.
The Foundation of Your New Kitchen: Cabinets and Countertops
Cabinet installation is the moment your kitchen starts to feel like a kitchen again. It's a game-changer. But it has to be done right. Every single box needs to be perfectly level, plumb, and square.
If the cabinets are even slightly off, it creates a domino effect of problems. Countertops won't sit flat, appliances won't fit snugly, and the doors will never align properly. Depending on how many cabinets you have and the complexity of your layout, this step can take a few days to over a week. The cabinet material you chose also plays a role. If you want to dive deeper, our guide on the best kitchen cabinet materials explains how different choices can affect the installation process.
As soon as the base cabinets are set, the countertop fabricator arrives to make a template.
Why Templating is a Must
Templating involves creating a precise, real-world pattern of your countertops right on top of the installed base cabinets. This isn't something you can do from a drawing. It captures the exact dimensions, curves, and angles of your kitchen, ensuring a flawless, custom fit for your stone or quartz. The template goes back to the shop where they use it to cut your slabs with incredible accuracy.
Layering in the Details
After templating, you can expect a 1-2 week wait while your countertops are being fabricated. Once they're installed, the pace picks right back up. Next up is the backsplash. Whether you chose a classic subway tile or a dramatic full-height slab, it goes in right after the counters are secured.
With the main surfaces complete, it's time to bring in the functional elements. This part of the job is a carefully managed dance between our plumbers, electricians, and installers.
Here’s the order of operations we follow:
- Cabinets First: The bones of the kitchen are set, leveled, and secured.
- Countertop Template & Install: A template is made, and the custom-cut countertops are installed a couple of weeks later.
- Backsplash: Tile or slab material is installed to protect the wall and complete the look.
- Appliance Delivery: The fridge, range, and dishwasher are brought in and placed in their new homes.
- Final Plumbing & Electrical: The plumber returns to hook up the sink, faucet, disposal, and dishwasher. The electrician comes back to install light fixtures, switches, and connect the appliances.
There’s a clear logic here. You can't install a sink without a countertop, and you can't wire under-cabinet lights until the cabinets are hanging on the wall. Following this sequence prevents delays and ensures a high-quality result.
Your Role During the Finishing Touches
As the homeowner, your job now shifts from making big decisions to checking the small details. Staying involved ensures the final product is exactly what you envisioned.
- Confirm Cabinet Layout: Before the installer permanently fastens the cabinets, do a quick walkthrough to confirm every box is in the right spot based on your design plans.
- Inspect Countertop Seams: When the countertops go in, take a close look at any seams. A skilled fabricator can make them nearly invisible.
- Check the Grout Color: Make sure the backsplash grout matches the sample you approved. It can look a little different once it’s on the wall.
- Test-Drive Your Appliances: Once everything is connected, run a quick rinse cycle on the dishwasher and turn on the stove burners to make sure they work.
- Flick the Switches: Test every light switch and check every faucet for leaks or low pressure.
This phase is where a construction site finally becomes the heart of your home. It’s where all the planning pays off, creating a beautiful and functional space ready for the final walkthrough.
How to Handle Delays and Final Inspections
Let’s be honest: even the most perfectly planned kitchen renovation can hit a snag. I've been in this business long enough to know that hoping for a flawless project is less effective than planning for the unexpected. Having a clear strategy for managing potential hurdles is what really separates a stressful renovation from a smooth one.
Think of it this way—delays are a normal part of any major construction project. They don't have to completely derail your timeline if you know what to look for and build in a little wiggle room from the start.
Common Causes of Renovation Delays
After years of managing projects in the Boca Raton area, I’ve seen the same few issues cause most delays. Knowing them ahead of time is your best defense.
- Material Backorders: That gorgeous specialty tile from Italy or those custom-built cabinets? They can have long lead times that are completely out of our hands. A single supplier delay can bring everything to a grinding halt for weeks.
- Subcontractor Scheduling: A good general contractor is like an orchestra conductor, coordinating a complex team of plumbers, electricians, and painters. If one trade gets held up on another job site, it can create a domino effect that impacts your project's schedule.
- Surprise Discoveries: This is a big one, especially in older South Florida homes. Once we start opening up walls, we might find anything from outdated wiring that isn't up to code to hidden plumbing leaks or even structural problems that have to be fixed.
- Inspection Failures: If an inspection doesn't pass, all work related to that inspection must stop. We can't move forward until the issue is corrected and the city inspector can come back out for a re-inspection, which can take days or sometimes even a week or more.
This is exactly why having a strong, open line of communication with your builder is so crucial. It’s worth taking the time to understand the 10 things your remodeling contractor wants you to know, because that partnership is what gets you through these challenges.
Navigating the Final Inspection Process
Once the last light fixture is installed and the final coat of paint has dried, you’ve reached the last official hurdle: the final inspections. This is where a building official from the City of Boca Raton gives their final stamp of approval, ensuring all the work is safe and meets current building codes.
Pro Tip: The final inspection is anything but a formality. A failed final inspection can legally prevent you from using your brand-new kitchen. A true professional prepares for this from day one, building everything to code so this last step is a smooth sign-off, not a source of last-minute stress.
The inspector will go over everything—the finished electrical, the new plumbing connections, and the overall construction. They're checking that GFCI outlets are where they need to be, that your new range hood is vented properly, and that there isn't a single leak in sight.
Your Punch List and Project Closeout
With the city's green light, it's time for you and your contractor to do one last walkthrough together. This is when you'll create the "punch list"—a final, detailed list of any minor adjustments needed. We're talking about the small stuff: a cabinet door that needs a slight alignment, a tiny paint scuff on the wall, or a piece of trim that needs another nail.
Checking off every item on that punch list is the very last step. Once those final tweaks are done, the project is officially complete. This meticulous process protects your investment and guarantees the final product meets the highest standards. People are investing more than ever in their kitchens—recent data shows the median spend on major renovations for larger kitchens grew 9% to $72,000 in 2024. A proper closeout makes sure every one of those dollars was well spent.
Answering Your Top Kitchen Renovation Timeline Questions
Even with a perfect plan on paper, you're going to have questions. A kitchen remodel is a massive undertaking with a ton of moving parts, and it’s completely normal to wonder about the "what-ifs." Getting straight answers ahead of time is the best way to keep your peace of mind from demolition day all the way to the final walkthrough.
Let's dive into the most common questions we hear from our Boca Raton clients, based on years of real-world, in-the-trenches experience.
What's the Single Biggest Cause of Delays?
While a lot of things can throw a wrench in the works, the number one culprit, time and again, is material lead times. This has become a huge factor in recent years. That gorgeous quartz slab you fell in love with, the semi-custom cabinets, or that high-end European oven can take anywhere from 4 to 16 weeks to arrive. Sometimes even longer.
Think about the domino effect: you can't have the countertop fabricator create a template until the cabinets are installed. You can't install the backsplash tile until the countertops are in. A single delay on a critical item like cabinets can bring the entire project to a screeching halt. This is precisely why we lock in and order these long-lead-time items as early as possible during the design phase.
How Should I Prep My Home for the Renovation?
A little prep work on your end goes a long way in making the whole construction phase less stressful for your family. Your contractor will handle sealing off the area and managing dust, but here’s what you can do to get ready:
- Pack Up the Kitchen: And I mean everything. Empty every cabinet and drawer. Clear off the countertops. Take pictures down from the walls. Box it all up and move it to a different room.
- Create a "No-Go" Zone: Make it clear to everyone in the house, especially kids, that the construction area is completely off-limits for safety.
- Set Up a Makeshift Kitchen: This is non-negotiable. Find a corner in the dining room, garage, or a spare bedroom for a microwave, coffee maker, and maybe a toaster oven. Having this little station for simple meals and your morning coffee helps life feel a bit more normal.
Can We Actually Live in the House During the Remodel?
Yes, absolutely. Most people do. But you have to go into it with realistic expectations about the disruption. For the 8 to 12 weeks of active work, your home is a job site. There will be noise, dust (despite our best efforts), and a crew of trade professionals coming and going.
Living through it is an exercise in patience. That temporary kitchen will be your best friend, and you’ll probably find yourself getting pretty good at grilling. It's a short-term adjustment, but everyone agrees the inconvenience is a small price to pay for the final result.
A Quick Note on Boca Raton Condo Renovations
If you're in a condo or a community with a strict HOA, the rules of the game change a bit. Most buildings have set working hours (like 9 a.m. to 5 p.m., Monday-Friday only) and specific rules for noise, elevator use, and debris removal. These regulations can sometimes add a little extra time to the overall project compared to a single-family home.
When Do I Make the Final Payment?
This is a big one: the final payment should never be due until the project is 100% complete. That means after the city has signed off on all final inspections and every last item on your punch list has been fixed to your complete satisfaction.
A standard payment schedule is broken into milestones. You'll put down a deposit to get things started, with subsequent payments due when major phases are complete—for example, after demolition, when cabinets are delivered, or after countertops are installed. The final 10-15% is held back until you officially sign off on the job. Never, ever agree to a contract that demands full payment before the work is finished. It’s your ultimate protection and ensures your contractor is motivated to get every last detail perfect.
Navigating a kitchen renovation timeline is all about clear communication and having a partner you trust. At Kitchen Renovations Perfected, we're with you at every step, from the first sketch to the final reveal. Ready to start designing your dream kitchen in Boca Raton? Contact us today for a complimentary consultation.